Monday, December 29, 2014

Erica would love for you to meet Keni...

...that's short for Kenmore Ultra-Stitch 10.  My beautiful and wonderful sewing machine. She's an oldie but a goodie, handed down from my mother and used regularly to live out my dreams. That sounds super cheesy but its true; I LOVE this thing.

As you probably know, I started an Etsy shop about a month ago. I've already gotten 3 sales. If you didn't know, check it out www.etsy.com/shop/RagsRebornGifts
                                     
My first sales!! Thank you, thank you Vietfil and Michelle (I also got a sale from a lovely lady out-of-state who bought a pillow for her daughter but I don't know her well enough ask for a photograph)!! : )

I just realized that I don't have any blogs that showcase Keni's magic. Well, its time to change that! Here's a simple sewing tutorial for a homemade scarf.

                                       Made one for my mom's boyfriend and one for Wes.

DIY Scarf Tutorial --
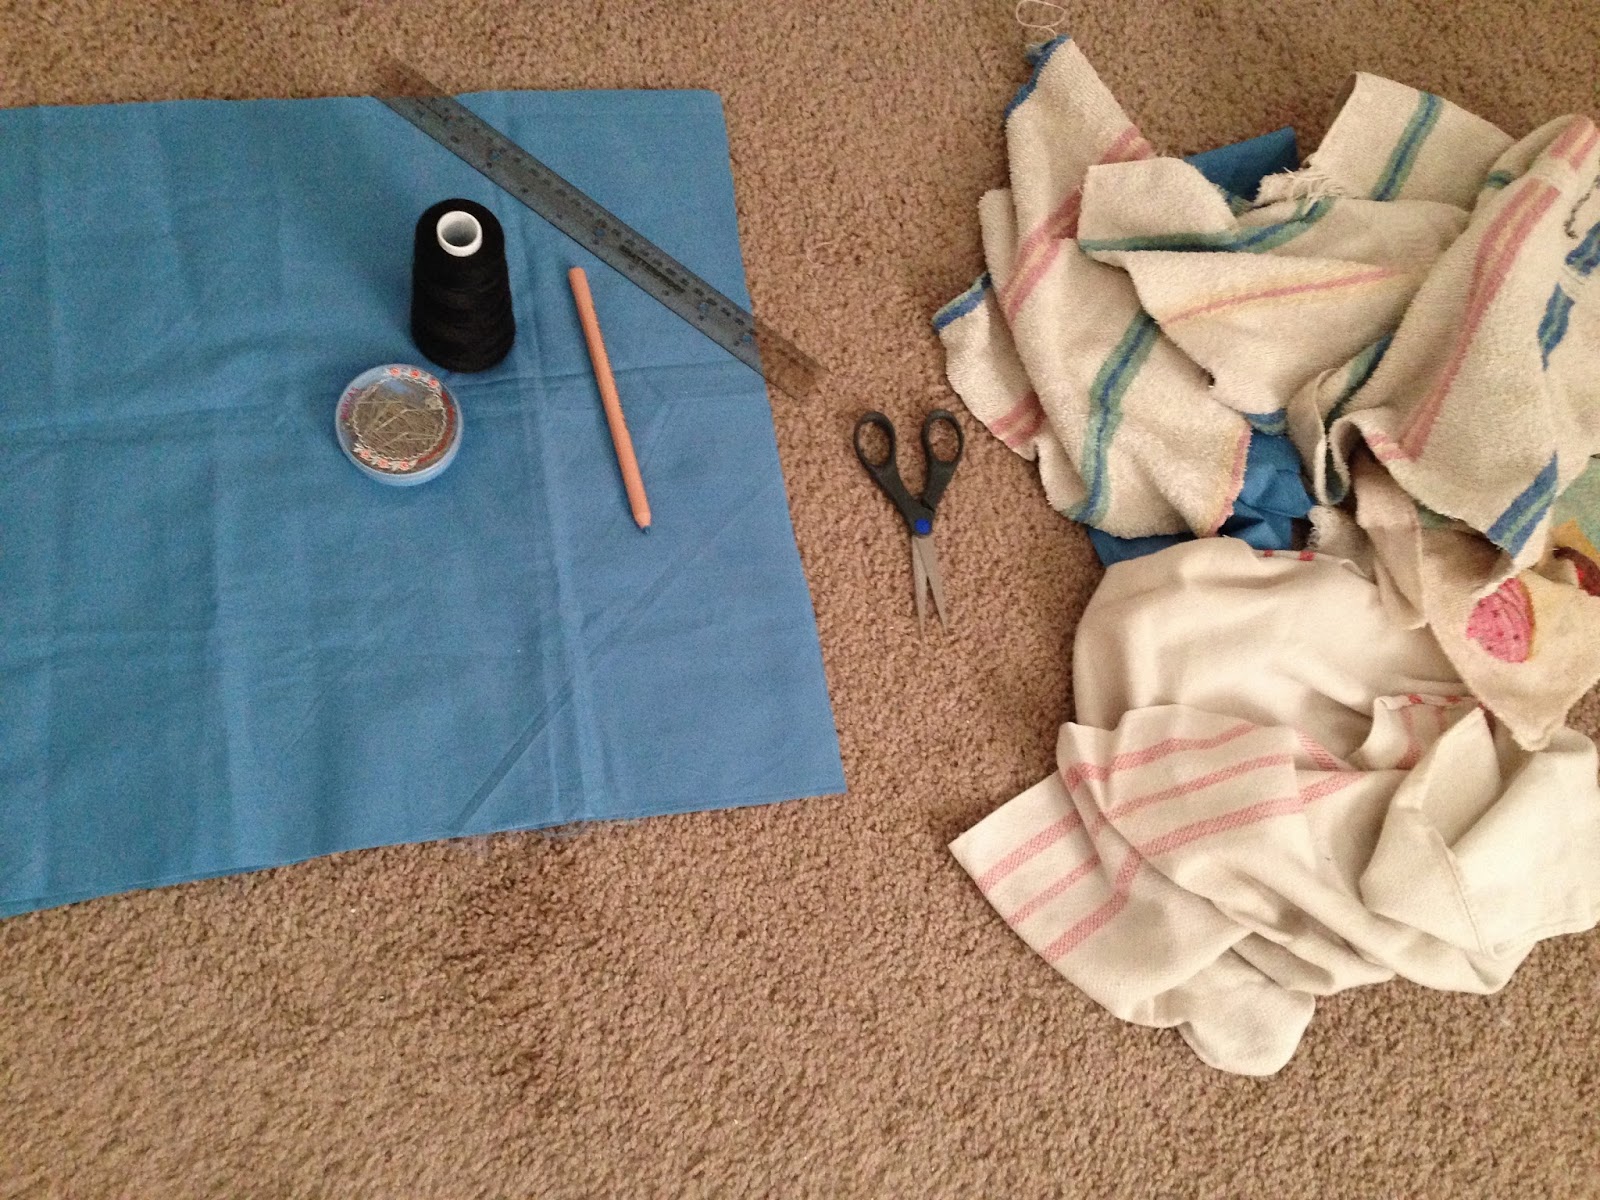
    Materials needed: sewing machine, one yard of cloth, scissors, ruler


1. I chose a pattern that is already lined so measuring was a cinch. Call it cheating, call it genius, call it what you will but it made this project a lot easier.The length of the scarf will be one yard. The width can be however wide you want. I made mine 8 inches. Fold your cloth in half lengthwise (hot dog style). Cut along the fold so you end up with 2 long strips of equal size. Cut off any excess, if necessary.

2. Sew the two pieces together along the sides of the length.
           Leave the first and last 6 inches of the two pieces unsewn. We will use this part for the tassels at the end.
           Face the pattern to the inside (so its essentially inside out).
           Sew about a centimeter in so the seam isn't too close to the edge of the cloth. That will help with it coming apart or fraying.
3. After sewing, turn your scarf inside out (so now the pattern should be facing the outside like its ready to wear). It should look like a tube.
4. Sew the two loose ends together so now it should be one whole piece of cloth (a very long rectangle). The only things that aren't sewn are the 6 inches you left free for tassels.


5. Time for tassels!! Cut the excess 6 inches into little strips. Mine were about 1 centimeter (maybe a bit thinner). Cut the same amount on the 'front' and 'back' 6 inches. After cutting them, tie two at a time into a knot at the top.


And that's it. Bundle up and enjoy the winter. Almost time for 2015. Another year for new adventures! : )

Monday, December 22, 2014

Merry, jolly, white Christmas from Erica and Sadie!


Last week, my work had an ornament exchange. Everyone brings an ornament; its put in a gift sack and the participant gets to draw a number in return. Later in the day, the participants get to take home the ornament that matches the number they drew in the morning. Some had secondary numbers that corresponded to matching gift cards but I didn't get one of those. I got a nice glittery ornament shaped as a sleigh filled with presents.

For this event, I wanted to make my own ornament (its so close to Christmas, I bet there aren't any good ones left at the stores anyway). I was born in Michigan so I'm pretty sure the love of snow and winter weather is in my blood. Here's a quick run down on how my sparkly snowflake ornaments came to be. They turned out a bit more elementary than I would have preferred but that makes this a great project to do with children.

Materials needed:
dowels, craft glue, wire cutters, paint, glitter, paper plate, ribbon, ruler, paint brush

1. Measure and cut the dowels into pieces to form geometric patterns. I played around with a few shapes and designs. Arrange the pieces on the paper plate into any pattern of your choosing.

2. Glue the pieces together and paint both sides of your snowflake. I waited about an hour to let my glue fully dry before painting. It probably took forever because I used an excessive amount of glue (as you can see in the picture above). Then after painting, I let 'em dry overnight (it was getting late anyway).
3. Using the paintbrush, spread glue all over the snowflake. Then sprinkle generously with glitter. Make sure the whole thing is coated!!

4. Tie ribbon on top to use as the loop to hang on the tree.

I made three so each of my coworkers could either keep one or use it to participate in the ornament exchange. Only a few more days until Christmas. Is all your crafting done? I'm done with my DIY gifts : ) Now all I have left to do is baking...chocolate peppermint bark and white chocolate macadamia nut cookies. Yum!

Monday, December 15, 2014

Captain America and Iron Man are Erica's favorite super heroes...

... but Wes' favorite is Spider-Man. I've learned to be a Spider-Man fan over the years of dating Wes. When we went to Sydney, we saw Amazing Spider-Man 2: The Rise of Electro at the world's largest IMAX. It was the one in Darling Harbour. P.S. Darling Harbor is my favorite place in Sydney; I highly recommend it if you ever visit the land down under.

Wes's friends got him a hideous Spider-Man shirt from a garage sale. (It was one of those oversized faux silk ones.) He mentioned that he needed a lunch bag for work. I was wandering around Target and saw a canvas lunch bag on sale and snagged it. Then DIY inspiration happened!! I took the two and made this.

Recycled shirt lunch bag tutorial-
   Materials needed: lunch bag (mine was canvas), shirt, hot glue gun, scissors, needle & thread
                                                      The original bag and shirt

1. Cut the shirt into pieces that are a little bigger than the sides of your bag. One piece for each side of the bag (mine was 5 pieces).
2. Glue the pieces onto their respective sides.
3. Since we cut the shirt into pieces that were a little bigger than the sides of the lunch bag, we can trim to the exact perfect size. After trimming, sew the edges of the shirt onto the lunch bag. This probably isn't absolutely necessary but it will prevent damage from wear and tear.

Its almost Christmas!! A little over a week before I get to shower my loved ones with hand crafted gifts : )

A little off topic... but... I just wanted to thank everyone for the birthday wishes, engagement congratulations and condolences regarding Kensington. All the Facebook messages, texts and phone calls were greatly appreciated and reminded me of all the wonderful friends and family I am surrounded by.

Monday, December 8, 2014

Erica proudly works at Delta Dental of Oklahoma

This time last year, I was a Client Relations Representative and I worked with a lovely group of ladies. It was a good position and I did well. Now, I am a Marketplace Account Representative and I work with two even more wonderful ladies. I plan to make their Christmas presents but more on that later. This post is to showcase the gifts I made my coworkers last year.

I often buy too much material when I start crafts and projects. This idea came from having too much ribbon and too many beads. I looked around on Pinterest and other DIY blogs and saw these bracelets. While I was in bracelet mode, I also made travel bracelets for Wes and myself for when we went to Sydney. Two bracelet tutorials in one post. OMG! so exciting : )


1) Pearl and ribbon bracelet tutorial:

I suggest googling this and finding step-by-step pictures to accompany my instructions. It'll make it a lot easier.
Materials needed - wire, ribbon, pearls, scissors

1. Use as many pearls as about 3/4 the size of your wrist. Cut ribbon about 2.5 times the length you want the bracelet to be. Cut the wire about 1.5 times the length you want the bracelet to be. (I always use large numbers for measurements to stay on the safe side)
2. Poke the wire about 3 inches into your ribbon (the loose 3 inches will be what you use to tie it to your wrist). Work the wire into a knot where you initially poked it through.
3. String one pearl though the wire. Fold the ribbon into a small upside down "U" and poke the wire through the other end of the pearl.
4. String a pearl onto the wire and wrap the ribbon under the pearl.
5. Fold the ribbon into another small upside down "U" shape and poke the wire though the other side of the pearl.
6. Continue stringing pearls though, wrapping the  ribbon under and making upside down "U"s and poking the wire through the other end of the pearl until you're out of pearls.
7. Leave about 3 inches of ribbon and work the wire into another knot. Cut off excess wire.


2) Cord and hexagonal nut bracelet tutorial:

I suggest googling this and finding step-by-step pictures to accompany my instructions. It'll make it a lot easier.
Materials needed - cord or some type of tough string, hexagonal nuts (hardware stores call them hex nuts - lets call them beads) , tape & scissors

1. Use 16-20 beads plus one for the clasp. Actually, however many you want is fine as long as it's an even number. Grab the extra one to use for the next step. Cut three equal pieces of cord. I would use about 3 times the length you want your bracelet to be.
2. Tie the cord though one bead. Tape this bead down on a flat surface, I would recommend a table.
3. Braid about 1/4 of your string.
4. This next step will probably either sound very intuitive or confusing depending on how well you know how to braid. After you have a quarter of your string braided, start weaving the beads into the braid.  I've been braiding since I was very small and I probably couldn't give instructions on how to but I can give tips - string the beads tightly into the braid, string one bead after each cross over of string, braid very slowly. I don't know if its clear in the photo, but there's one full braid in between each bead.
5. After all your beads are weaved in, continue braiding the rest of your string. The beads should have taken up half your string so you'll have 1/4 remaining so, in theory, the first and last section of bracelet should be the same length. Mine didn't quite turn out that way.
6. Leave enough string to tie a loop knot at the end. The loop should be big enough to put the initial bead from step 2 though but not too big to where it'll fall through.

I apologize for the lack of pictures. They would have made the instructions a lot clearer. When I made these, I only had pictures but no instructions. Maybe if you find the DIY pictures online, you can use my instructions as a companion guide.

Monday, December 1, 2014

Next to crafting, baking is Erica's favorite hobby.

I love desserts. I've baked almost everything: cookies, cupcakes, muffins, a pie or two, cheesecake, and even vegan cookies. Some have turned out amazing (^.^) and other recipes have been duds (;_;) It could be because I cannot follow a recipe. I either 1. think I can do it better or 2. I am too cheap to buy everything I need so I substitute ingredients.  I made wheat pumpkin bread with pumpkin spice whipped cream for Thanksgiving and plan on doing a chocolate peppermint bark for Christmas. And probably also a cookie for Christmas but not sure what type, yet.

I was looking though the little drawer that's built in underneath the oven --what is that thing called?--and saw that I had way too many cookie trays. What to do? DIY them into gifts, of course!
This is the one that's currently hanging in my cubicle at work.

Cookie tray magnetic board tutorial-
don't really need all of those things, duh, but the essentials are - cookie tray, paint, and string. I would recommend a drill for the holes for the string but I couldn't find one so I used a hammer and a screw driver. It takes quite some time to hammer a hole through a cookie tray. LOL

This won't be much of a tutorial. Think of it more like "here's an idea for you to re-purpose old cookie trays." Three steps:

1. Hammer or drill two holes at the top of the tray.
2. Paint the tray or, as in the first picture, glue a background to the tray.
3.Loop string through the holes on top.

I made some silly magnets to adorn mine.  I also glued pictures along the bottom. Other ideas: pen and Post-It notes, magnetic poetry, charms or to-do lists.


Monday, November 24, 2014

Fact: Erica likes to do puzzles on weekends.

I've gotten to the stage in my life where I have long left my partying days behind and now my idea of a fun weekend is hanging out with Wes, my fur babies, my crafts and my sewing machine.  A hobby I enjoy is puzzling. I started with a 500-piece and went up from there.

Here is my first puzzle. I started doing these with my dad when I was in high school.

I've made tons of these things. Right now I have these hung up at the apartment.

My "Sunday fun-day sister" helped me do these. Oh and 'fun-day' meant I went to her house to cook, watch Once Upon a Time and work on these puzzles.

I got Wes into puzzles. These are the ones we made together. We are working on another one right now and have one more to do after that.

Enough of my musing, it's craft night!! I like painting my nails. I have no nails and I refuse to grow them out because I don't like long nails but I surely do enjoy painting what little bit I have. LOL I had all my nail polish in a shoe box but that looked too boring so I made this.


Cloth box tutorial-
 (its recycling old stuff and much cheaper than buying a fancy box...recycling + being cheap = a double whammy of winning!)
Materials needed: cardboard box, cloth, craft glue, ribbon, scissors

1. Make sure your cloth is about twice as big as your cardboard box.
2. Set your box in the middle of your cloth.
3. Spread glue all over your box. Wrap your cloth tightly around the box and cut off any excess.  I wrapped the cloth all the way around the box and about 2-3 inches into the inside walls of the box. Don't glue down the edges inside the box, yet.
4. Cut a piece of cloth about the size of the inside of your box (I like to cut bigger pieces and trim later). Glue that piece into the center of your box and glue edges along the walls of the box. It can be a little messy since no one will actually see the inside of your box.
5. Glue the excess from the piece that went around the box (step 3) down.
6. Glue a ribbon around the top of your box and tie a pretty bow.

Six steps and that's it! Happy Thanksgiving, everyone : )

Monday, November 17, 2014

Erica is happy to present rags|reborn. !!!!!

I will be thirty in less than a month. I went through a pretty bad mid-life crisis this past summer.

<OMG, I'm turning 30!>
                   <What have I done in my life?>
          <Is my job a real career?>
 <Why don't I have children, a husband, divorce, house, second marriage, refinanced mortgage, more children and all the other things society tells me thirty-year-olds should have accomplished by now?>
                 <Why can't I fit in and be like everyone else?>
                             This last one is a constant struggle like you wouldn't believe.

I thought and prayed and wrote countless entries in my journal while I was in my depressive cocoon of negativity. And now, through my hard work and creative endeavors, I have become a butterfly. Well, I'm not the butterfly, but I have made something that can be the equivalent of the butterfly.

It started with this blog.  I thought, "Hey, if I have a blog, that's something that's MINE. I did this... I have something that I accomplished and am super proud to show off." The tag line to my Monday Craft Night blog is "I sew. I craft. I have big ideas. Great things are coming."


And great things are here! Over the weekend, I set up my Etsy shop. Its supposed to be stylized rags|reborn. but there's already a shop with that name and I can't use symbols... so my shop is RagsRebornGiftshttps://www.etsy.com/shop/RagsRebornGifts

Here's my work station. Desk, notebook, sewing machine and music on my laptop. Sadie loves her bed but hates the sewing machine.

Please visit my shop. Browse and buy, if you'd like. If you're in the Oklahoma City metro area, message me and we can work out a delivery system so you don't have to pay the shipping fee. Here's a sampling of my pillows.  I do totes, too, but you'll just have to head on over to the Etsy shop to see them.


Here is my beautiful sewing machine. Its a hand-me-down from my mom. 

Monday, November 10, 2014

Erica's first full length tutorial!!

I decided to do the dogs' laundry today. (my allergies are killing me!!) One of Kensington's pillows got destroyed in the dryer and, in my fit of throwing pillow debris into the trash, I accidentally threw away one of Sadie's pillow cases. This is the perfect opportunity to do a real full-length tutorial with pictures because I'll have to make a new pillow and pillow case for the pups.


Puppy pillow tutorial:

Materials you'll need: cloth, something to stuff into the pillow (for some reason, Kensington likes sleeping on harder material instead of soft cotton pillow stuffing. So, I'm using old rags and towels for the "stuffing"), pencil, scissors, ruler, thread & needle or a sewing machine, if you have one.


1. Measure and cut the cloth into the size of the pillow you want (you'll need a piece for the front & one for the back).  My two pieces are 19inches wide x 17inches tall and pictured in the materials photo above.
2. Sew whatever decorations you want on the front of the pillow
I decided to stick with something simple.  

3. Sew the two square pieces together around the edges. Only sew three of the four edges together.

4. Stuff the empty pillow with your stuffing and sew the last edge together. If you are using a sewing machine, I find it easier to pin the last edge in place so no stuffing falls out while you're running it through the sewing machine.
 
 All done and on Kensington's bed. Now for Sadie's...

Puppy pillow case tutorial:
Materials you'll need: pillow, cloth, sewing machine or needle & thread, scissors, ruler and buttons (I used the snap on buttons)

1. Measure and cut the cloth. It should be a little bit bigger than the size of your pillow. (two pieces just like in the project above) Mine is a 20x20 inch square.
2. Sew any embellishments you want to the front piece.
                                                        I'm sticking with the simplicity theme
3. Sew three edges together. Affix the buttons on the last edge (using instructions that came with the buttons.)
4. Put pillow in, button it up and you're all done.

See you guys next week!

Monday, November 3, 2014

Ack! Writer's block... the week Erica couldn't think of anything to blog...

I suppose this isn't a bad thing. I'm pretty long winded, usually, so we'll just keep this one short. But I will have lots of pictures because there are dogs involved. And everyone loves precious pictures of Kensington and Sadie. : )

Poor Wes always gets volunteered for in my craft nights.
 
A few months ago, I decided we all needed bows. I think my mom was having us over for a cookout or something and I wanted us all to dress formally. Since it was the middle of summer, I couldn't make actual clothes for my already furry dogs so I accessorized.
 
Kensington wasn't in a cuddly mood. Note boxie is always my faithful art companion!
 
Cloth no-sew bow tie tutorial:
     materials needed - cloth (I used two colors), scissors, hot glue, a ruler, Velcro
 
1. Measure and cut a strip of cloth a little bit longer than your neck, head, or whatever you intend to tie a bow on. The width of your cloth should be thicker than the actual width you want to have upon completion. I made my strips of cloth about a foot long and 3inches wide.
2. Lay the strip of cloth flat and fold the top & bottom edges into the middle and hot glue. Then fold the left & right edges about a centimeter in and hot glue. Now, your strip of fabric should look like one solid piece with no frayed edges.
3. Put that aside and grab another piece of cloth to make the actual bow part.  Cut a square the size you want your bow to be. Fold the square piece into a few accordion folds. You can fuss with it until you get the desired bow shape.
4. Cut one last small piece of cloth to wrap around the center of your bow. Once the bow is in place, put a tiny dab of hot glue on the back so the accordion folds don't unfold. Hot glue the bow, strip of cloth in the middle, and strip of cloth from step 2 together on the back of the bow tie. Now all three pieces should be connected.
5. Stick your Velcro to the ends of the bow tie and there you have it. I used different colors for the different pieces of fabric for my and Sadie's bows. Wes and Kensington just got plain ones but no one complained.


Monday, October 27, 2014

This year for Halloween...Erica and Wes are going to a masquerade!

"Masquerade! Different faces on parade, masquerade!"  Last month, we went to see The Phantom of the Opera at the Civic Center. I think it was my favorite musical I've been to thus far. One of my favorite scenes was the masquerade song. And so I thought, "I want to go to a masquerade!!" Since I probably won't be invited to any here anytime soon, I decided that Wes and I would just have to pretend.  Here is my mask.

Nothing too fancy. Just a white mask from the local craft store and some glitter, feathers, and other fun embellishments.

What I'd like to showcase is my hat.


I got all of my supplies from the Dollar Tree. A plastic party hat (like the fake bowler hats you wear for New Years or 4th of July), some floral arrangements, a piece of poster board, and paint...only $4, guys!! Here is how you turn a cheap plastic hat into a mat hatter's, masquerade worthy top hat:

Materials needed: all mentioned above, AND a paper sack, scissors, tape & glue, ribbon, any embellishments.
1. Cut apart the plastic hat; the two pieces should be the brim and actual hat part.
2. Roll a piece of poster board into the circumference and height of hat you want. Tape the poster board roll into the brim of the hat. Tape the other hat part to the top of the poster board. Now your plastic hat should look like a stovepipe hat.
3. Cut pieces of poster board into small sections and tape them to the brim of the hat. This will expand the brim. Trim as needed.
4. Now your hat should look like a mess of tape and poster board. Rip part the paper sack and glue it over the poster board.
5. Now your hat should look like its made of paper sack. That will be your canvas to paint. I just painted mine one color but if you're more artistic, work your magic!
6. I used the ribbon to hide how I glued the floral pieces to the hat. I glued a piece, tied ribbon around and then glued more floral, etc.

I'm off to the ball...

Monday, October 20, 2014

Last year for Halloween...Erica was a cupcake!!

Its that time again... costume parties a plenty. What are YOU going to be for Halloween? Last year, I was a cupcake and Wes was a baker.

 
Yup, we were adorable. We made it to two Halloween parties and I got to strut my cupcake-ness all night long. Once again, this tutorial would have been awesome if I took step-by-step pictures but I didn't know at the time that I'd need the aforementioned pictures. So, here's the best I could do. (Just a tad bit of advice...this project should be done over multiple hours with breaks or days in between and its best of have an assistant, boyfriend or craft night buddy to help because there's lots of "hey, can you hold one thing out of the way while I hot glue something else" involved.) 
 
Cupcake costume tutorial -
Materials needed: laundry basket, poster board (2 pieces or more...depending on how big your basket is), shoe laces (I used two sets), tulle (the mesh fabric, I bought a yard), cotton stuffing (one bag should do), embellishments, hot glue (A LOT of hot glue... so much so you'll develop a love hate relationship with it in the end), scissors, duct tape, a small bag (I used one of those little bags that you get when you buy jewelry from a craft fair or boutique)  
 
1. Purchase a laundry basket you can fit in. Cut the bottom out of the basket and tie the shoe laces on as if they were suspenders.
2. Cut your poster board into a few pieces and fold each piece accordion style. Since the basket is round, you can't use one piece all the way around. I cut a piece that folded into about 2 - 3 accordion folds and hot glued it on.  One piece at a time until the basket resembles the cup part of the cupcake.
3. If your poster board is not evenly shaped in the end, go around with scissors and trim the top and bottom. I found this easier than measuring each piece to make sure they were the same size.
4. Hot glue is amazing but it doesn't hold everything. Duct tape the poster board to the inside of your laundry basket to make sure none falls off. This would be another good time to have a buddy help you hold everything in place while you go around with duct tape... not necessary but it does make it easier.
 
After steps 1-4, you should look like half of a cupcake. This would be a good time to take a break and find your assistant. You'll need him or her for the next few steps.
 

5. Cut the tulle into 4 - 6 pieces. Glue the edge of each piece onto the top of the laundry basket.
6. Open the bag of cotton stuffing and tear apart the stuffing and fluff it up so its not one large bundle.  This is where it becomes a two person job...
7. Hold some cotton stuffing on the edge of your laundry basket, fold the tulle over and hot glue.  Do this all around your laundry basket. I used soooo much hot glue and burned every single one of my poor little fingers but was successful in the end.  Don't despair!!
8. After hot gluing all the cotton stuffing into the tulle and onto the laundry basket, I went around a second time and glued all the loose pieces to each other or onto the laundry basket. This would be another good time to have a buddy help you hold everything in place while you go around with extra glue.

After steps 5-8, I became a cupcake!!

 
 9. Lastly, is the fun stuff. Embellish that cupcake!  Give yourself some sprinkles, some jazz and pizazz. LOL I used stick-on gems on the accordion folds of my poster board and little cupcake and baked good stickers all over the tulle. I wanted to add glitter as sprinkles but figured that would be way too messy. 
10.  Tie your little jewelry bag inside your laundry basket. Then you can be a partying cupcake without a purse or clutch and still have your lip stick, keys, etc.
 
 
Here is the finished project.  I went to one of my good friend's epic Halloween party and took third in the costume party. Here's me graciously accepting my ribbon.  Another costume to come next week. See you guys then : )