Showing posts with label crafts. Show all posts

Monday, January 25, 2016

Continued from last week...

Girls night dinner at Gogo Sushi : )

Sorry to leave you guys hanging like that last week. Are we ready for two more cheap, easy & awesome DIYs? YES WE ARE!!
BTW, please know that my Blogger formatting is still being crazy. I swear I'm not typing centered but for some reason, it shows up that way when its published. I've tried everything but technology has bested me. I give up; we'll just read everything aligned to the center tonight. Sorry (if this bugs you as much as it does me).  (;_:)

Here's the finished project for my coworkers' Christmas gifts.

Infinity scarf tutorial:
       Last year, I sewed scarves for Mike and Wes. This year, I thought it would be fun to make some for the females. 

       Materials needed- fabric (I'm using an old dress that doesn't fit me anymore, a dress that was gifted to me to use as fabric because it didn't fit its previous owner & some scrap cloth from a different project), scissors, tape measure, sewing machine & pins
       This project was actually free because all the fabric was used or scrap. But, if you didn't have old clothes or fabric, you can buy some cheap-o t-shirts from the Dollar Tree to use. 
Dress from Jessa, dress I bought myself & fabric for pillows I made Athena & Sonja.

1. Measure and cut the cloth into strips. It doesn't matter how many strips. I cut a few and sewed them together to have a variety of colors. The length and width depends on how big you want your scarf to be. I made three scarves: one for Jessa, one for Courtney and one for Wes' mom (not pictured because I was in a hurry and forgot to take a picture before I wrapped it). The scarf I used for this tutorial is the one pictured after step #3. 
    My measurements were: 
       red cloth (2 pieces) - 23 x 5 inches,
       beige cloth (1 piece) - 33 x 5 inches,
       patterned cloth (1 piece)- 28 x 5 inches


2. Hem the edges of the cloth, if needed. I used some really thin fabric so I hemmed mine to ensure that it won't fray or tear with use. Then lay the strips of cloth in whatever order you want & pin it all together to make a round piece of fabric

3. Sew the pieces together where you had pinned. And there it is... an infinity scarf!!

There are literally hundreds of Sharpie ceramic mug blogs/tutorials out there. Trust me, I read a bunch of them to get a good idea of how it's supposed to be done. I love the idea of customization and personalization so I definitely wanted to make some of these mugs for Christmas gifts. I took notes on the best advice from other crafters and came up with this.

Jessa & Mason's mugs. They're having a Pokemon themed wedding in March and I thought this would be a great pre-wedding gift.

Sharpie ceramic mug tutorial:
Materials needed- cheap ceramic mugs (the cheaper the better is what most bloggers say for this project), Windex & paper towels, Sharpie permanent markers

1. Take off the manufacture's sticker, bar code, price dot, etc from the mug. Make sure to really tear it off. We don't want anything catching on fire in the oven! Then wipe down the mugs with Windex.
2. Draw, color, go to Crazytown Decoration-ville on your mug. I did one for each of my coworkers (#team HCR) and then I did 3 pairs. A pair for Wes' video gaming best friends, and then a pair for my friends Courtney & Alex and Jessa & Mason. Wait three days before moving onto step #3. This will give plenty of time for the ink to settle in.
Down, Right, Fierce Street Fighter Move for Travis.

3. Place the mugs into a cold oven (aka DON'T pre-heat), turn the oven on to 450 degrees Fahrenheit and let bake for thirty minutes. After the 30 minutes, turn the oven off but do not open it. The mugs need to stay in the oven to cool. I let mine cool over night. Then the next morning, you have neat mugs that you decorated yourself. Oh, how thoughtful!!
I made three sets: the first is for new parents Courtney and Alex, the mugs read Mom needs coffee/Dad needs coffee; the second pair is for Wes' friends, Travis and Cameron, they have Street Fighter commands drawn on them; and the last pair are for newly engaged Jessa and Mason who are avid Pokemon fanatics, I drew Pokeballs on the mugs but you can't see them in this picture. I did research for the Street Fighter & Pokemon mugs so I wouldn't draw anything incorrectly.


A few weeks ago, Wes & I had his two best friends over for dinner (for Christmas). We all chipped in and got Wes a PS4. (This was my idea even though I don't know a lick about video games.) I also bought him Fallout 4 and an extra controller--so they could all play together. Wes also got his friend a PS4 game. And I drew Street Fighter super attack command moves onto their mugs (my idea but Wes had to show me what the commands looked like).  LOL 

So...it's been a few weeks since I wrote this and give Travis & Cameron their mugs (I think we all had our dinner on December 27th). It has been reported that the Sharpie has started to wear off. Do no put these mugs in the dishwasher and wash them very gently to avoid fading. 


Monday, December 21, 2015

RagsReborn's first year

My booth set up at the Holiday Handmade Show.
I survived my first year!! It's actually been over a year since my Etsy shop's anniversary date is November 16, 2014. And I conceptualized RagsReborn a few months before I opened the Etsy shop. But I'm just gonna say 2014 doesn't really count and go with 2015 as my first year.

Before I do my self reflection and year end wrap up, I would like to tell you about my wonderful experience at the Holiday Handmade Show held at The Crown Center church in Moore, OK.               Everything worked...
       the staff was extremely helpful (huge shout out to Debbie and her family! P.S. all of your grandchildren are adorable!),
  the other vendors were nice (and had handmade items),
       my sales were good (great, actually...cha-ching!)
  and I saw some familiar faces -- thanks to Lacey & her mom and my coworker, Deb, for coming out!
Two things that stood out for me at this show was -
       1. The event organizer and her family: the show wasn't particularly organized but what they lacked in preparedness, they made up for in willingness to help. Each and every member of the event organizer's family (I think they are a prominent family in the church) interacted with me throughout the day. I had help unloading my car both Friday night at set-up and Saturday morning day-of-show, setting up my booth and getting chairs from church storage. Everyone stopped to shop and chit chat with me at my booth. I felt welcomed even though I was not a member of the church. The grandchildren helped me work on Christmas presents that I had brought to sew for my friends & family. I even got to babysit one of the grandchildren's pet cricket! 
           At the end of the day, I thanked Debbie for having me and she invited me back to the spring show. I have met many nice people at craft shows but I think she was the best.
       2. The parking arrangement: this sounds silly but it made a HUGE difference. People actually used the porte cochere properly. (I had to Google the proper word for this but it's basically the valet parking drive thru thing in front of buildings.) Usually, people park all crazy and have no regard for other vendors when they are unloading/reloading for a craft show.
            Everyone at The Crown Center was so polite!! The cars parallel parked behind each other and took turns pulling up to the front entrance. Everyone left enough space in between the cars, too. If there was no room to park in the port cochere, cars parked in the parking lot and waited until there was an opening to pull up. This sounds like common sense but all the other craft shows I participated in did NOT operate like this. The most surprising thing (Wes witnessed this when he came to help me pack up) was that a car drove in the wrong way but instead of just parking incorrectly, he backed up, drove around and entered the correct way. I wish I could have witnessed it myself. I think that one act alone would have been enough to restore my faith in humanity. LOL 

Okay...back to "RagsReborn's first year." I have made 18 sales on Etsy!  That is a big deal to me. I was only expecting a few, if any, Etsy sales since my main focus is craft shows (coming to you direct: live and in person!!). I am terrible at social media (more on that later) so I didn't think my Etsy shop would receive any sales at all. I'm going to deem this first year a success (^_^) But, I have only received 3 reviews. How do I get more people to review my products? I'm not even asking for just good reviews. I want any sort of feedback. 

$$$$$ I haven't "crunched the numbers" (as Wes likes to say) but I think my books look good. I am not sure if I made a profit but I'm pretty sure I at least broke even. I sorta keep tabs on costs for craft shows and aim to recuperate my booth rental fee and whatever other costs I have figured. I did seven shows this year and I only lost money on three. That's less than half!! $$$$$
       To me, sales or no sales, just being in seven shows is a win. My very first show was the Indie Trunk Show in May. Then, I gave myself a really ambitious November schedule (three shows in a row!) and I made it. I am now a pro at packing/unpacking my car (well, technically Wes is the expert since he does the packing/unpacking) & booth set up. I have come out of my shell to interact with customers. I have sold a good amount at each show and I have done a couple of custom orders that I am really proud of. I also made a business transaction. 
If you like RPGs and intense board games, check this place out! It's in Norman, OK. 
An old college friend also realized his dream and opened up a board game cafe with a few of his buddies. (2015...the year of dreams!) To further the "local helping local" cause, he agreed to let me outfit his store with RagsReborn pillows!! I've decided that my favorite things to sew are custom order pillows. I get to be a little more creative and I feel like they're more important than a regular t-shirt pillow. Maybe 'important' isn't the right word... a custom order pillow carries more sentiment for the buyer and I really enjoy seeing the look on people's faces when I deliver the finished product.

Now for my only complaint... I completely suck at social media! *insert angry face emoji!* I learned how to use Instagram and Facebook just this year (and for the sole purpose of furthering RagsReborn). I wasn't expecting tons of followers but I'm a little disappointed with what I have now. 
       I only have 64 Instagram followers and 73 Facebook likes. I know people who get that many likes per hour. I only have that many in an entire year. How do I increase these numbers??? Someone help me!! Someone pretty please "friend" and "follow" me! I post good pictures, I do status updates, I blog regularly... how do I get people to notice these things? I'm not outgoing or popular in real life and I think, unfortunately, that is affecting my social media presence. But I don't know how to fix it. I was in a young professionals group for networking but I kinda stopped going. It's just not my personality to be an extrovert. So I am calling out to you... please check out my Facebook page and Instagram account. And if you buy a pillow off Etsy, please leave a review.

This is how I blog... on the couch in my most comfortable and unflattering clothes with dogs on my lap and my lap top on the ottoman (my "ottoman top"??)
And finally a tremendous THANK YOU to anyone who has looked at any of my social media platforms, came out to a show, bought a pillow, had me sew a custom order and just said "Hey, great job!!" You guys are the best!! 


Monday, February 23, 2015

Erica is making headbands!! (pt.2)

Continued from last week...
Yeah, I totally craft in my jammies. Ain't no dress code for bloggin'!
    Oh and I totally swapped Emma's headband for mine. The more I looked at hers, the more I kept thinking it wasn't her style. I really think the braided one suits her better. And now... Rachel, Elizabeth and I all have matching flower ones. The HCR department can be totes stylin' together! Hahaha.

Tutorial #3.
This one goes to a friend I've known for over 15 years. (they have song dedications...can I make craft dedications?) That's literally half my lifetime and a record in friendship for me. I'm not saying I don't keep in touch with people--because I try!-- but its SO HARD when friends move away for work or family or get overly consumed with said work and said family. But Lacey and I still manage to see each other about twice a month. And for that, I love her dearly.

Pearls headband tutorial:
Materials needed- elastic, cloth (I used two fabrics only because I wanted to incorporate some of the peacock cloth), string of pearls--mine is fake plastic costume jewelry, hot glue, scissors, and a  ruler

a. Cut a strip of cloth 15 inches long and 1 inch wide. I mainly chose those measurements because that's how wide my elastic is. Fold the cloth in half length wise and hot glue together. Now, glue each end to an end of your elastic. Headband made. Prettiness to come...
If I knew that all a headband was is a piece of cloth glued to some elastic, I would have 1. saved so much money my teenage years and 2. made so much money in my young adulthood making and selling these things!
b. Wind the string of pearls into small circles on your fabric. Glue down the pearls once you have the size of circle you want. I made a few of these.
c. Cut the pearl circles out of your cloth. I cut on the edge of the circle for the ones on my white cloth but left a border on my peacock ones since I wanted the pattern to show.
d. Glue the pearl circles into any arrangement on your headband from step A. And there you have it!

You can skip step A and just glue these to an existing headband. Which brings me to...

Tutorial #4.
I love letters! I think getting a letter in the mail is one of the best things EVER. I have one friend from college who still writes. Dominique and I don't write much nowadays, but I'll send out a letter every few months and she'll send me a card every now and then. Instead of just a card for her birthday, I decided to also include this headband (and some other gifties...none that I made, though, so who cares what they are? LOL).

Re-purposed headband tutorial:
      Materials needed - old headband, a flower adornment, cloth, felt, scissors and hot glue. I wanted to use the rest of my peacock patterned cloth. I thought it would be a good idea to use some in each headband to tie them all together as one themed project.

a. Get an old headband you no longer use...or one that you do still use but want to spruce up before the next time you wear it. Measure the felt the exact length of the headband (minus the elastic part) and hot glue it onto the headband.
b. Draw leaves onto the cloth and cut out. I did 10 leaves. I freehanded mine but if I had to do it over again, I would have found a pattern or drawn them out first. I wasted a lot of cloth on the ones I messed up and I couldn't quite get them all the same size.
c. Arrange the leaves into the pattern that you want, then remove and hot glue them on (hoping that you had memorized the pattern. Haha!) Then glue the flower to the center of your leaf cluster. Voila!


Monday, December 8, 2014

Erica proudly works at Delta Dental of Oklahoma

This time last year, I was a Client Relations Representative and I worked with a lovely group of ladies. It was a good position and I did well. Now, I am a Marketplace Account Representative and I work with two even more wonderful ladies. I plan to make their Christmas presents but more on that later. This post is to showcase the gifts I made my coworkers last year.

I often buy too much material when I start crafts and projects. This idea came from having too much ribbon and too many beads. I looked around on Pinterest and other DIY blogs and saw these bracelets. While I was in bracelet mode, I also made travel bracelets for Wes and myself for when we went to Sydney. Two bracelet tutorials in one post. OMG! so exciting : )


1) Pearl and ribbon bracelet tutorial:

I suggest googling this and finding step-by-step pictures to accompany my instructions. It'll make it a lot easier.
Materials needed - wire, ribbon, pearls, scissors

1. Use as many pearls as about 3/4 the size of your wrist. Cut ribbon about 2.5 times the length you want the bracelet to be. Cut the wire about 1.5 times the length you want the bracelet to be. (I always use large numbers for measurements to stay on the safe side)
2. Poke the wire about 3 inches into your ribbon (the loose 3 inches will be what you use to tie it to your wrist). Work the wire into a knot where you initially poked it through.
3. String one pearl though the wire. Fold the ribbon into a small upside down "U" and poke the wire through the other end of the pearl.
4. String a pearl onto the wire and wrap the ribbon under the pearl.
5. Fold the ribbon into another small upside down "U" shape and poke the wire though the other side of the pearl.
6. Continue stringing pearls though, wrapping the  ribbon under and making upside down "U"s and poking the wire through the other end of the pearl until you're out of pearls.
7. Leave about 3 inches of ribbon and work the wire into another knot. Cut off excess wire.


2) Cord and hexagonal nut bracelet tutorial:

I suggest googling this and finding step-by-step pictures to accompany my instructions. It'll make it a lot easier.
Materials needed - cord or some type of tough string, hexagonal nuts (hardware stores call them hex nuts - lets call them beads) , tape & scissors

1. Use 16-20 beads plus one for the clasp. Actually, however many you want is fine as long as it's an even number. Grab the extra one to use for the next step. Cut three equal pieces of cord. I would use about 3 times the length you want your bracelet to be.
2. Tie the cord though one bead. Tape this bead down on a flat surface, I would recommend a table.
3. Braid about 1/4 of your string.
4. This next step will probably either sound very intuitive or confusing depending on how well you know how to braid. After you have a quarter of your string braided, start weaving the beads into the braid.  I've been braiding since I was very small and I probably couldn't give instructions on how to but I can give tips - string the beads tightly into the braid, string one bead after each cross over of string, braid very slowly. I don't know if its clear in the photo, but there's one full braid in between each bead.
5. After all your beads are weaved in, continue braiding the rest of your string. The beads should have taken up half your string so you'll have 1/4 remaining so, in theory, the first and last section of bracelet should be the same length. Mine didn't quite turn out that way.
6. Leave enough string to tie a loop knot at the end. The loop should be big enough to put the initial bead from step 2 though but not too big to where it'll fall through.

I apologize for the lack of pictures. They would have made the instructions a lot clearer. When I made these, I only had pictures but no instructions. Maybe if you find the DIY pictures online, you can use my instructions as a companion guide.

Monday, November 10, 2014

Erica's first full length tutorial!!

I decided to do the dogs' laundry today. (my allergies are killing me!!) One of Kensington's pillows got destroyed in the dryer and, in my fit of throwing pillow debris into the trash, I accidentally threw away one of Sadie's pillow cases. This is the perfect opportunity to do a real full-length tutorial with pictures because I'll have to make a new pillow and pillow case for the pups.


Puppy pillow tutorial:

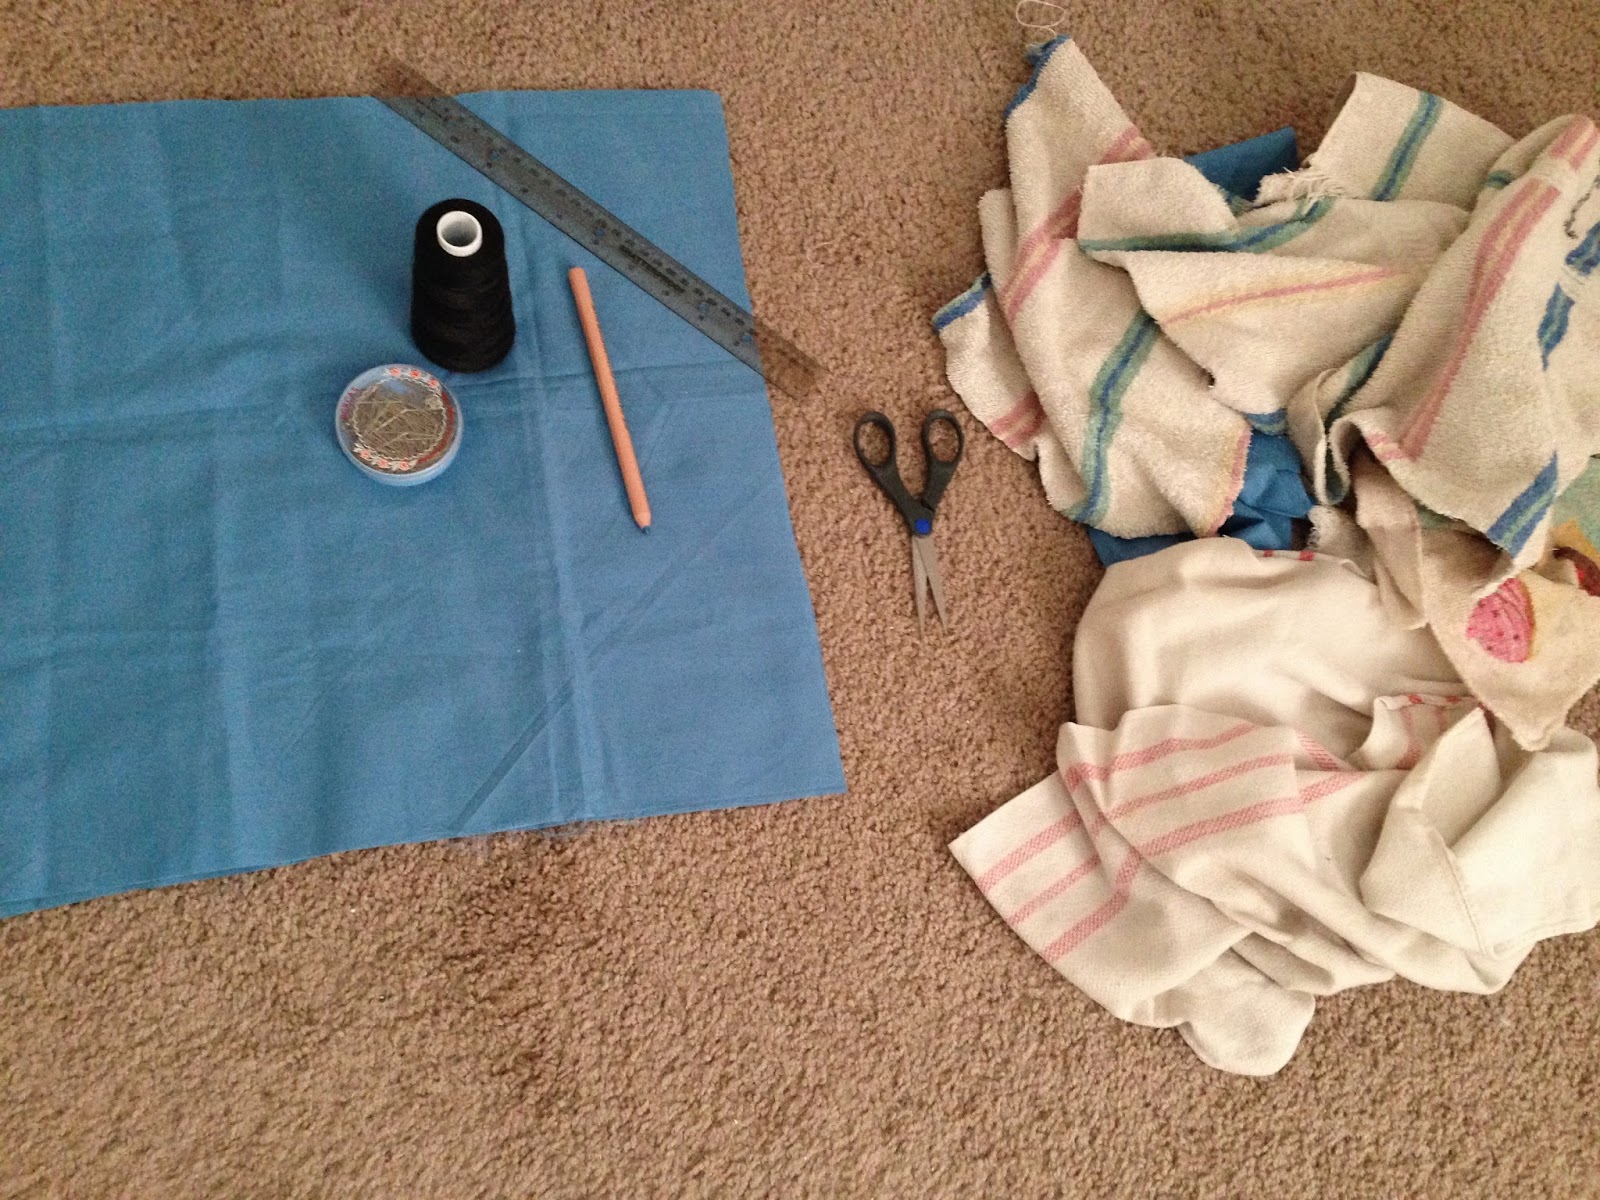
Materials you'll need: cloth, something to stuff into the pillow (for some reason, Kensington likes sleeping on harder material instead of soft cotton pillow stuffing. So, I'm using old rags and towels for the "stuffing"), pencil, scissors, ruler, thread & needle or a sewing machine, if you have one.


1. Measure and cut the cloth into the size of the pillow you want (you'll need a piece for the front & one for the back).  My two pieces are 19inches wide x 17inches tall and pictured in the materials photo above.
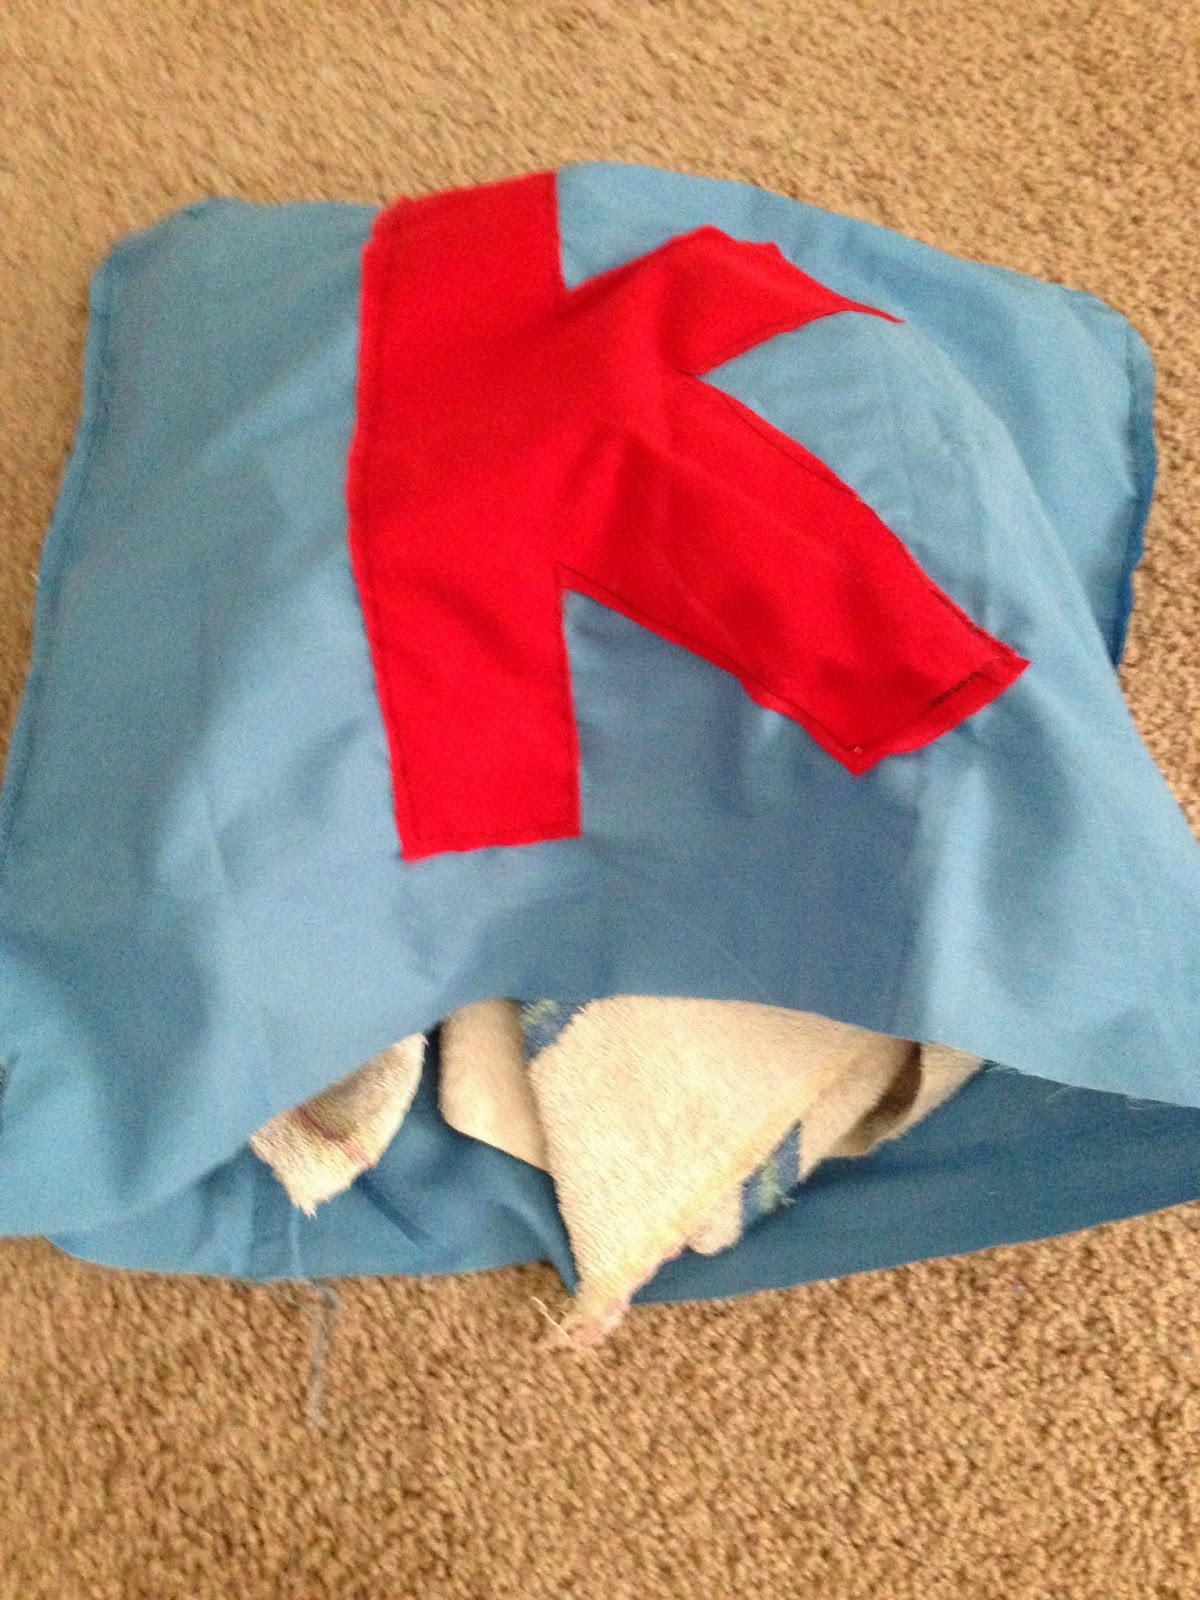
2. Sew whatever decorations you want on the front of the pillow
I decided to stick with something simple.  

3. Sew the two square pieces together around the edges. Only sew three of the four edges together.

4. Stuff the empty pillow with your stuffing and sew the last edge together. If you are using a sewing machine, I find it easier to pin the last edge in place so no stuffing falls out while you're running it through the sewing machine.
 
 All done and on Kensington's bed. Now for Sadie's...

Puppy pillow case tutorial:
Materials you'll need: pillow, cloth, sewing machine or needle & thread, scissors, ruler and buttons (I used the snap on buttons)

1. Measure and cut the cloth. It should be a little bit bigger than the size of your pillow. (two pieces just like in the project above) Mine is a 20x20 inch square.
2. Sew any embellishments you want to the front piece.
                                                        I'm sticking with the simplicity theme
3. Sew three edges together. Affix the buttons on the last edge (using instructions that came with the buttons.)
4. Put pillow in, button it up and you're all done.

See you guys next week!

Monday, October 20, 2014

Last year for Halloween...Erica was a cupcake!!

Its that time again... costume parties a plenty. What are YOU going to be for Halloween? Last year, I was a cupcake and Wes was a baker.

 
Yup, we were adorable. We made it to two Halloween parties and I got to strut my cupcake-ness all night long. Once again, this tutorial would have been awesome if I took step-by-step pictures but I didn't know at the time that I'd need the aforementioned pictures. So, here's the best I could do. (Just a tad bit of advice...this project should be done over multiple hours with breaks or days in between and its best of have an assistant, boyfriend or craft night buddy to help because there's lots of "hey, can you hold one thing out of the way while I hot glue something else" involved.) 
 
Cupcake costume tutorial -
Materials needed: laundry basket, poster board (2 pieces or more...depending on how big your basket is), shoe laces (I used two sets), tulle (the mesh fabric, I bought a yard), cotton stuffing (one bag should do), embellishments, hot glue (A LOT of hot glue... so much so you'll develop a love hate relationship with it in the end), scissors, duct tape, a small bag (I used one of those little bags that you get when you buy jewelry from a craft fair or boutique)  
 
1. Purchase a laundry basket you can fit in. Cut the bottom out of the basket and tie the shoe laces on as if they were suspenders.
2. Cut your poster board into a few pieces and fold each piece accordion style. Since the basket is round, you can't use one piece all the way around. I cut a piece that folded into about 2 - 3 accordion folds and hot glued it on.  One piece at a time until the basket resembles the cup part of the cupcake.
3. If your poster board is not evenly shaped in the end, go around with scissors and trim the top and bottom. I found this easier than measuring each piece to make sure they were the same size.
4. Hot glue is amazing but it doesn't hold everything. Duct tape the poster board to the inside of your laundry basket to make sure none falls off. This would be another good time to have a buddy help you hold everything in place while you go around with duct tape... not necessary but it does make it easier.
 
After steps 1-4, you should look like half of a cupcake. This would be a good time to take a break and find your assistant. You'll need him or her for the next few steps.
 

5. Cut the tulle into 4 - 6 pieces. Glue the edge of each piece onto the top of the laundry basket.
6. Open the bag of cotton stuffing and tear apart the stuffing and fluff it up so its not one large bundle.  This is where it becomes a two person job...
7. Hold some cotton stuffing on the edge of your laundry basket, fold the tulle over and hot glue.  Do this all around your laundry basket. I used soooo much hot glue and burned every single one of my poor little fingers but was successful in the end.  Don't despair!!
8. After hot gluing all the cotton stuffing into the tulle and onto the laundry basket, I went around a second time and glued all the loose pieces to each other or onto the laundry basket. This would be another good time to have a buddy help you hold everything in place while you go around with extra glue.

After steps 5-8, I became a cupcake!!

 
 9. Lastly, is the fun stuff. Embellish that cupcake!  Give yourself some sprinkles, some jazz and pizazz. LOL I used stick-on gems on the accordion folds of my poster board and little cupcake and baked good stickers all over the tulle. I wanted to add glitter as sprinkles but figured that would be way too messy. 
10.  Tie your little jewelry bag inside your laundry basket. Then you can be a partying cupcake without a purse or clutch and still have your lip stick, keys, etc.
 
 
Here is the finished project.  I went to one of my good friend's epic Halloween party and took third in the costume party. Here's me graciously accepting my ribbon.  Another costume to come next week. See you guys then : )

Monday, October 13, 2014

Erica LOVES earrings!

I knew I had to organize and rearrange my earrings for this blog's pictures. What I didn't know is that I'd get carried away and organize all of my accessories... necklaces, bracelets and hair accessories were done along with the earrings. I love living with my mate but there's something therapeutic about having the apartment to yourself and cleaning with loud music on. I'm so productive!! Here is what my earrings ended up looking like. All nice and in line. I had more but I got rid of a ton of stuff I don't wear anymore.


Funny story about this thing.  I knew I had way too many earrings and throwing them in a box would not work.  I couldn't see them all and they were getting tangled : ( I had an idea in my head and I was fairly certain I've seen this "aluminum sheet of thing with holes" at a hardware store before.  So I head to Home Depot and find the first stocker walking the aisles.  "Sir," I said politely as I approached, "I have an idea of how to organize my earrings. I need a sheet of something I can hang that's about the size of your standard poster. I need it to have holes punched in it.  I need the holes to be spaced evenly so I can stick all my pairs of earrings on this thing and hang it in my closet. Can you direct me to something like that?" And surprisingly, he took me right to this thing. I guess he's been asked before. Crafty girls must come to Home Depot a lot.

It works great on my dangly earrings but what about the studs? How about something like this?


I got this idea off  Pinterest and here's my take on it...
     Picture frame & Ribbon earring holder tutorial -
     Materials needed: picture frame (any size will work, I went with the standard 4"x6"), 2 types of ribbon, scissors & hot glue

1. Take the backing and glass out of your picture frame.  Save it for another craft! : )
2. Start on one corner and tie your vertical ribbon (the piece that's not lacy in my picture) into a knot behind the frame.
3. Wrap about a couple of times up and down the picture frame. Hot glue the end piece to the back of the frame.
4. Then tie the horizontal piece of ribbon. I tied mine into a bow because I couldn't cleverly disguise the knot anywhere on the frame.
5. Pull across the frame, cut and hot glue. Repeat until you have enough rows for your earrings.
6. Glue a piece of ribbon on the top right and left corners to hang.
7. Let hot glue completely dry and make sure the frame is cool before putting earrings in.

Easy peasy. Thanks for spending your Monday with me!!