Monday, March 30, 2015

The first thing Erica learned how to cook...

...was fried rice. I am Chinese after all! LOL I never really "learned" how to cook. My parents never passed down family recipes or sat me down for a cooking lesson. There was no 'Measure this to this amount and cut that exactly right;' no 'Heat this up to exactly 350 degrees;' not even a lesson on how to not over-salt. Luckily, I've never poisoned myself with under-cooked meat or eaten expired goods.

When I was younger, I simply grew up watching my dad make dinner and when I became old enough, I became the family sous chef. I STILL am my mom's sous chef. Every time Wes and I go over for dinner, I'm doing most of the work in the kitchen. And I insist on helping in the kitchen when I'm invited to friends' for dinner. But I really don't mind, I love cooking...and I love eating even more! It works out quite wonderfully.

So back to fried rice... I remember in middle school, my best friend at the time (Jessica) wanted to learn how to cook Chinese food. I sat down one night and attempted writing her a recipe. I don't know if she ever made it or not, but I think it was at that moment that I decided fried rice was going to be my go-to recipe. When people ask for Chinese food, this is what I cook them. And when they ask how to make Chinese food, this is what I teach them.

Fried rice recipe:
Ingredients (serves 3) - 2 cups of uncooked rice; Wes and I recently ventured into brown rice so that's what I'm using. I've used white or jasmine rice my entire life until now.
                                     1 egg
                                     soy sauce
1. Make the rice (in a rice cooker. I had a friend who made her rice in a pot. I am neither that talented nor patient.) Try to make the rice a little drier than you normally would. Soft or soggy rice is really hard to fry.
2. Let the rice sit in the fridge over night.  You have to leave it over night to let it dry out and get hard. When I was younger, my parents never let me order fried rice at Chinese restaurants because they said I'd be eating old food. Supposedly, they take all the leftover rice from the week before and fry that up to serve instead of using new rice. Not because they're cheapskates but because old rice just works better.
3. Break up the rice until its not clumped together. No being lazy here... it won't fry if its in ginormous clumps.
4. Dump it all in a wok (I don't know what to tell you if you don't have a wok, I've never made it in anything else.  A skillet would be too shallow and you'd get rice everywhere.) Have the stove on high heat. You can add a little bit of vegetable oil to your wok so the rice doesn't stick but you're supposed to be stirring the rice around so much that it won't stick anyway.
5. Stir vigorously and fry the rice. You want to break up the rice until its back to individual grains again. Keep stirring!!
6. When its all broken up and lightly fried (about 3-5 minutes), break an egg into the wok.
7. Keep stirring to break the egg up and completely mix it into the rice. This is a good arm workout!
8. Add as much soy sauce as you'd like.
9. Stir again until all the soy sauce is mixed in and dried out. Your rice should not be damp and soggy from the egg and soy sauce.
10. Serve hot.

Lunch is served!

You can add peas or shrimp or whatever you want to it at step 8 after the soy sauce. I usually just do plain fried rice and have stir fry or pot stickers with it. I do like the fancy fried rice, though. Maybe I'll do that next!

Monday, March 23, 2015

I'm sure she's mentioned this before...but Erica loves baking!!

I got the coolest thing from Wes' friends for Christmas.
Here's some promotional advertising for you.
They're non-stick and machine washable. You make your batter and then pour it in and bake on a cookie sheet. You don't even need to put them in a muffin tray! The cupcakes come right out when you're done. I've made both savory muffins and sweet cupcakes in these and I love them. The New York Baking Company makes them. Check out their website www.thenewyorkbakingcompany.com

One thing I make that always gets rave reviews is corn bread muffins. I'm a little sad that my sweet baked goods don't do as well but these things are awesome. Instead of crafting, I'm going to post another recipe.


Cornbread muffins:
Ingredients - 1 box of Jiffy cornbread mix
                     1 cup of wheat flour
                     2 eggs
                     2/3 cup of milk
                     1/2 cup cheese (any kind will do)
                     A dash of salt and pepper
                     1 cup of add-ins ... this is what makes them special ^_^
I've done 1/2 cup of shredded kale and 1/2 cup of diced pepperoni.
I've done a cup of canned corn with a small whole diced up jalapeno.
I've done 1/2 cup of shredded spinach with 1/2 cup of diced salami.
The possibilities are endless. Just make sure whatever you put in adds up to one cup. I think my favorite has been the kale and pepperoni.
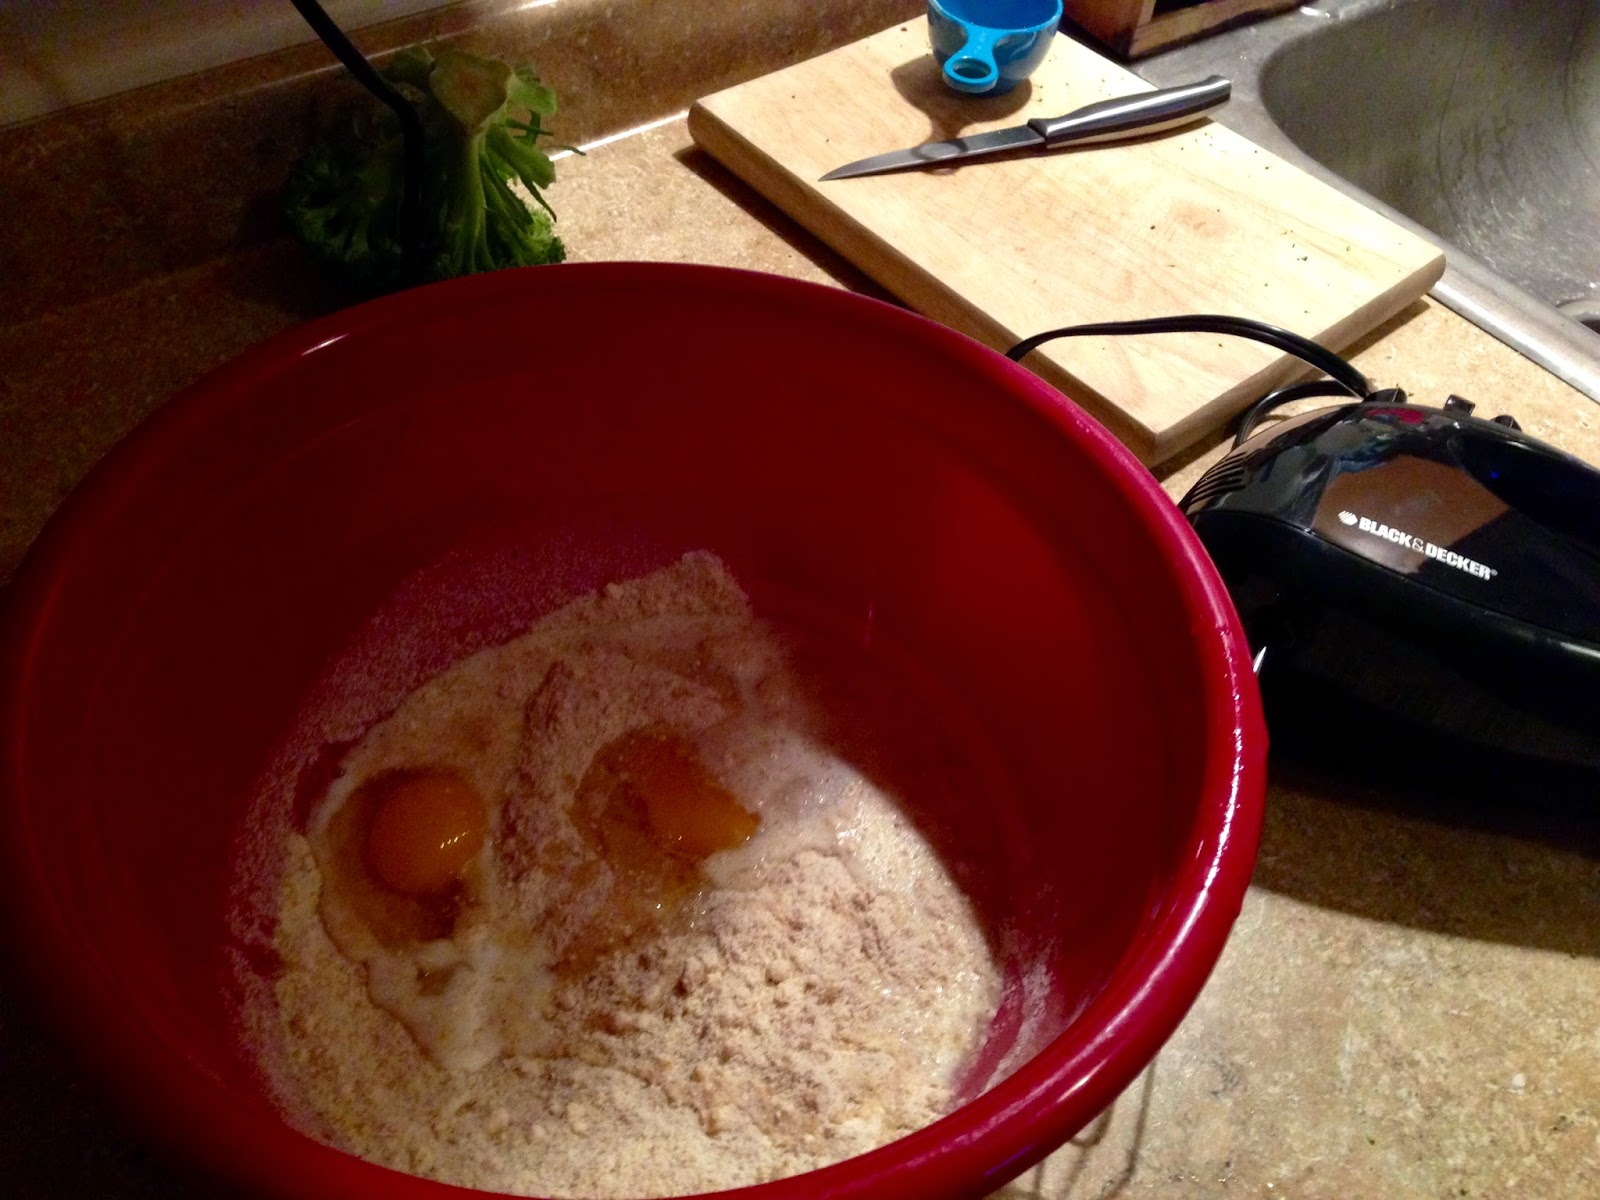
For tonight's post, I'll be adding in.... 1/2 cup diced broccoli crowns, a hand full of crushed peanuts and 1/2 cup thinly sliced pancetta.

Peanuts aren't in the picture because they were a last minute addition

1. In a large bowl, mix together the box of cornbread mix, wheat flour and salt & pepper by hand with a wooden spoon.
2. Add in the eggs and milk and mix thoroughly using an electric hand mixer (about 1-3 minutes).
3. Add in the cheese, peanuts, 1/2 cup diced broccoli crowns & 1/2 cup thinly sliced pancetta and mix again with the electric mixer (about another 1-3 minutes).
4. Preheat your oven to 350 degrees. All the recipes I've ever used have me pre-heat the oven first but then it takes me so long to mix the ingredients that I'm just leaving the oven on and wasting electricity. So, I'm not pre-heating until everything is mixed. Plus, this gives me a chance to take a quick break.
5. Pour batter into a greased muffin tray or silicone cupcake holders. Cupcake holders are better ;)
6. Bake for 30-35 minutes and serve hot. Makes one dozen muffins.

Bon apetit!

Monday, March 16, 2015

Erica's favorite cookies are ...

... no bake cookies!!

If I ever make it onto Top Chef, I would get cut immediately for these because they require zero culinary skill. But they are sooooo good!! There are literally hundreds of no bake cookie recipes out there and they're probably all the same. So why do you need to read MY blog for no bake cookies? Well, its because my recipe is different. To set myself apart, I decided to add craisins to my no bakes. (The story is... I had a bag of craisins that I needed to use up and I was bringing dessert to dinner at my mom's later that weekend. She and Mike are super healthy so I threw craisins in for them. They turned out really good. It was a perfect mixture of sweet and tangy.)

No Bake Cookie Recipe-
 ingredients needed: 2 cups of sugar
                                 1 stick of butter (that should equal 1/2 a cup)
                                 1/2 cup of cocoa powder (I've tried it by melting baking chocolate because I was out of powder and it does NOT turn out the same)
                                 1/2 cup milk (I made them with water once because I was out of milk and they turned out fine. They didn't stick together, though. Just market them as chocolate oatmeal crumbles! LOL)
                                  1/2 cup peanut butter
                                  3 1/4 cup oatmeal (Too little oatmeal equals disaster! The cookies don't harden up and they turn into goopy messes--much like the consistency of half melted fudge. Even putting them in the freezer doesn't harden them up.)
                                  3/4 cup craisins
                                  Wax or parchment paper

1. Melt the butter in a large pot. Once melted, add milk, sugar & cocoa. Mix together (make sure there are no lumps) and leave on heat for about another minute.
2. Remove from heat and stir in peanut butter. Stir until everything is completely mixed together.
Doesn't look that appetizing right now... Yes, there's a lump in my picture but I stirred it in.
3. Add craisins and mix them in.
4. Add oatmeal and mix that in thoroughly.
Still not looking too appetizing...
5. Spoon onto waxpaper and let cool for about an hour. (I put newspaper under my wax paper... they're not directly on the newspaper!)
Now they look yummy!
6. Refrigerate overnight. And, enjoy!! Makes about 15-20 cookies depending on how big you make them.

P.S. This is how I blog. Sadie is in my lap ... my laptop is on the couch. Spoiled Sadie!!

Monday, March 9, 2015

Erica is entering the world of recipe writing...

The next few months will be filled with sewing and pillow making so I won't have regular weekly crafts. Instead, I will share a few of my favorite recipes. But...here's the deal... I don't follow recipes (in my defense, nothing ever really turns out nasty). Since I don't follow recipes, I don't know how good I'll be at writing them. I don't measure ingredients and I add random things as I go (my favorites are flax seed and cilantro). When I find a recipe online, I follow it halfway and then I cook the rest according to whatever sounds good in my head.

Other times, I'll only find a picture of something and try to cook it. That's how this recipe came about. I saw this on barre3's Facebook page.
It looked amazing and I wanted to eat it. But the link didn't work. I replicated it using the picture as a guide and it turned out great. (I served it to Lacey & Wes and they both liked it so its not just me saying it was delicious). Here's what I did...


Stuffed butternut squash-
     Ingredients: 1 butternut squash (makes 4 servings)
                        3 tablespoons of butter
                        1 tube of ground turkey
                        a spattering of fresh herbs (I'm using marjoram and cilantro)
                        a handful of mushrooms diced
                        2 stalks of celery diced
                        tiny bit of minced garlic
                        dash of  salt & pepper
                        1 cup of Italian white cheese (I'm using mozzarella and fontina)

1. Cut your butternut squash as shown and then hollow it out. (This could cause you to lose some fingers so be careful!)
I used a spoon and butter knife to scrape about three quarters of the meat out. (Its good to leave some of the meat in the squash) The squash pieces should look like 4 little bowls.
Then cut the meat into small cubes.

2. Sautee the garlic, herbs, celery and mushrooms together. Set aside. Then, sautee the squash and turkey; cook until about almost done. Mix the vegetable mixture in with the turkey and season with as much salt and pepper as desired.

3. Melt your butter & spread on the hollowed out squash and place on a cookie/baking sheet.

4. Spoon the turkey mixture back into the squash. Bake at 350F for 45 minutes.

5. Sprinkle a generous amount of cheese on top and bake another 5 minutes-just long enough to let the cheese melt.

6.Remove from oven and cool for about 5 minutes before serving.

Delicious!! And healthy : )

Monday, March 2, 2015

Erica has awesome amazing news!!

Guess who's in the Indie Trunk Show?  This crafty little blogger right here! Come visit me on Saturday, May 16th. If you forget to save the date, no worries... I plan to promote and advertise in the upcoming months...you'll get a flier ;)

Last December, my friend, Michelle, and I went to the Indie Trunk Show at the State Fair Grounds www.indietrunkshowokc.com It was pretty cool. A ton of local artists and vendors were there. So much unique stuff. I was walking around and thinking,

This is 100 percent without a doubt DEFINITELY what I want to do... I want to have a booth filled with my RagsRebornGifts (pillows and totes). And me in the middle of it all...handing out business cards like a pro and accepting custom orders on the spot. OMG... CUSTOM ORDERS!! Those are my absolute favorite to sew. Just imagine it-- lovely people bringing me used t-shirts and me sewing away; turning them into pillows. Then crowds of those same people happily skipping away with their new reborn t-shirt! (Its cheesy but my musings usually are) The only thing that would be missing is Sadie under my work space.

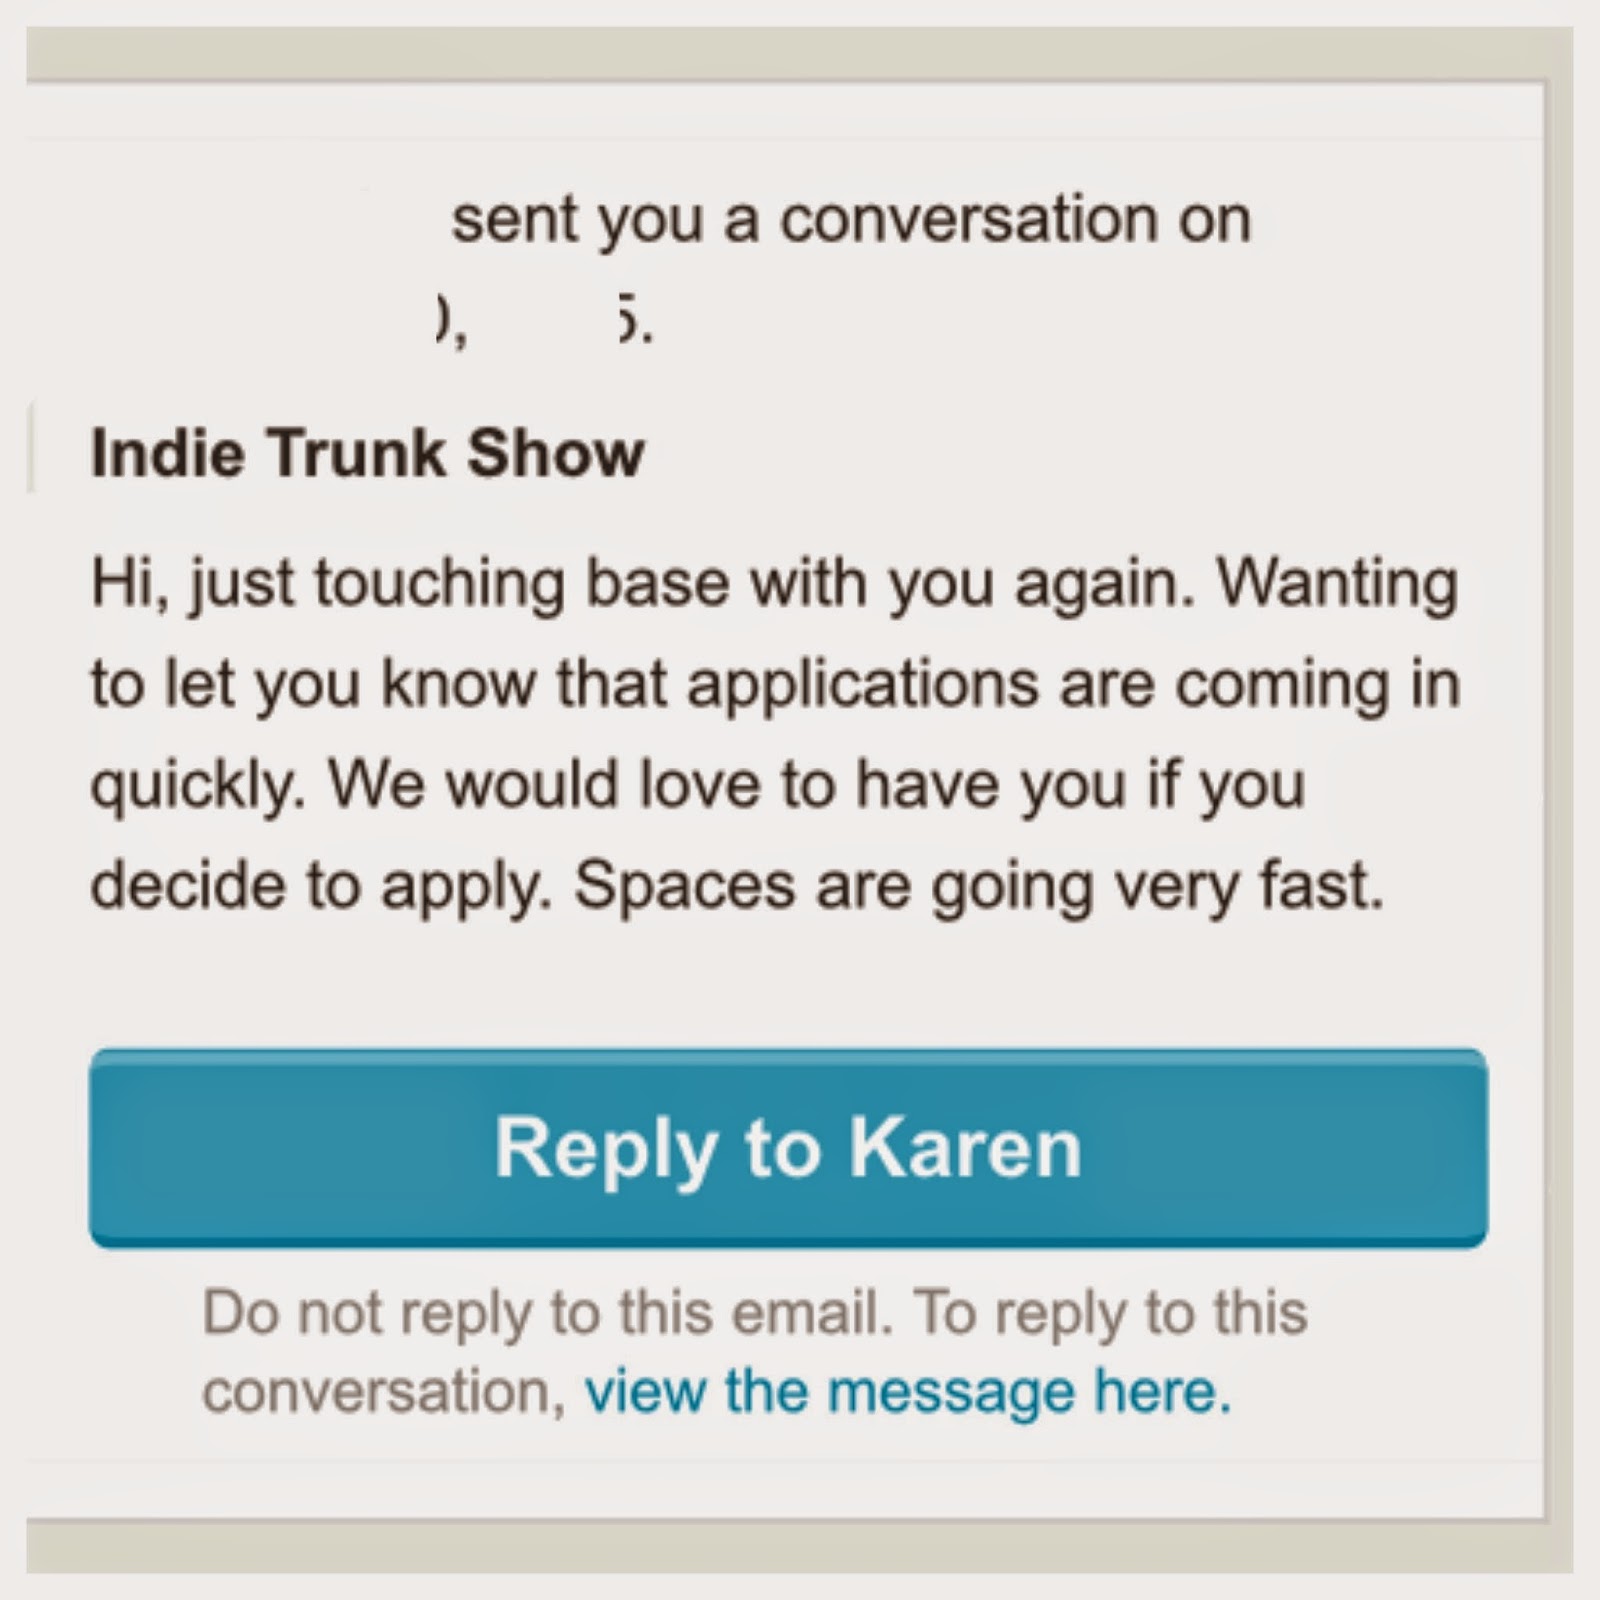
So here's how it happened... I was checking my Etsy dashboard and all of the sudden, I get this conversation:
I immediately got super excited but then thought it was just another marketing ploy. This lady probably contacted tons of Etsy sellers to get the volume of responses she wants. This lady is a professional in marketing...she knows what she's doing. I decided that I wasn't ready, yet, and my business isn't even a year old. I'll accumulate more inventory and then be in the show for 2016.

Then, a few weeks later, I get this message:
"Wow, she does like my stuff'" I thought.  Like, she likes it more than just as if it was a marketing ploy. I did some research and decided that I can handle this. Sure, I need to definitely make more pillows and totes (I only have about 15 made now). And, I need to advertise. If I want to focus on custom orders sewn on-the-spot, I gotta get my name out there. But, hey, its only February and the show is in May. I can do this...right? I'm an over-thinker and an over-stresser, so I made a little plan out in my head, weighed the pros and cons and then applied. And waited.

Then, I got this email!! 
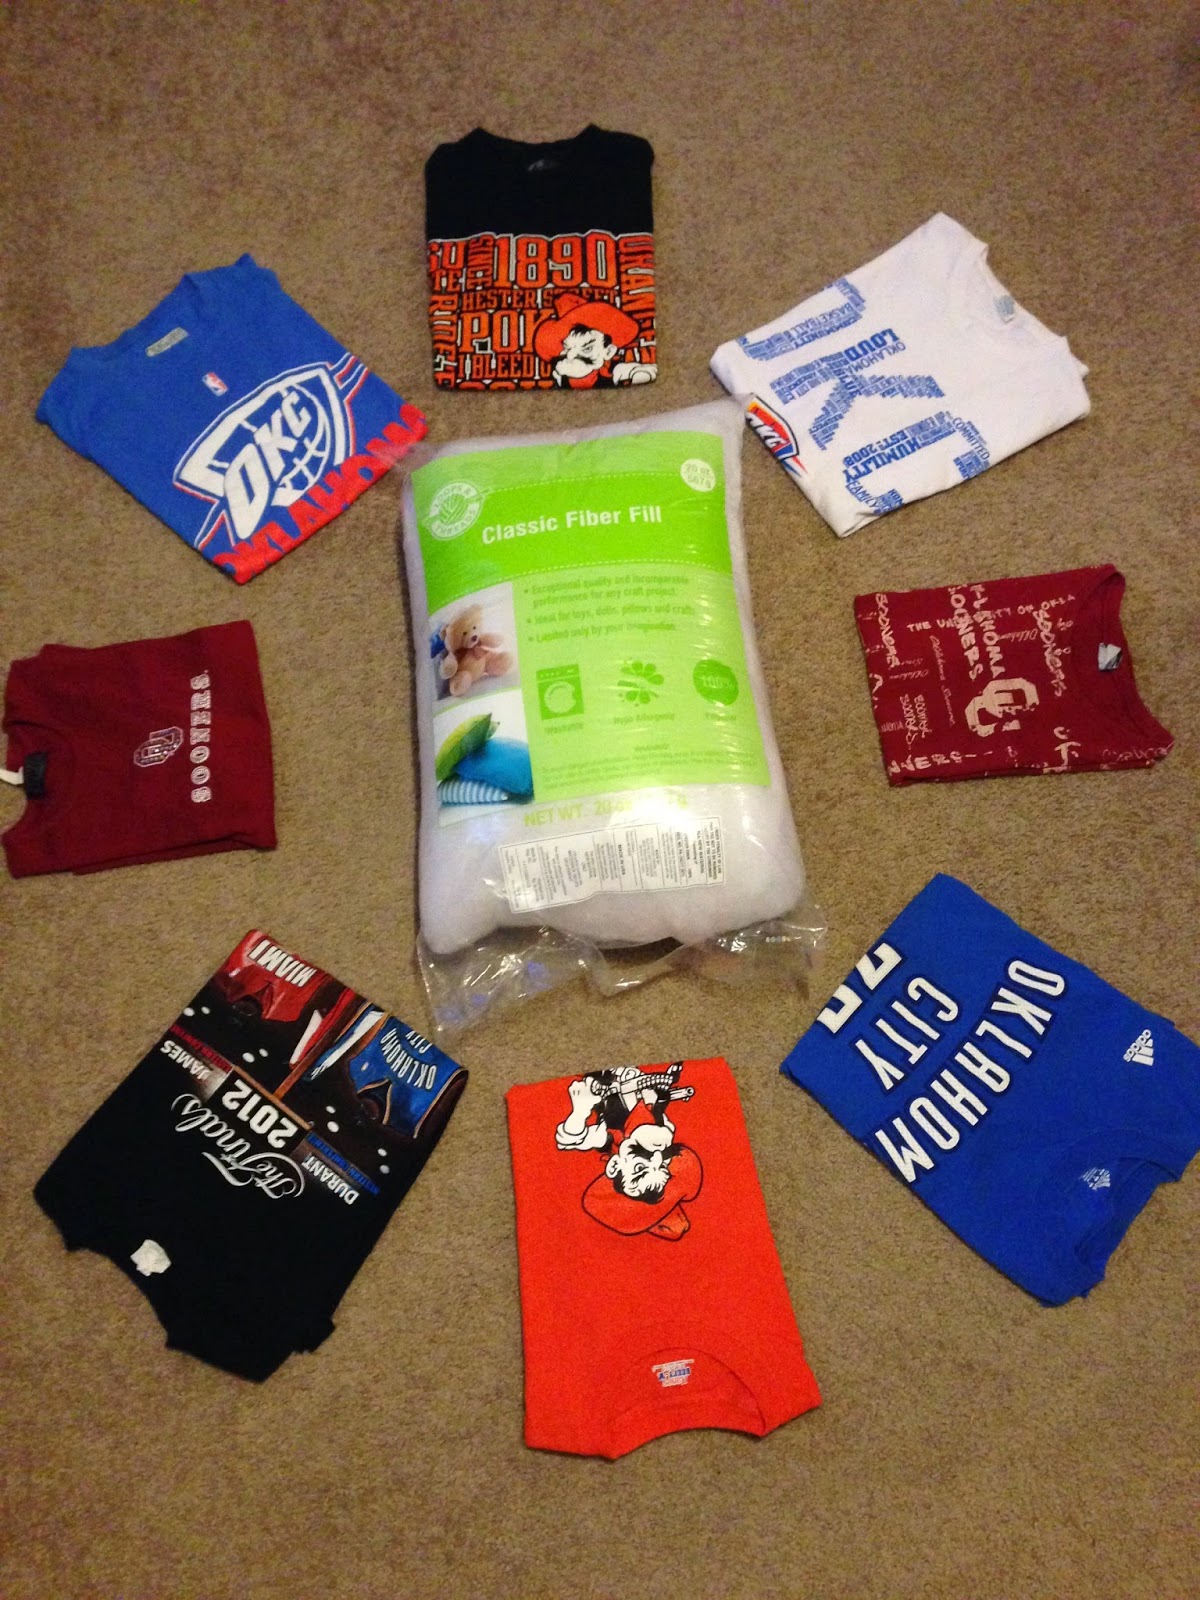
I'm accepted!! I've never been accepted into anything my entire life. LOL I feel like the cool kid who tried out for the cheer leading team and got head cheerleader. Its kinda a big deal. So, it's off to work for me. This is where you, loyal readers and fans, come in... I need inventory! If you have a used t-shirt that you don't mind parting with, let me know. I'm taking donations.You can get a pretty good idea of what I use by looking at my Etsy shop www.etsy.com/shop/RagsRebornGifts I also plan to hit up thrift shops around Oklahoma City. If you know some good ones or want to go thrifting with me, then let me know. I love adventures and would love to have you with me!
So many pillows to make!!

I sew. I craft. I have big ideas. Great things are coming.

Monday, February 23, 2015

Erica is making headbands!! (pt.2)

Continued from last week...
Yeah, I totally craft in my jammies. Ain't no dress code for bloggin'!
    Oh and I totally swapped Emma's headband for mine. The more I looked at hers, the more I kept thinking it wasn't her style. I really think the braided one suits her better. And now... Rachel, Elizabeth and I all have matching flower ones. The HCR department can be totes stylin' together! Hahaha.

Tutorial #3.
This one goes to a friend I've known for over 15 years. (they have song dedications...can I make craft dedications?) That's literally half my lifetime and a record in friendship for me. I'm not saying I don't keep in touch with people--because I try!-- but its SO HARD when friends move away for work or family or get overly consumed with said work and said family. But Lacey and I still manage to see each other about twice a month. And for that, I love her dearly.

Pearls headband tutorial:
Materials needed- elastic, cloth (I used two fabrics only because I wanted to incorporate some of the peacock cloth), string of pearls--mine is fake plastic costume jewelry, hot glue, scissors, and a  ruler

a. Cut a strip of cloth 15 inches long and 1 inch wide. I mainly chose those measurements because that's how wide my elastic is. Fold the cloth in half length wise and hot glue together. Now, glue each end to an end of your elastic. Headband made. Prettiness to come...
If I knew that all a headband was is a piece of cloth glued to some elastic, I would have 1. saved so much money my teenage years and 2. made so much money in my young adulthood making and selling these things!
b. Wind the string of pearls into small circles on your fabric. Glue down the pearls once you have the size of circle you want. I made a few of these.
c. Cut the pearl circles out of your cloth. I cut on the edge of the circle for the ones on my white cloth but left a border on my peacock ones since I wanted the pattern to show.
d. Glue the pearl circles into any arrangement on your headband from step A. And there you have it!

You can skip step A and just glue these to an existing headband. Which brings me to...

Tutorial #4.
I love letters! I think getting a letter in the mail is one of the best things EVER. I have one friend from college who still writes. Dominique and I don't write much nowadays, but I'll send out a letter every few months and she'll send me a card every now and then. Instead of just a card for her birthday, I decided to also include this headband (and some other gifties...none that I made, though, so who cares what they are? LOL).

Re-purposed headband tutorial:
      Materials needed - old headband, a flower adornment, cloth, felt, scissors and hot glue. I wanted to use the rest of my peacock patterned cloth. I thought it would be a good idea to use some in each headband to tie them all together as one themed project.

a. Get an old headband you no longer use...or one that you do still use but want to spruce up before the next time you wear it. Measure the felt the exact length of the headband (minus the elastic part) and hot glue it onto the headband.
b. Draw leaves onto the cloth and cut out. I did 10 leaves. I freehanded mine but if I had to do it over again, I would have found a pattern or drawn them out first. I wasted a lot of cloth on the ones I messed up and I couldn't quite get them all the same size.
c. Arrange the leaves into the pattern that you want, then remove and hot glue them on (hoping that you had memorized the pattern. Haha!) Then glue the flower to the center of your leaf cluster. Voila!


Monday, February 16, 2015

Erica is making headbands!! (pt.1)

Headbands are cute, trendy and surprisingly easy to make. I had most of the materials already at home so that makes them a very cost effective craft, too. I'm doing a few so no back story tonight. Just crafts!!

Tutorial #1. Cloth flower headband
I'm making these for Elizabeth and Rachel (for our department Valentine's Day)
      my former craft night pal (she has a birthday coming up)
           and for my friend, Emma (for a one year wedding anniversary care package). Wes and I went to Sydney last year for my cousin Kent and his wife, Emma's, wedding. They were the absolute best hosts--showed us all that Sydney had to offer-- so we decided to send them an Oklahoma care package for their one year anniversary in May.

Materials needed:
Cloth- mine is an old romper-, elastic (not necessary to arrange into an 'E.' Haha!), ruler, scissors, hot glue gun, tacks and a sewing machine- unless you want to sew by hand, which is totally okay.

1) Cut the elastic into a 7 inch piece. Cut the cloth into a strip 15 inches long and 2 inches wide. Bigger or smaller depending on the size of the head you're making this for.
2) Fold the cloth in half length wise and sew together.
          Tip: I hate ironing with every fiber of my being so I would not tell you to do this unless its absolutely necessary... my cloth was really wrinkly so I ironed it before I started sewing. It made everything much neater and easier to measure & sew straight lines.
3) Sew the ends of the cloth to the ends of the elastic. Now you have a headband!
4) That's super cute and you could leave it as is... but I think I'll add cloth flowers to mine.
     a. cut 4 small squares of cloth;
     b. pinch the cloth from the center and scrunch up each piece into what you imagine would look like a petal;
     c. one at a time, hot glue the petal shaped pieces together.  Glue the pieces together at the base (where my finger is pinching). I used the glue to help arrange my petals into a flower formation after all four of the base pieces were glued together;
     d. take your push pin and pin in the center; I put a dab of hot glue on the pointy end of the pin after I pushed it through the flower (so no one gets poked in the head!).
5) Hot glue your flower(s) to the headband.

Tutorial #2. Braids and ribbon/lace headband


I'm keeping this one for myself. I love the look of braids and I want to learn how to braid my hair a thousand different ways. This cloth is from a romper I got in Hong Kong. I bought it before they became popular, I swear! LOL Sadly, it never really fit me right so I cut off the top half to use for crafting (for this one and the headbands above). I still wear the bottom half as pants.
Materials needed - cloth, lace or ribbon, elastic, scissors, hot glue gun and ruler

1) Cut your elastic to about 9 inches (more or less, of course, depending on your size of head).
2) Cut your ribbon to about 12 inches. I get headaches easily so I don't like my headbands too tight. Also, the ribbon doesn't stretch so you have to make it longer than your elastic so it'll stretch along with it. I'm using two pieces of ribbon for this. You can use as much or little as you'd like.
3) Now for the fun part... braiding! I'm going to try to teach you how to braid, if you don't already know how. I was never really taught to braid (I think I just played with my hair long enough until I figured it out. LOL) so I'm not sure how well this will go...
     a. cut your cloth into 3 slender and even 14 inch strips. It seems like a lot but things shrink when they're braided. I didn't measure mine perfectly but they were mostly the same length and width.
     b. firmly place the ends of cloth on the edge of a surface. I would have loved to have another human holding it for me but my craft night buddy now resides in Texas : ( I had to settle for tape and a paperweight.
     c. cross piece A over piece B
         now piece A should be next to piece C
         cross piece C over piece A
         now B should be your first piece, C should be your second and A should be your third piece.
     d. continue to cross your first piece over the second piece and then the third piece also over the second piece. Try to keep your pieces of cloth from twisting and braid them as tightly as you can. I made a total of three braids.
4) When I finished each braid, I didn't tie or tape any of the ends. I just untaped them from my surface and left them loose until I was done with all three of them.  They shouldn't fall apart. I then braided the three single braids together into a large thick braid. I hot glued the ends of the large thick braid together.
5) Hot glue your large thick braid to the elastic. Then hot glue a piece of ribbon on each side of it.

I have a couple of more ideas for headbands (and more material lying around) but I think I'll save those for next week. Its getting too close to my dinner time and I'm hungry!