Showing posts with label recipe. Show all posts

Monday, October 3, 2016

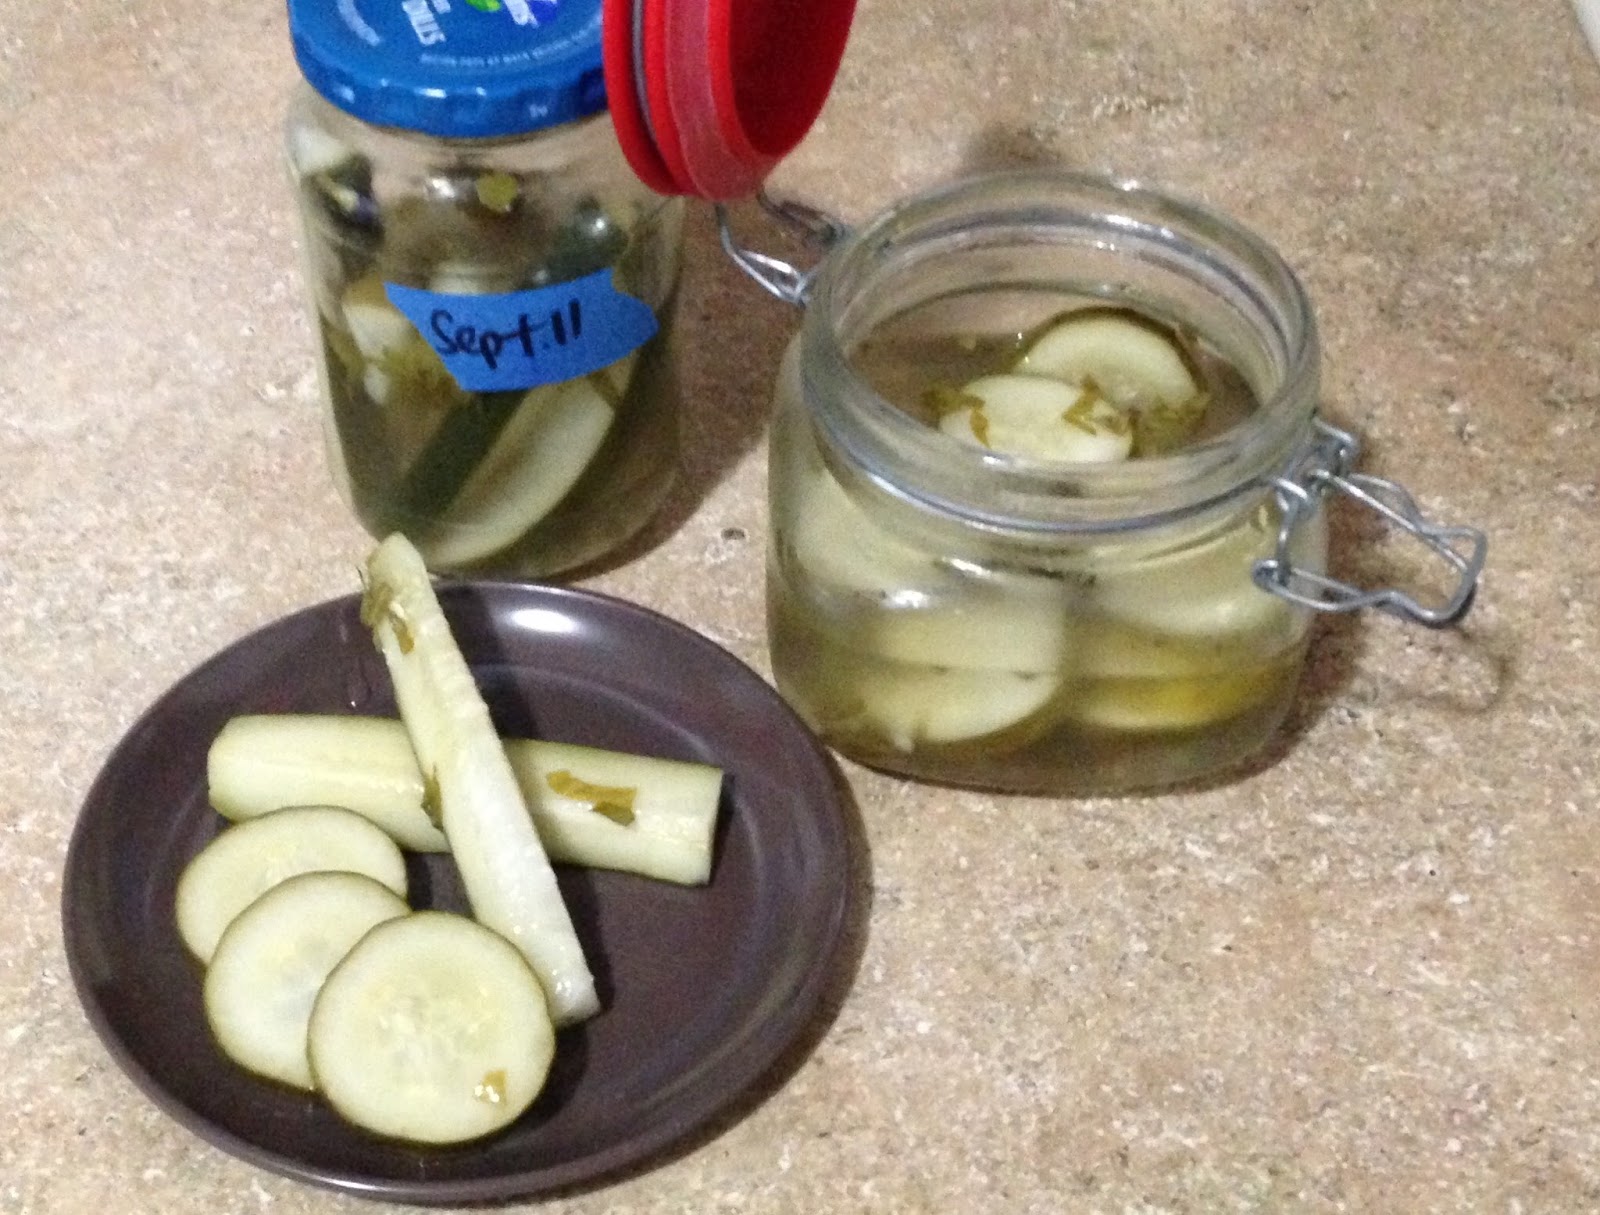
Erica & Wes make house made pickles.


The first time I had fancy "restaurant's own recipe" house made pickles was at Iron Starr BBQ a few years ago. I'm sure I've had house-made pickles before at various restaurants but this was the first time that it was brought to my attention. The menu highlighted them and our waiter praised them. After the waiter left our table, Wes told me that he's had them before and they were gross. LOL Their pickles were okay. I didn't really like them but I wouldn't say they were gross either. I never really paid much attention to pickles after that.

Fast forward a few years... I had dinner at Goro Ramen and they have the best house made pickles ever! I excitedly went home to tell Wes. He replied by telling me that ALL house-made pickles are gross. They're never pickled enough and they always still taste like cucumbers--and he hates cucumbers. A few weeks after that, we had dinner at Uptown Grocery (By the way, having a hot bar & salad bar inside of a grocery store is GENIUS! You get to have dinner and then go grocery shopping all in one place.)  I got some of their pickles and they were awesomely delicious. How does Wes not understand this? With that, I decided that we needed to make our own house-made pickles that wouldn't be gross; ours would be pickled enough and no longer taste like cucumbers.

House-made pickle recipe:
       Ingredients needed- 3 cucumbers, 1 teaspoon (1/2 teaspoon per jar) minced garlic, a handful of fresh basil (most recipes call for fresh dill but we are only growing basil & mint and I don't think mint pickles will taste as good), a pinch of red pepper flakes*, 1 cup water, 1 cup vinegar, 1 1/2 tablespoons salt, two jars with airtight lids
*We actually made two batches... one jar of spears with only basil & garlic and then a jar of round discs with red pepper flakes added.

1. Wash & dry the cucumbers. Cut off both ends and slice into spears or rounds.

2. Chop the basil.

3. Put the garlic, chopped basil and pepper flakes into the jars.

4. Place the cut cucumbers into the jar.

5. Boil water, vinegar and salt. (This will be the pickling brine.)

6. Pour brine into jars. Make sure the cucumbers are covered completely. I did this in the sink so it wouldn't make a mess if the brine spilled.

7. Tap the jars against the counter a few times to remove the air bubbles then put the lid on. Make sure it is nice & tight.

8. Let jars cool and then refrigerate. Leave in the refrigerator for 2 weeks. (Wes prefers 3 weeks to make sure they're pickled enough with no annoying cucumber flavoring.) Then look... yummy pickles!

Monday, August 17, 2015

Erica is baking Alan-berry muffins.

While there are no such things as "Alan-berries", I do have a friend named Alan who gives me fresh blackberries from his parents' farm. They are the sweetest & most delicious blackberries ever! He says his parents grow all sorts of fruits and veggies. I need to start getting more produce from him.

I used the first batch of blackberries he gave me to make blackberry cinnamon rolls for Wes' birthday. They turned out really well. I can't blog about them since I completely stole the recipe from the Internet and followed it step by step. This batch of blackberries will be used for muffins. My original muffins that I am literally making for the first time as I'm writing this blog.

This is my friend, Alan. He likes beer, I like beer, and we get along great. Greater than great, actually, I'd say we're thick as thieves. We used to work together at Accord Human Resources but it wasn't until after he quit that we really started to hang out. I don't know when we started this little tradition but we have a "beer on a Monday" theme to our get togethers. About once or twice a month, we'll meet up, have dinner and catch up on each other's lives. Over a few years of these Monday beer dinners, Alan has become one of my best friends.
We don't always pose and take pictures at dinner...this was his last birthday.
Dinners are usually beer and sushi on the patio with his dog, Sonja, at the Midtown GoGo Sushi. We've recently thrown pie into the mix. Fassler Hall and GoGo Sushi are walking distance from each other so why not? It'd be a shame to skip out on dessert. And Sonja loves it because she gets extra walking time and she knows she's getting a bratwurst each time she goes to Fassler.
Pretty Sonja!

I wanted to put beer into my blackberry muffins so I googled "baking with beer." Unbeknownst to me, there is a whole beer pastry movement out there. Beer cupcakes, beer breads, everything. I learned that beer is a leavening agent.  One blogger told me that you can replace a cup of milk with a cup of beer as long as you add something else in to replace the fat that's in the milk. So you can use a small amount of vegetable oil plus beer instead of milk. I don't really like vegetable oil so I wouldn't do that. I would try it with shortening, though...that's if I had any, which I don't. Armed with this knowledge, I set out to my pantry. I had all the ingredients needed to make traditional muffins--flour, sugar, eggs, milk and butter. To make "Alan-berry muffins," I'm adding blackberries, beer and maple syrup.

WARNING:  This recipe is completely experimental.  As stated earlier, this is the very first time I've ever made it and I'm sort of making it up as I go. After making these, I will taste them and write feedback at the end of this blog. Please feel free to tweak this recipe if you have a better experience or more knowledge in baking with beer. I love comments!!

Blackberry, beer & maple muffins:
      Ingredients needed- 1 1/4 cup flour
                                       1 cup sugar
                                       1 egg
                                       4 tablespoons (half a stick) of butter, softened
                                       1 teaspooon baking powder
                                       1/4 cup milk
                                       3/4 cup beer (I used a blonde because I hate dark beers. A few of the baking blogs I read suggested IPAs)
                                       1 tablespoon maple syrup
                                       1 cup blackberries

1. Beat the butter and sugar in a large bowl.
2. Add the egg and maple syrup. Mix well and then add the rest of the wet ingredients - beer and milk.
3. In a separate bowl, mix the dry ingredients together - flour and baking soda.
In case you didn't know, chopsticks are the best utensil ever.
4. Add the dry ingredients to the wet ingredients and mix well (I used an electric mixer for all of this.) I poured the dry ingredients in little by little as I mixed.
5. Pre-heat the oven to 350 degrees Fahrenheit.
6. Add blackberries to the batter and mix together one last time. 
7. Spoon into muffin tray or baking cups and bake for 40-45 minutes.
8. Let cool for about 5-10 minutes. Serve with maple syrup drizzled on top. Recipe makes one dozen muffins.

After tasting these, I have some recommendations:
       The muffins turned out too moist for my liking. I kept them in the oven for quite a while but I felt like they never fully cooked.  They reminded me of the pre-packaged Otis Spunkmeyer muffins.
       Wes says the muffins taste good but there's too much wet ingredients in there. The top and sides cooked through but the middle stayed a little gooey. He could taste the beer a little bit but I couldn't. I could smell it, though, and the muffins smelled really good as they were baking. 
       For next time, I would add a thickening agent... maybe some corn starch or gelatin. I think I used too much beer. I could use a little less or I could use beer + more butter instead of beer + milk. That way I only have one liquid ingredient. Or maybe add a little more flour. 
       That's the fun in baking...it's like an experiment each time!
Wes & I had ours at breakfast with ham and eggs over the weekend. I never was a fan of breakfast (mostly because I hate waking up early on weekends) but Wes has really turned me on to it. It's his favorite meal and we have breakfast at least one day on the weekends. Married life is great : ) 


Monday, August 3, 2015

Wes is cooking again...

...and he's making chili. Last week's blog was a bit long so we'll keep this one short. I am also photographing and blogging and sorta helping in the kitchen as Wes cooks & dictates instructions to me (I'm a multitasking extraordinaire over here!) so I don't have much time for storytelling anyway. Wes is quick in the kitchen so this is just a little difficult. Hopefully, I won't leave out any steps. He's my proof reader anyway, so if I leave something out, I'm sure he'll add it back in. Enjoy!

--By the way... my husband's best dish is his slow cooker chili. So.effing.YUMMY. We haven't entered any competitions but if we did, I'm almost certain we'd place. We use the same basics each time: meat, tomatoes, chili powder but we also like to mix it up and do something a little different each time. This combination of meats and vegetables made for an amazing recipe. Its the middle of summer but, what the hey, let's go ahead and make some chili anyway! (Remind me to not get into children's poem or book writing.)--

Wes' Chili recipe-
       Ingredients needed:

  • 3 stalks of celery
  • 6 small peppers (You can use any combination of any type of pepper you want--all hot or all mild or a mix of the two. We are using banana peppers from our garden. They are a medium mild pepper.)
  • 1 pound of ground beef (I was going to type 'tube' because that's what it comes in but Wes made me change it to pound.)
  • 9 ounces of beef chorizo (which also comes in a tube)
  • 1 16 ounce can of diced potatoes (We used the canned potatoes with jalapenos because we're using milder banana peppers.)
  • 2 10 ounce cans of diced tomatoes with lime juice and cilantro (You must get the cilantro lime tomaotes...the other ones aren't as good!)
  • 1 tablespoon green onions (because neither of us like traditional onions)
  • A tiny "little bit" of garlic (Wes' measurement)
  • Wes says he never measures the amount of chili powder he puts in there... let's just say a 4 tablespoons of dark chili powder & 2 tablespoons of regular chili powder

1. Remove the seeds from the peppers and dice them. Then dice the celery.
The man moves too quickly so I only got a picture of the peppers. The celery wasn't diced too small. I would say about pieces a quarter inch thick.
2. Put the diced vegetables in the crock pot along with the garlic and green onions. Also, add the potatoes. It doesn't matter what order you add them in since we'll be stirring them together at the end anyway.
3. Put both meats in a pan and brown them together. Make sure they are mixed up really well. (Check out my action shots!!)

4. Put both cooked meats atop the veggies in the crock pot.
5. Add tomatoes and chili powder. 
Cilantro lime tomatoes only!! I am obsessed with cilantro!!
6. Stir thoroughly to make sure everything is combined.
7. Cook on high for 3 hours. 
       I have no nutritional or serving size/amount for this recipe. I can tell you its pretty spicy, not gluten free and not vegan. We usually have a bowl each for dinner and then there's enough left over for us to do leftovers for lunch the next day. It keeps in the fridge for a few days and you can reheat it in the microwave or on the stove top. 
       Since taking a picture of a slow cooker sitting there for three hours is boring, here is a picture of Wes & Sadie resting after our hard work.


Monday, July 20, 2015

Erica wants to talk Endometriosis & Mini Chicken Potpies.

It'll be half depressing (endometriosis ;_; ) and half awesome (chicken potpies!!)...I'm being so generous in giving you the best of both worlds. Yeah, thank me the next time we hang out.
I saw this on a friend's Facebook and had to steal it. Literally my life every time.
I have the best gyno ever. This is how much I like her:
       I first went to Dr. Newcomb in my early twenties. She discovered my health abnormalities and she was the one to prescribe me wonderful pain medicine. She was at Deaconess but moved to the super ghetto south side about 2 or 3 years after I first starting going to her. I was devastated but I decided to stick with Deaconess and started seeing one of the other doctors there. I was not a fan of my new OB/GYN so I went running back to Dr. Newcomb. 
       As mentioned earlier, Dr. Newcomb now practices in a very run-down and seedy part of town. At my first appointment, she greeted me with, "Welcome back, gurl, I moved to the hooood!" (Yes, this lady has a sense of humor.) Anyway, I do not fit in with her clientele whatsoever and walking into her waiting room brings fits of panic and raging shame, embarrassment & depression. Everyone in her waiting room is women ranging from ages 14 - 40 visibly pregnant and pregnant by mistake. The women are either there alone with looks of both fear and hope on their face or they're there with their boyfriends, who have looks of regret and 'pissed off that the condom broke' on their face. Seriously, no one is just there for their annual well-woman exam. I walk in with a neon sign above my head screaming "INFERTILE!!" They all look at me funny (How come she's not pregnant? Is she just not showing, yet? Where's her baby daddy?) and the staff (who has seen my charts and knows of my medical condition) treat me differently... a bad kind of differently. It's a grueling 20-minute wait but eventually, I get to see Dr. Newcomb and everything is well again. I have to really like a doctor to subject myself to such torture in the waiting room. And I do; I love Dr. Newcomb. She's patient and kind and will answer all of my absurd questions. 
       So, back to my update... A few weeks ago, I went in for the follow-up to my endometriosis surgery (if you want to see pictures of what severe endometriosis looks like, let me know. I have gory detailed pictures of my uterus and ovaries. I won't post them here just in case you weren't planning on vomiting tonight.) Dr. Newcomb first asked if I wanted to see a fertility specialist to get pregnant. No. Okay, moving on... she said the surgery would buy me some time but eventually, I'll need to get on birth control. NOOO!!! I hate birth control. She said I have anywhere between six weeks to six months before the lesions start growing again. They flare up every time I have a period so it would be best if I just stopped having periods. AKA birth control or if I am completely 100% against birth control, I can just get surgery every few years to remove the endometriosis lesions. That's a no for my checkbook. So, I'm stuck. I don't want to be in immense pain & I don't want to have surgery every five years but I've done birth control before and it made me hate my life in so many other ways. Dr. Newcomb assured me that both medicine and my body have come a long way since the first time I was on birth control and there will be one that suites me. But for now, I will wait out my six weeks and see her in September, and in the meantime, she offered me a much stronger pain medicine for my menses. If you're wondering, the answer is no, I am not addicted to pain medicine. Dr. Newcomb actually told me that it's astonishing how much pain I can handle. She said that there are women with only one third as severe endometriosis as I have and they act like they're dying. I should be acting like I'm dying but I just pop some pills and move on with life. She said I was one tough cookie. Haha!
       Oh and eventually (maybe 10 -15 years from now), I'll be getting a hysterectomy. Yay me, ain't my life great?  The next time you feel like complaining about being pregnant or complaining about your children, just think... you could be me. Yeah, that will shut your complaining up pretty damn quickly. 

That was the 'Woe is me'/angry/depressing/'I hate my life' part of this blog post. Now to the happy part... another recipe!!
This is the easiest recipe and all of the ingredients are pre-made. I usually use fresh ingredients but sometimes I get lazy after work and just want something simple. And I hate working with raw meat, especially slimy chicken. We'll be sauteing and baking so, really, you can say this is a "real cooking" recipe. Right? Aw hell, I don't need to defend myself... I'm using frozen veggies and canned chicken but in the end these chicken potpies look and taste so good!! One quick disclaimer, though... I originally got this recipe off a Campbell's soup can so I can't technically call it mine. But I did add some extra steps & ingredients to it to give it my own variation. Here goes:

Mini chicken potpies-
       Ingredients needed: frozen mixed vegetables, dried parsley & basil, pepper, green onions, flax seed, butter spray, cream of chicken soup, canned chicken, flaky biscuits (it's imperative that you use the flaky ones), muffin pan
1. Saute the chicken and green onions.
2. Add the pepper, parsley & basil and continue to cook until the chicken is browned.
Sorry for the blurry picture... it was hot. I blame the steam. LOL
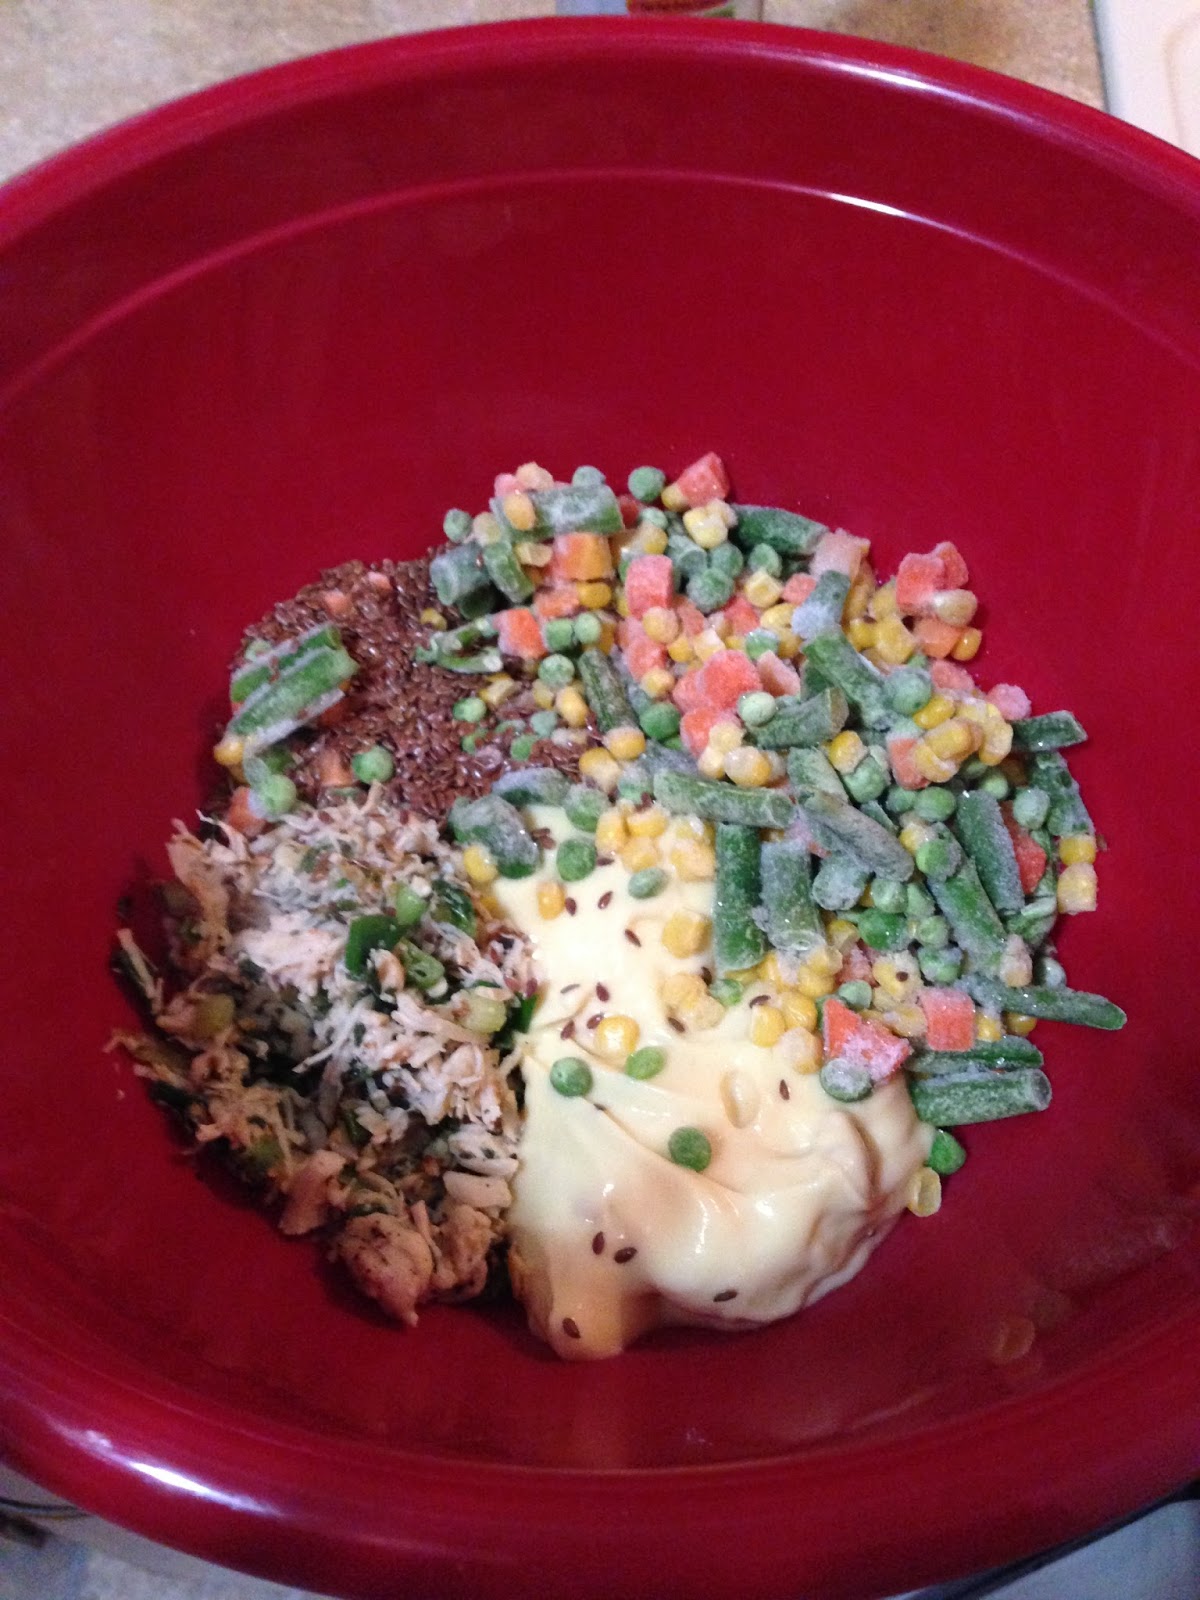
3. Mix in a large bowl (damn, forgot to add 'large bowl' to my ingredient picture) - chicken mixture, mixed vegetables, cream of chicken & flax seed.  I don't know how much flax seed or vegetables. It changes every time I make it. I would probably use one and a half cup vegetables and a small handful of seeds. Unless you hate veggies & seeds...then use less. Then set mixture aside.
4. Get your muffin pans and your spray butter. Spray the heck out of those muffin pans! Also, preheat the oven to 350 degrees. 
5. Open up your biscuits and line the muffin pan with them.
       Do this by pulling apart the biscuits. This is why you want to buy the flaky ones. This recipe makes twelve chicken potpies and each muffin needs to be torn into three pieces. 
You'll have left over biscuits after you finish lining the pans, which is what you want. We'll need the rest of the biscuits later. 
6. Spoon the chicken/cream of chicken/veggie mixture into each of the biscuit-lined muffin slots.
7. Using the leftover biscuits, cover the tops of the potpies. Tear the biscuits into individual pieces/layers like in step #5. If you don't want to do this, I suppose you can just buy more than one tube of biscuits. I've never thought of that before...
8. Bake at 350 degrees for half an hour. The biscuits should be nice n' brown and the insides bubbly n' hot. You can use a large spoon to get these out of the muffin pans. Since we used so much butter spray, the potpies should come right out. 
Serve while they're still warm. I took what felt like so many pictures as I was making these. But it's still only 8 steps. I'm still doing good on my 'no more than 10 steps' rule. Yay \(^.^)/ Sorry, for the pre-recipe lady rant, if it offended you in any way. That wasn't my intent.  Just had to keep it real. LOL I swear I don't talk like this in real life. 


Monday, April 6, 2015

Wes is making deliciously amazing pot roast.

Ahhh date night <3 Dinner on the patio. With lanterns!! Welcome spring : )

One of the first things that Wes cooked for me was pot roast. (Actually, the first thing he cooked for me was a pork tenderloin but that's not a regular in our recipe rotation so we'll just skip straight to the pot roast.) Not long after we started dating, one of his co-workers gave him some left over pot roast. Seeing as he was a bachelor, she gave him enough to last a week. LOL Since he had so much, Wes was nice enough to share. I've never had homemade pot roast; it was so yummy! Why have I never made this before?!?! After that, we (mostly Wes) felt inspired to make our own pot roast. Wes doesn't cook often, but there are two things he does well. One is chili and the other is pot roast. I'll blog about the chili another time.
We're having it for dinner tonight so I'm here in the kitchen taking pictures and typing as he cooks...
Slow-Cooker Pot Roast Recipe:
INGREDIENTS -                   3 cups vegetable broth      
    2lb of roast                         2 bay leaves (1 leaf for each pound of meat)


1 large potato                     1 pinch of minced garlic
1 cup lentils                        1 dash of parsley, salt and pepper (or however much you'd prefer)
1 cup carrots                      1 packet of soup mix


Disclaimer: Wes prefers mushrooms but he knows my favorite is lentils so he's doing lentils for me. You have to really like lentils to add them in your pot roast. If you aren't a huge lentil fan, I'd say go with mushrooms instead. Since the lentils are in the crock pot all day, they get super mushy and soak up all the broth. And its a crazy gravy-like consistency mess if you try to heat up the left overs. When I studied in Spain, my host mom made this really thick lentil soup and I LOVED it. It was one of the tastiest things that she cooked. So, I'm okay with mushy stewed lentils but they aren't for the faint of heart.

1. Thaw the meat. If you forget to thaw it, defrost the meat by running it under cold water (not hot water). Wes saw Alton Brown do some experiment with defrosting duck shaped ice sculptures    using either running cold water or in the oven and cold water worked better. Poor melted ducks!!
2. Cut up the meat, potatoes and carrots into chunks.
3. Put into the slow cooker in this order - meat, bay leaf, lentils, carrots, parsley, salt, pepper, soup mix, garlic, broth and, then potato. Save the potatoes for last. When they cook, they'll get soft but not mushy because they're left on top. (Some of this I'm quoting directly from Wes.)
4. Cook for 8 hours on low heat. If you only have 6 hours, you should have it on low for a majority of the time and then switch it to high for the last hour.
5. If you aren't going to be at home, no need to check on it. But if you are home, stir the stuff in the crock pot around every 2 hours. After your 8 hours are done, it should look awesome and like this.

So there you have it...my man can cook! : ) I'll ask him to make chili so we can have a blog on that, too. Using other people's recipes makes blogging easier. Maybe, I can bug my mom into getting some of her Chinese food recipes. Mmmmm!