Monday, February 16, 2015

Erica is making headbands!! (pt.1)

Headbands are cute, trendy and surprisingly easy to make. I had most of the materials already at home so that makes them a very cost effective craft, too. I'm doing a few so no back story tonight. Just crafts!!

Tutorial #1. Cloth flower headband
I'm making these for Elizabeth and Rachel (for our department Valentine's Day)
      my former craft night pal (she has a birthday coming up)
           and for my friend, Emma (for a one year wedding anniversary care package). Wes and I went to Sydney last year for my cousin Kent and his wife, Emma's, wedding. They were the absolute best hosts--showed us all that Sydney had to offer-- so we decided to send them an Oklahoma care package for their one year anniversary in May.

Materials needed:
Cloth- mine is an old romper-, elastic (not necessary to arrange into an 'E.' Haha!), ruler, scissors, hot glue gun, tacks and a sewing machine- unless you want to sew by hand, which is totally okay.

1) Cut the elastic into a 7 inch piece. Cut the cloth into a strip 15 inches long and 2 inches wide. Bigger or smaller depending on the size of the head you're making this for.
2) Fold the cloth in half length wise and sew together.
          Tip: I hate ironing with every fiber of my being so I would not tell you to do this unless its absolutely necessary... my cloth was really wrinkly so I ironed it before I started sewing. It made everything much neater and easier to measure & sew straight lines.
3) Sew the ends of the cloth to the ends of the elastic. Now you have a headband!
4) That's super cute and you could leave it as is... but I think I'll add cloth flowers to mine.
     a. cut 4 small squares of cloth;
     b. pinch the cloth from the center and scrunch up each piece into what you imagine would look like a petal;
     c. one at a time, hot glue the petal shaped pieces together.  Glue the pieces together at the base (where my finger is pinching). I used the glue to help arrange my petals into a flower formation after all four of the base pieces were glued together;
     d. take your push pin and pin in the center; I put a dab of hot glue on the pointy end of the pin after I pushed it through the flower (so no one gets poked in the head!).
5) Hot glue your flower(s) to the headband.

Tutorial #2. Braids and ribbon/lace headband


I'm keeping this one for myself. I love the look of braids and I want to learn how to braid my hair a thousand different ways. This cloth is from a romper I got in Hong Kong. I bought it before they became popular, I swear! LOL Sadly, it never really fit me right so I cut off the top half to use for crafting (for this one and the headbands above). I still wear the bottom half as pants.
Materials needed - cloth, lace or ribbon, elastic, scissors, hot glue gun and ruler

1) Cut your elastic to about 9 inches (more or less, of course, depending on your size of head).
2) Cut your ribbon to about 12 inches. I get headaches easily so I don't like my headbands too tight. Also, the ribbon doesn't stretch so you have to make it longer than your elastic so it'll stretch along with it. I'm using two pieces of ribbon for this. You can use as much or little as you'd like.
3) Now for the fun part... braiding! I'm going to try to teach you how to braid, if you don't already know how. I was never really taught to braid (I think I just played with my hair long enough until I figured it out. LOL) so I'm not sure how well this will go...
     a. cut your cloth into 3 slender and even 14 inch strips. It seems like a lot but things shrink when they're braided. I didn't measure mine perfectly but they were mostly the same length and width.
     b. firmly place the ends of cloth on the edge of a surface. I would have loved to have another human holding it for me but my craft night buddy now resides in Texas : ( I had to settle for tape and a paperweight.
     c. cross piece A over piece B
         now piece A should be next to piece C
         cross piece C over piece A
         now B should be your first piece, C should be your second and A should be your third piece.
     d. continue to cross your first piece over the second piece and then the third piece also over the second piece. Try to keep your pieces of cloth from twisting and braid them as tightly as you can. I made a total of three braids.
4) When I finished each braid, I didn't tie or tape any of the ends. I just untaped them from my surface and left them loose until I was done with all three of them.  They shouldn't fall apart. I then braided the three single braids together into a large thick braid. I hot glued the ends of the large thick braid together.
5) Hot glue your large thick braid to the elastic. Then hot glue a piece of ribbon on each side of it.

I have a couple of more ideas for headbands (and more material lying around) but I think I'll save those for next week. Its getting too close to my dinner time and I'm hungry! 


Monday, February 9, 2015

Erica is getting ready for Valentine's day!


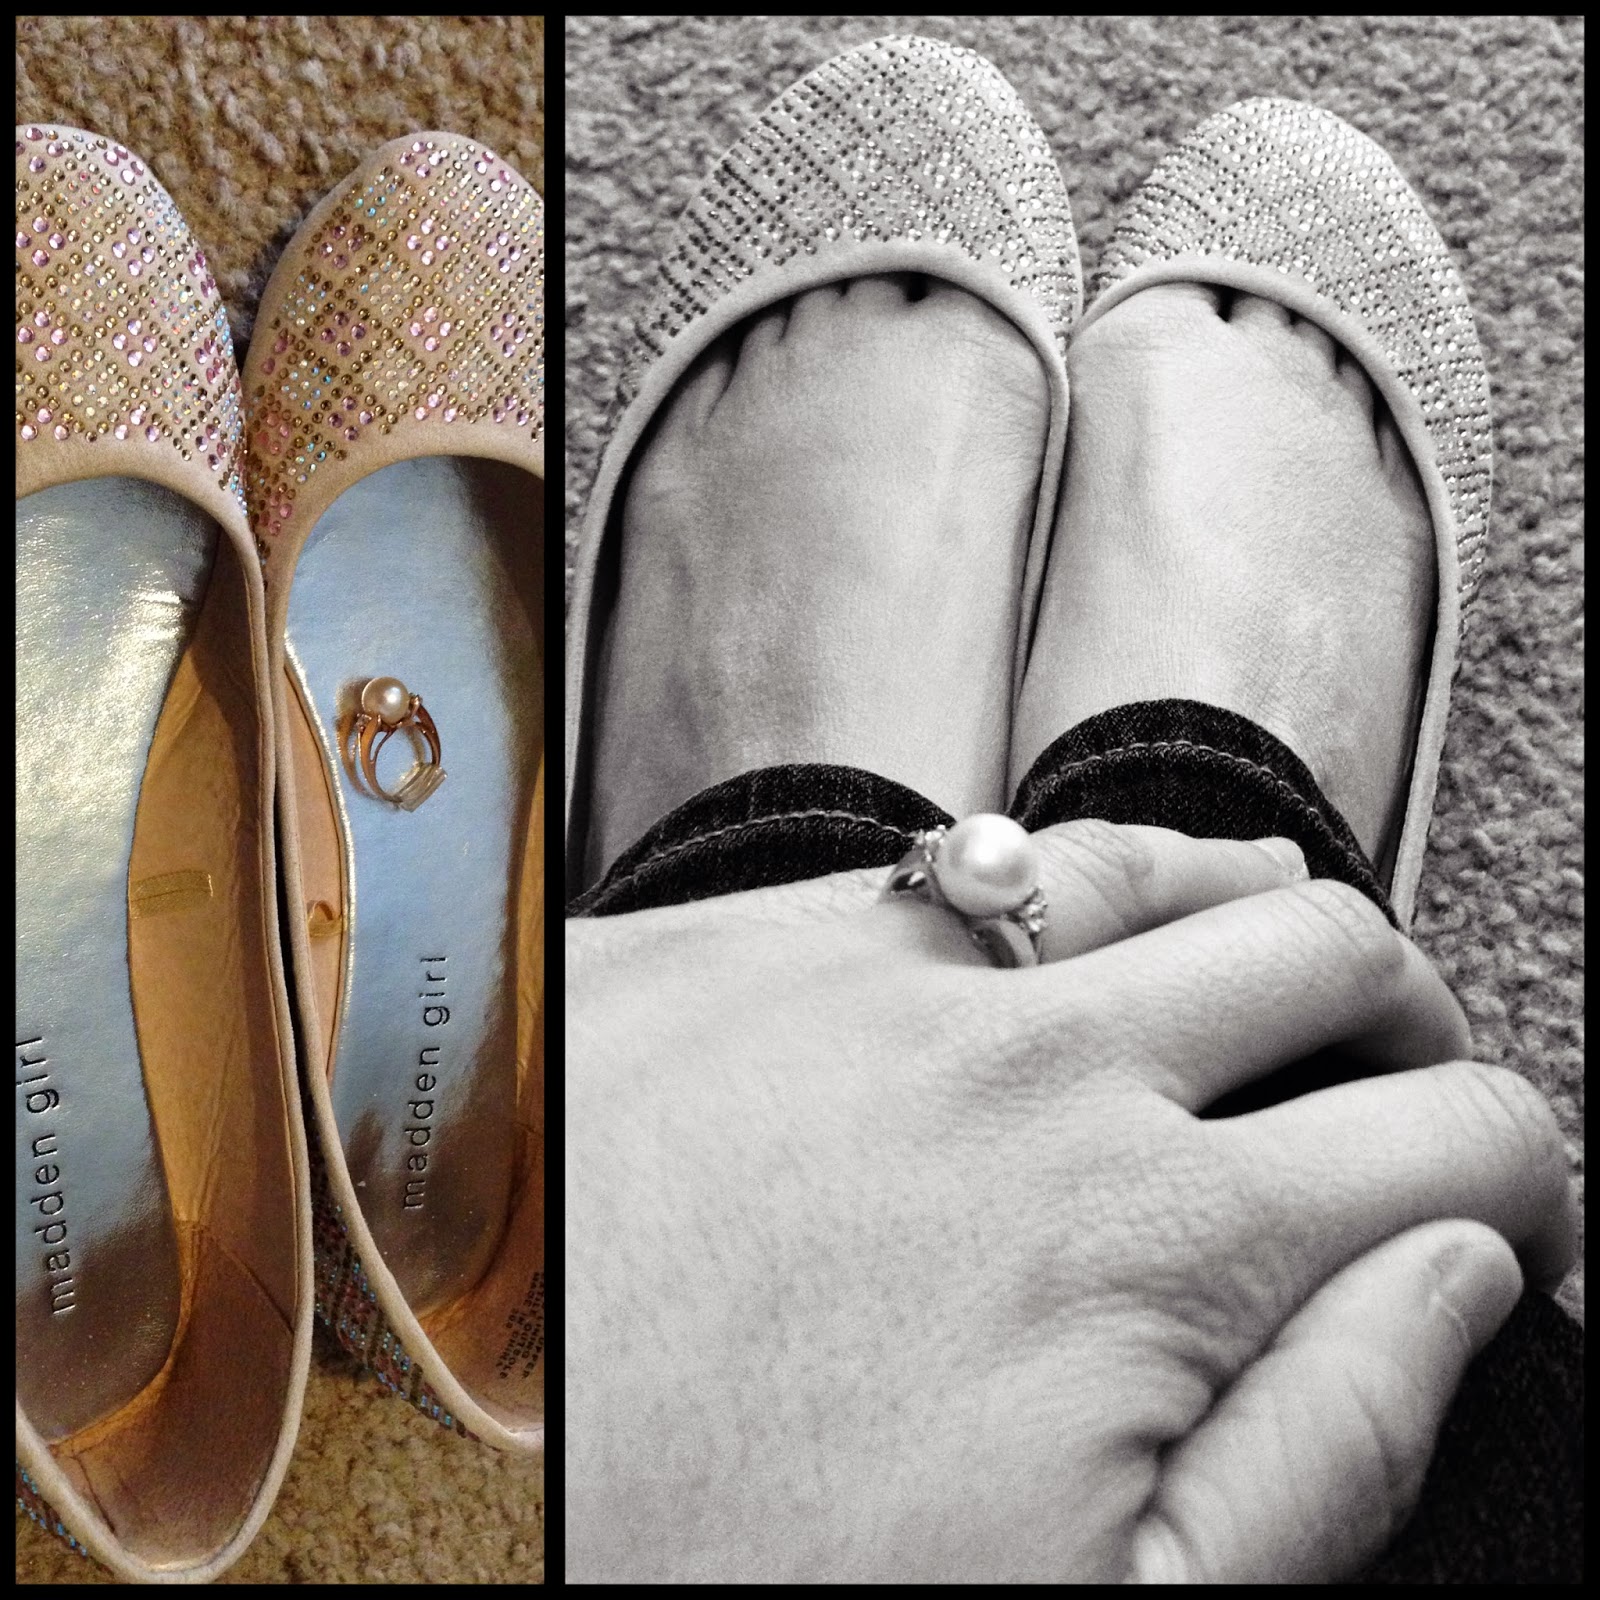
Wes is really proud of how well the  shoes he got me match the engagement ring.  I'm really proud of my amateur artistic photography.

You probably already know, but Wes and I got engaged last December (on my birthday no less!). We plan to have a sort-of-destination-wedding... just us two... we'll do a road trip and get married wherever we end up! Growing up, my family never took actual road trips...we drove straight to our destination with no stops. That was fun and all but I want to drive out West, stop in a bed-and-breakfast, see a tourist spot, eat in a restaurant featured in Man vs. Food and see if I can do the challenge. I want lots of stops in various cities and postcards from the Flying J. I'm still planning so ideas are welcome. :)

My co-worker, Rachel, is all about that Instagram. She turned me on to StoneFoxBride. Its a hippiesque wedding boutique in New York. Their Instagram is filled with pictures of future brides' engagement rings and the story behind them. I commented on one of the pictures and asked how I could submit my ring story.  No reply. : ( Maybe, I'll try again... @stonefoxbride How do I submit a ring story? And if you're reading my blog, here is my story... pick it! Pick it! Please!


Wes, Kensington, Sadie and I had my birthday dinner at my mom's with her fiance, Mike. I had gone to my mom's earlier that day to do laundry and got roped into being her sous chef for dinner. Kensington was super sick at the time so I was pretty worn out by the time we returned home (and I think it was like 11pm...way past my bedtime!). As Wes and I were lying in bed talking and reviewing the day, he asked,
"What are we going to do for your next forty birthdays?"
"This, I guess..."
"Well, lets just get married then!"
I gleefully agreed and he handed me my ring. It was perfect!!

While we're on the topic of mushy love stories, I'll just do a mush barf craft tonight. It'll be perfect for Valentine's Day. LOL This is what I made Wes for Valentine's Day last year.

Sadie is a vain one...just look at her checking herself out in the mirror! LOL

Materials needed - Mirror, paint, painter's tape, anything else you want to put on the mirror-- I used duct tape (the decorative kind),glitter, photograph, beads and glue

1. Using the painter's tape, tape a pattern that you want to use as the mirror. The sections that are not taped will be painted. I chose a small square in the middle and some artistic lines for a border.
2. Paint the entire mirror (tape and all) a solid color.
3. After the paint is fully dry, pull off the painter's tape to reveal your mirror pattern.
4. After that, you are either done or ready to decorate. I chose a picture of us and some other simple additions. 

And that's it. My goal and inspiration for my crafts is simple and cheap projects that look like they took way more time and effort once they're completed. None of my projects are ever over 10 steps or over $25. I think there's something great in turning simple into grandiose. What do you think? Do you believe in "less is more"?

Monday, February 2, 2015

If you host a game night, pretty please invite Erica.

That title probably sounds a tad bit desperate but its been a long time since I've been to a game night. I have friends who would host a Cards Against Humanity night or some sort of trivia or other party game night but we haven't been having many get-togethers lately.
Here's my game collection. Let me know if you want to come over : )

Several years ago, I had a group of friends who played complex role playing games (most of them involved too much strategy for me to enjoy but others were actually pretty fun) but I've sadly lost touch with them, too. There was one game they played that I really liked. Its called Red Dragon Inn. Its hard to explain so I won't try...but I swear its fun. I played once with a group that included my friend, Vietfil (who is also Catholic...which is an important detail to this story). In the game, you draw cards that resemble drinks; most of them are alcoholic which take away your life. But some drinks revive you. One of those such drinks is Holy Water. Twice in the night that we played, Vietfil was about to die in the game and drew a Holy Water card. It was a miracle!!! After the first time, we started chanting the Hail Mary and she drew the card again! Mary was our homegirl that night!! I'm not making fun of Catholics or anything like that, but it was pretty hilarious. Since I've already outed myself as a nerd, I'll tell you one more story before crafting.

Last Autumn, Wes and I went to visit my cousin and her family in Arizona. Her youngest son had the Dungeons and Dragons beginner set. He was so excited to finally have willing participants (his brother refused to play). Wes and I managed to get through a game with Andrew. We didn't finish our quest. And I would not play a second round...no offense but that game goes sooooo slowly and I just don't have the patience! I think we played for almost three days... just to fail at our quest. >.> I think Andrew almost wanted us to fail because he thought it would be funny. Here's a picture of him being a smug Dungeon Master.


My craft tonight incorporates games and is something you can use for your next game night.
COASTERS!
Not just any coasters, though... Coasters made from Scrabble tiles!! I had a set of Scrabble tiles growing up. I must have gotten it from a garage sale because I only had the tiles and no board. I rearranged the tiles into cute little phrases and glued them together to make a coaster.
The pictures are pretty self-explanatory but here are some tips:
* Set our your letters and prepare the phrases before you start gluing. As you can see, I was missing a "C" in Erica and attempted to use a Sharpie to fill the void. Its not the same : ( I did switch W's and M's and that isn't too noticeable.
* I used regular Elmer's glue and it worked just fine. No hot glue or craft glue needed.
* Glue 2 x 2 squares first and then glue those squares together. For example, on the top right one, I glued W-O and D-blank togehter. Then U-L and U-blank. Then I glued W-O-U-D-blank and U-L-U-blank together. I always find it easier to work with smaller chunks and then piece them together into the final product.
* Wait until the glue is completely dry before lifting off whatever surface you're working on.
* The pink blank squares are painted with nail polish. I also painted a coat of top coat nail polish over the top. This makes the coasters look glossy and prevents condensation from your drink from washing away the glue.
The sky's the limit on what you can phrase together on these. If you do make some, please comment and show me what you came up with!

Monday, January 26, 2015

Erica is posting more sewing madness!

I guess its not really madness... its just a funky looking skirt! Have you noticed that I've been posting newer projects lately? So I actually have step by step pictures. Hooray! : ) This one will need it because I completely made up this skirt's design and barely did any measuring. That's always what you want to hear from a seamstress, right? Ha.


Simple skirt tutorial:
       Materials needed - two patterns of cloth (either jersey or some other light weight fabric), elastic, ruler, scissors, sewing machine.
       I sort of attempted to take my measurements and I ended up needing 1 yard of the primary fabric- the blue cloth- and a little less than half a yard of the secondary fabric- the gray and white cloth. The secondary fabric was scrap from another project so I didn't really get a good measurement. I wrapped the elastic around my waist and gave myself an extra inch for the waistband measurement.

1. Lay out your primary fabric and cut it into a round object. I did this by getting some thread and used it to trace a circle on my cloth (like a round pattern). Then I cut around the thread. I ended up with this. (I was aiming for circle but it totally ended up being an oval...but, don't fret, oval totally worked! It made the skirt look layered and asymmetrical.)
2. Lay out your secondary fabric and cut it into three equal strips. As such...

3. Pin the strips around your circle like a border. Then sew the pieces on and remove the pins. Now, your skirt should look like the third picture below.

 4. I mentioned earlier that I did not measure very well at all and I was using scraps for the trim on the skirt. Because of that, I did not have enough of the secondary material. *gasp!* I panicked at first, but then I just turned it into a slit. If you have this problem, follow the next two steps to make a slit. Lay out the skirt to find where you're short on secondary fabric.
5. Cut a little triangle (a very acute angle) about 4-6 inches up your skirt. Pin and hem in where you cut. The slit will blend right in with your skirt and no one will know it was a mistake ; )

6. Now for the hardest parts... Fold your skirt in half and lay your elastic in the center. Cut a half circle where your center is. Unfold the skirt to reveal a circle in the center.

7. Fold in an inch of the fabric into the center of the circle you just cut. Disclaimer: This will make total sense to those of you who've sewn pants or skirts before. For those of you who haven't, I'll do my best to explain.
     When you're sewing in a waistband, you need to fold and sew a little lip (about 1-2 inches) into the inside of your cloth (like, where the waistband should go).
      I always pin it along the inside edge before I sew. So, you'll have an inch of fabric pinned all around EXCEPT for about an inch at one end of the circle.
      Sew this lip to the inside of your skirt EXCEPT for about an inch at one end of the circle. Sew along the inside edge only. You're basically making a little tube around the circle you cut out in step #6.
      Don't worry if it looks like a mess... mine did. The only case where looking messy would be a problem is if you wanted to tuck in your shirt. Sewing clothes isn't something I've completely mastered so I will wear my skirt with a longer shirt to cover the waistband section.

 8. Pin a safety pin onto your elastic and push it through the lip you just sewed around your skirt. My mom used to forego the safety pin and poke it through with a chop stick but I never got that to work. Once you have the safety pin placed in the lip, you can guide it through rest of the circle, pulling the elastic through with it.
9. When the elastic is all the way through, remove the safety pin and sew the two ends of elastic together. Then sew up the remaining part of the lip. Do not sew the elastic to the lip or to any part of your skirt.
10. Put on your skirt and spin around! Finished product should look like this -


This is only the third piece of clothing I've ever made so sorry if the instructions seem a little fuzzy. Feel free to comment or ask questions. I would love the feedback! I wore my skirt to work the next day and my co-worker couldn't believe I made it! Not too shabby for making it up as I got without any concrete measurements. If I were to make another skirt, I would buy a waistband and just sew it to the skirt instead of making my own with elastic. I wanted to do it old school this time around but I don't think it was worth it. I've seen thick elastic in all colors at Hancock's. You just have the clerk measure around your middle and that takes care of steps #6-9. That's reduces it to a skirt in five easy-peasy steps!! Why do we even buy clothes anymore? LOL


Monday, January 19, 2015

Lynn and Erica will reunite in 2015!

Lynn and me at her wedding...my first bridesmaid experience. Throwing it back to 2011!

One of my best friends in my early adulthood is a wonderful lady named Lynn. She worked in the Downtown OKC/Business District area at the same time I did. We would try out all the restaurants and events that popped up in and around downtown. I remember going to a Cirque du Soleil performance and AC/DC concert with her. It was a great way to fall in love with Oklahoma City. And now, I can't complain that there's nothing to do in the metro area!

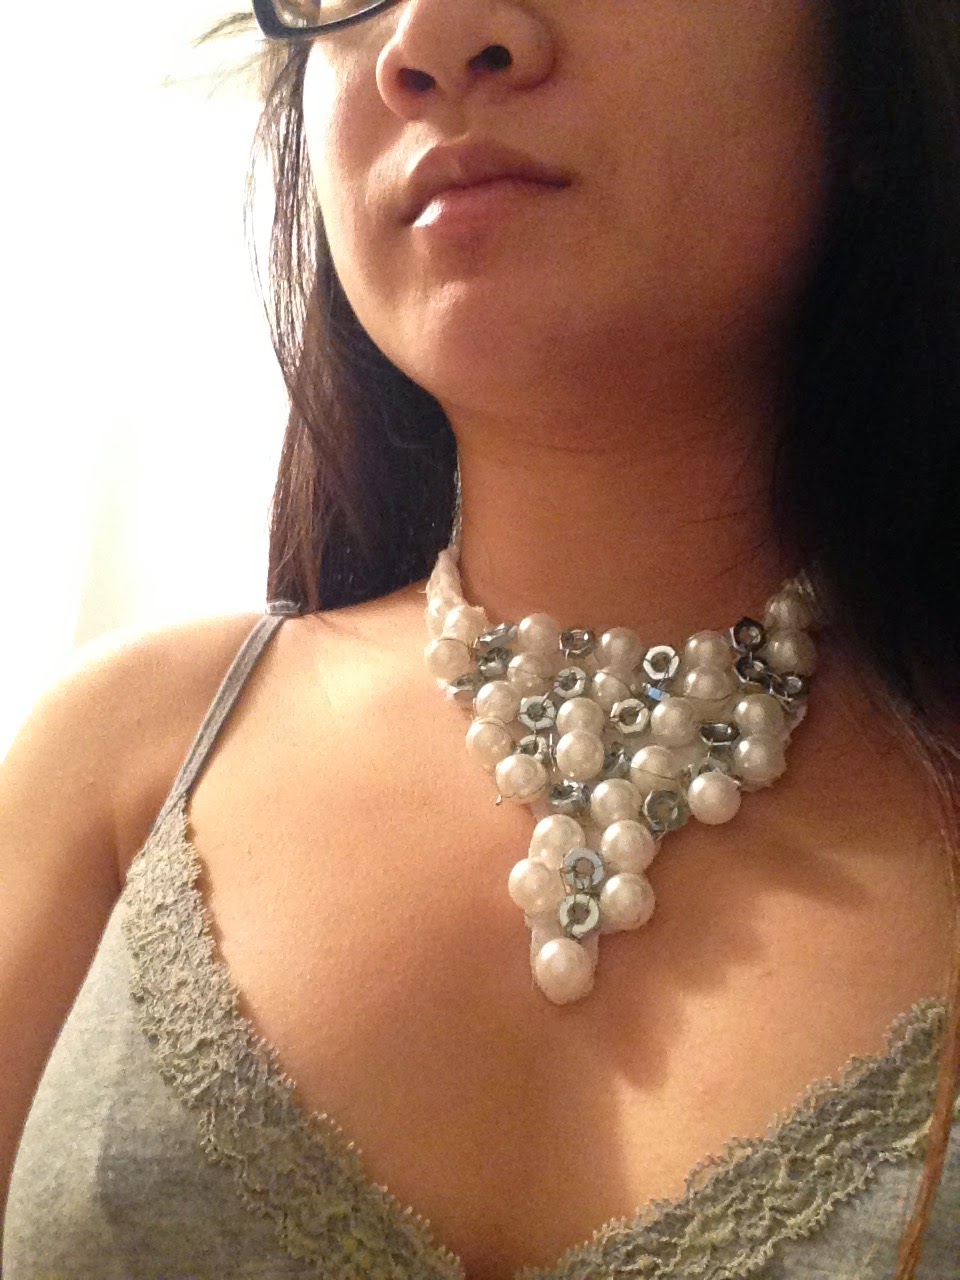
Well, she got married and moved with her husband to Texas and then to Virginia.  We still keep in touch but we haven't seen each other in probably 3 years. We text and talk on the phone and try to write but its not the same. I've never been to the east coast so I thought, "Its about time I visited Lynn," and now we're planning a reunion in the spring! I'm very excited.... and when I get excited, I make stuff. My friends either think its a curse or love all their random gifts; I haven't gotten a definitive answer regarding their feelings yet, but I hope its the latter. For Lynn, I decided on a piece of statement jewelry. She didn't wear a lot of accessories but I do remember a few pieces she liked and she was a Stella & Dot consultant for a brief period of time.

So, here you go Lynn... I hope you like it!!

Statement necklace tutorial:
     Materials needed: pearls--or beads that look like pearls, hex nuts, wire, scissors, cloth, hot glue gun (not all materials are pictured and I changed my mind on the cloth at the last minute so its not the peacock cloth in the finished product picture...sorry, it look me three sessions to get this necklace right and then I blogged afterward.)

1. Lay out your pearls and hex nuts in to the pattern you want the finished product to look like. Count and make sure you'll have enough of the pearls and hex nuts. I had to play around with my pattern a bit before I settled on a final design.

2. String the wire through the pearl. Bend the wire into a knot at the bottom of the pearl. Then string a hex nut through. I looped the wire around each pearl and hex nut to secure them in place.

3. For my pattern, I strung all the rows of pearls and hex nuts independently of each other. And then used small pieces of wire to attach them to each other. I tried doing it all at once with one piece of wire but it all got tangled so I figured doing 7 sections would be cleaner.

 (Here is a work-in-progress picture. This took forever so I should have added patience to my list of materials! LOL I have the scissors there for a size comparission. --------> )


4. Now that the 'statement' part is done, time for the 'necklace' part. The last two steps are really six steps but they're super easy so I'm condensing them into two.
Hot glue the completed pearl/hex nut wire piece to a piece of cloth. I originally wanted it on a patterned cloth but I changed my mind and decided on a more simple cloth for Lynn. After gluing, cut the pearl/hex nut piece out of the cloth. Hot gluing it to the cloth ensures that it won't fall apart (which is good if you're like me and don't work with wire often).

5. Lastly, turning it into a necklace.
Cut the remainder of your cloth into six equal pieces (I wanted my necklace to be pretty short so my cloth was probably 8 inches each but you can totally do long, too.) Braid the six pieces into two pieces leaving about 2-3 inches unbraided.  Hot glue one braid onto each side of the pearl/hex nut piece. Necklace is done! And it even looks good on dogs! LOL
Sadie has a bright future in jewelry modeling!


Monday, January 12, 2015

When too stressed to post a tutorial, Erica will just write about dogs.

The last few months of 2014 were a crazy roller coaster. I survived and now 2015 is here. While I appreciate life lessons and adventures, I'm hoping to have a relaxing and much calmer January. I have to admit that I'm a little crafted out. (Can it be?!?! o_O) I made over 75% of my Christmas gifts and I added a lot of new products to my Etsy shop...maybe I do need a break! While I was perusing the Etsy blog, I came across this article. https://blog.etsy.com/en/2014/4-perks-of-working-with-pets


I totally agree with the article. Sadie and Kensington are always welcome guests to my craft nights. They definitely provide stress relief and inspiration. And a lint roller has become an actual craft supply! Almost all of my projects are either gifts or something for the dogs. Sadie lives under my desk...she used to be deathly afraid of the sewing machine, but now she stays in her bed while ole Kenni is running.


Over the years, Kensington learned to not trample or destroy my crafts and supplies, as they were always laid out around the apartment. Sadie hasn't quite learned that, yet, but she sure does love helping (aka being as close to me as possible without getting glued or glittered).

One of the crazy end-of-2014 events was Kensington's passing. He had a terrible cough and his little lungs eventually gave out. I'm sure he's enjoying every bit of puppy heaven. Here's a throw back to my November 24th blog. (It was the cloth covered decorative box tutorial...just in case you didn't read that one). Wes and I made one for Kensington a week or so ago. I thought it'd be appropriate to share since Kensington passed about a month ago today. The only difference in this box and the one I made in the tutorial is the the burlap.  I used hot glue to glue around the edges and let it overlap about an inch into the inside of the box. The beauty of these decorative boxes is that they're run-of-the-mill cardboard and scraps of cloth. But after you put it all together, they look like the nice fancy boxes you can buy from Hobby Lobby or Target.


Monday, January 5, 2015

This is the second year Erica made a majority of her Christmas presents...

...and I see it as an accomplishment. I only bought gifts for my mom, her boyfriend Mike, (my soon-to-be step-dad, actually!) and Wes. I made tea light candle holders for my coworkers and a few very special friends this year. I would have posted this before Christmas but I was afraid someone would read this and it would ruin the surprise. They're not really Christmas-y, actually, so I guess the timing of this post doesn't matter. I hope everyone had a spectacular Christmas and an even more wonderful New Year! : )


These are super simple. Here are tutorials of all the candle jars shown above.

Candle #1:
Materials needed - jar with lid, whole coffee beans, tea light candles, hot glue, and ribbon
1. Fill the jar half way with coffee beans and add the tea light to the middle.
2. Hot glue the ribbon to the lid. Keep the lid on the candle when not burning. Remove lid to burn.
3. When you burn the tea light, the entire room should smell like fresh brewed coffee.

Candle #2:
Materials needed - small circular jar, cinnamon sticks (my size jar needed one and a half packs), tea light, hot glue and ribbon (I think I use hot glue and ribbon for everything!)
1. Hot glue the cinnamon sticks all around the jar. Hot glue dries really quickly so I just used small dabs of glue. I also glued around and in between the sticks. My sticks were taller than the jar so it looked like the jar was made of cinnamon sticks, which I thought looked neat. If that's not your taste, you can measure and cut the sticks.
2. Tie a ribbon around the jar.
3. When you burn the tea light, the room will smell cinnamon-y and warm.

Candle #3:
Materials needed - glass jar, tea lights, Elmers glue, hot glue, marbles, pearls, glitter, paint brush, newspaper (as a floor covering -- glitter is messy!), cardstock or cardboard

1. Hot glue marbles and pearls around the jar. Arrange in any pattern you wish. I used a ton of hot glue because I was paranoid of my marbles and pearls coming off. LOL
2. Measure a piece of card stock or cardboard just a pinch smaller the size of your jar with ornaments glued on. Glue the jar onto the cardboard or stock (depending on which you have). This will further prevent them from falling off.
3. Spread glue all over the rest of the jar and sprinkle generously with glitter. I did this over newspaper. I still got glitter all over the ottoman and carpet...sorry, Wes.
4. Put the tea light in and it should be super sparkly when the candle's lit.

Candle #4: (this one is really similar to the one I just did)
Materials needed - glass jar, "gems" - they're actually decorative fillers, tiny pebbles (like the ones at the bottom of aquariums), hot glue, and a tea light
1. Hot glue decorative fillers around the jar. I found them surprisingly easy to glue on.
2. Remove excess hot glue and finger prints from the jar. I used a Clorox wipe.
3. Fill with a very shallow layer of pebbles & place in tea light.

I don't have a close up finished picture of this because I was running out of time and I absentmindedly wrapped them without taking a picture.  The one on the bottom right square is pretty close to complete. And, yes, Sadie loves helping. : )