Showing posts with label DIY crafts. Show all posts

Monday, October 12, 2020

Erica and her sewing club make windsocks.

Along with presenting my pretty bohemian windsock tutorial, this is also an excuse to show off my crocheted dress.

It's been so long since I posted anything (although I have been sewing and crocheting like crazy... just not any DIY'ing or crafting) that I don't really remember how to. Let's see... write some boring backstory, write an instructional tutorial, add some pictures. Ok, here goes - 

I am a proud and happy member of American Sewing Guild. I have been for the past three years. It's a great group. Everyone is super friendly, knowledgeable and generous. Earlier this year, our sewing club chapter president, Kim, told us that if we wanted to present/lead a DIY class for one of our meetings, we would receive $10 in "ASG Bucks". These can be used toward our annual retreat (ok, cool πŸ˜€), ASG merchandise (nah πŸ˜’) and to buy stuff at our fabric swap/garage sales (YEEESSSSS!!! πŸ˜πŸ˜ƒπŸ˜). We all know how much I love buying fabric and sewing notions... I NEEDED those ASG Bucks. LOL Anyway, the only rules were that the project had to be relatively simple, can be completed in under an hour and fairly cheap (since the sewing club provides all the supplies needed). One of my favorite things is finding and doing fun & easy craft projects. I knew I had to sign up to lead a meeting even though I have never taught anything in my entire life and I have zero patience for humans. The meeting was last week and it went surprisingly well (beginner's luck, maybe). We made windsocks using embroidery hoops, fabric strips and ribbon. Everyone finished their project and had a lovely time. Here are the instructions.

DIY Windsock:

Kim bought the embroidery hoops and fabric with our ASG dues but all the ribbon came from the garage sale!! All.of.it. Now you see how amazing our garage sales are and why I need those ASG Bucks. LOL

Supplies needed: embroidery hoop (any size will do), 3 pieces of equal length string, 2-inch wide fabric strips (the length can be cut to your preference), scissors (Kim suggested using scrapbooking scissors or pinking shears to cut designs into the fabric strips), ribbon, lace, other decorative material, glue (optional)


1. Open the embroidery hoop and set the outside piece (the piece with the screw and fastener) aside. 

2. Tie the three pieces of string to the inside of the embroidery hoop to form a triangle. Gather the pieces of string together and tie them into a knotted loop at the top. This will be for hanging up the finished windsock.

3. Drape the fabric strips around the inside of the embroidery hoop. This is easier to do if the hoop is hanging from somthing (or a friend is holding it for you). If you're worried about the fabric strips moving out of place, put a dab of glue on it to stick it to the embroidery hoop.

4. Add ribbon, lace or any other decorative material over the fabric strips. Go crazy with color, patterns and texture! Kim suggest stringing beads or bells to the end of the pieces.

5. Once everything is draped in place, put the outside of the embroidery hoop back on (again, easier to do if you have a friend holding it for you). This will hold all of the fabric strips, ribbon, lace, etc. in place. Fastener it on tightly.

And we're done!! Hang it outside (or inside) and enjoy!! So pretty, right? 


Monday, July 6, 2020

Erica & friends make bowls out of buttons.


**EDIT** - In this weird time of covid-19, we did not meet in person to complete this project. The project was started in February before the quarantine began. We got to the part where we glued buttons all over the balloon and Courtney worked on the project some (since we left everything at her house and she's super generous with her time) and sent me pictures for this blog post. I picked up the semi-finished project from her porch--contactless!--and finished up the rest at home.  


I’m so excited because I haven't posted a DIY tutorial (or any sort of blog, really) in ages and I’m finally getting to now! I'm part of a semi-regular craft night with three other women (Courtney--one of my really good friends and mother & wife extraordinaire, Jessa--who is always so generous in providing our art supplies, and Rachelle--owner of the wildly successful international yarn brand, Moon Drake). Our last project was to make a bowl from glue and buttons. They turned out really nice. πŸ˜„ Mine is currently in my sewing room. Just a warning: this project takes forever to complete due to having to wait for layer upon layers of glue to dry, so don’t start it if you’re short on time. LOL

The ladies crafting in Courtney's kitchen.

DIY Button Bowl:
SUPPLIES – buttons, balloon, Sharpee (or another brand) marker, paint brush, glue (we used Elmer’s), mod podge, plastic cup, water resistant coating.


1.   Inflate balloon; the top of the balloon will be the size of the bowl.

2.   Set the balloon on top of a plastic cup for balance. It will remain here for the duration of this project. So use a cup you won’t be needing for the foreseeable future. LOL

3.   Use a permanent marker to outline the size/shape of the bowl onto the balloon.

4.   Brush Elmer’s glue onto the bowl portion of the balloon. 
      We used three coats of clue and left the balloon alone to dry over night. I think each layer took 1 – 2 hours to dry but I wasn’t really timing it. While we were waiting for the glue to dry, Courtney and I ate dinner πŸ²πŸ˜‹πŸ₯˜and painted our fingernails. πŸ’…

5.   Using Elmer’s glue, adhere buttons over the dried glue. 
     *Glue the buttons above the Sharpee line. 
     *Glue a large button in the top center so the bowl will balance once its taken off the balloon. 
The buttons should be spaced pretty close together but don’t worry if there is empty space in between. The mod podge will fill all of that in. We left our balloons alone and let them dry over night. 
While not necessary, Jessa & I covered our balloons with plastic wrap so the buttons wouldn’t get disturbed.

6.   Brush mod podge over the buttons and let dry over night.

7.   Take the balloon off the cup and pop it (cut the knot from the bottom of the balloon and carefully let the air out). Slowly peel the balloon off the button bowl. This is when I picked up my semi-finished bowl from Courtney's porch. I decided last minute to paint the inside of the bowl red to match the buttons.

8.   Brush water resistant coating onto the inside and outside of the bowl. Let dry.

And we’re finally done!! The project itself is pretty easy. It just took forever to dry. I’m curious to make other bowls from different small objects…like beads or confetti or jewelry/charms. So many things to experiment with!! Another quarantine project!!

Monday, September 9, 2019

Lacey & Erica make office memo holders


... one of mine is going to the office, the others will become part of my craft show display.

Its almost been twenty years since our college emo phase; 2019 is a good time to recreate that look. I wish I had an old college picture for comparison but I didn't have digital camera back then. 

Lacey & I have known each other since middle school but I think we really became friends when we were roommates freshman year of college. We were both weird, unpopular and invisible, which sounds pretty unpleasant but it actually was perfect timing because she introduced me to emo music, where all of our heroes sung about being weird, unpopular and invisible.  We had the best times singing along to My Chemical Romance, The Used, AFI and Good Charlotte. I haven't kept up with those bands' music but I was feeling nostalgic one day at work and clicked on one of my older Pandora stations (appropriately named Emo Songs). A new Good Charlotte song came on and then this conversation happened.
So here we are... in 2019, wearing heavy black eye liner and glitter, listening to a CD, drinking vodsprittles and DIY'ing stuff. Just like back in the good old days.  BTW, vodsprittles are a cocktail made with vodka, Sprite and Skittles. 

DIY office memo holders-

Supplies needed: plastic animal figures, electric drill (not pictured because I don't own one; we borrowed Lacey's roommate's), dowel rods, alligator clips, craft glue, spray paint

1. Drill a hole into the back of each plastic animal that is the size of the dowel rod

2. Glue an alligator clip to the top of each dowel rod. Let dry.
**It probably isn't necessary, but Lacey brought a handheld pencil sharpener and we sharpened both ends of the dowel rods so they'd fit easier into the alligator clips and animals.

3. Glue the dowel rod (with alligator clip attached) into each animal's back. Let dry.

4. Spray paint after the glue has dried. 
Not the best pictures because we spray painted out on the patio at like 9pm with only a flashlight for light.

And that's it. Super simple. Super cute. No one wants to do a complicated craft while having cocktails on a weeknight. LOL 😜

Monday, July 16, 2018

Erica re-purposes a scarf.

I was just thinking to myself that I haven't posted any DIY projects in a while. I have tons on my "things to sew" list but I guess sewing for craft shows, gifts and custom orders takes precedence over projects for myself. And, to be honest, I've also become a little lazy on the weekends. A few months ago, I reconnected with an old friend who recently split from her long-time boyfriend. She went through her closet and gave me a bunch of clothes that reminded her of him. She thought I would like the bright colors and could use them as fabric for my pillows & stuffed animals. Around this same time, I was looking though some pictures that I had pinned online. One was a quick three step picture tutorial for a kimono. Time for the stars to align...
As I am writing this, it is currently a causal Sunday afternoon, which is the best time for me to open up the blinds, let the sunshine in and get creative in my sewing room. The tutorial I came across showed three pictures: a photograph of a stylish woman posing in a cute kimono, a large piece of patterned fabric, and some dotted lines with the words "Cut Here". I thought I would try to create the kimono from those pictures and also provide a little more instruction. I am using one of the scarves my friend gave me as the fabric. I chose it because it is trimmed in lace and fringe, which I thought could add some nice detail. If you are purchasing fabric (instead of re-purposing an old scarf), I would get at least two yards; more or less depending on how big you want the finished project to be.
1. Turn the fabric inside out, fold it in half and lay it on a flat surface. Make sure the creased side is facing the top. Measure 1/2 yard from the top and 8 inches from the outside. Draw a line from those measurements on both sides of the fabric.
2. Draw a straight line from the first line down to the bottom of each side of the fabric. You should have two upside-down "L" shaped lines; one on each side of the fabric. If you use your imagination, you can already see the outline of the finished kimono.
3. Pin along the drawn "L" shapes and cut.
4. Sew along the pinned lines. Sew one straight line from the bottom of the kimono to the edge of the sleeve. I actually sewn twice, one straight stitch and one zigzag stitch, to make sure the finished project wouldn't fray or tear.
5. Draw and cut out a neck-hole shape. Only cut through one layer of the folded fabric.
6. Draw and cut a straight line through one layer of fabric only from the bottom of the kimono to the neck-hole. Once cut and turned right-side-out, the fabric should open up and resemble a kimono.
7. Hem both sides of the cut line. I started the hem at the bottom of one side, sewn around the neck-line and all the way back down to the bottom of the other side. One nice, long, frustrating hem. LOL
And there it is... a fun summer kimono to throw over all of your casual outfits. Its not perfect but I think the fact that it is billowy hides all the crooked lines and the uneven hem. God bless loose & flowy fabric to hid all my sewing flaws! I used a Pashmina scarf as my fabric. If I had to do it again, I would chose a light cotton or jersey; only because it would be easier to work with. What do you guys think? Was it worth cutting up a nice scarf?


Monday, October 16, 2017

Erica and Lacey make cosmetics pouches.

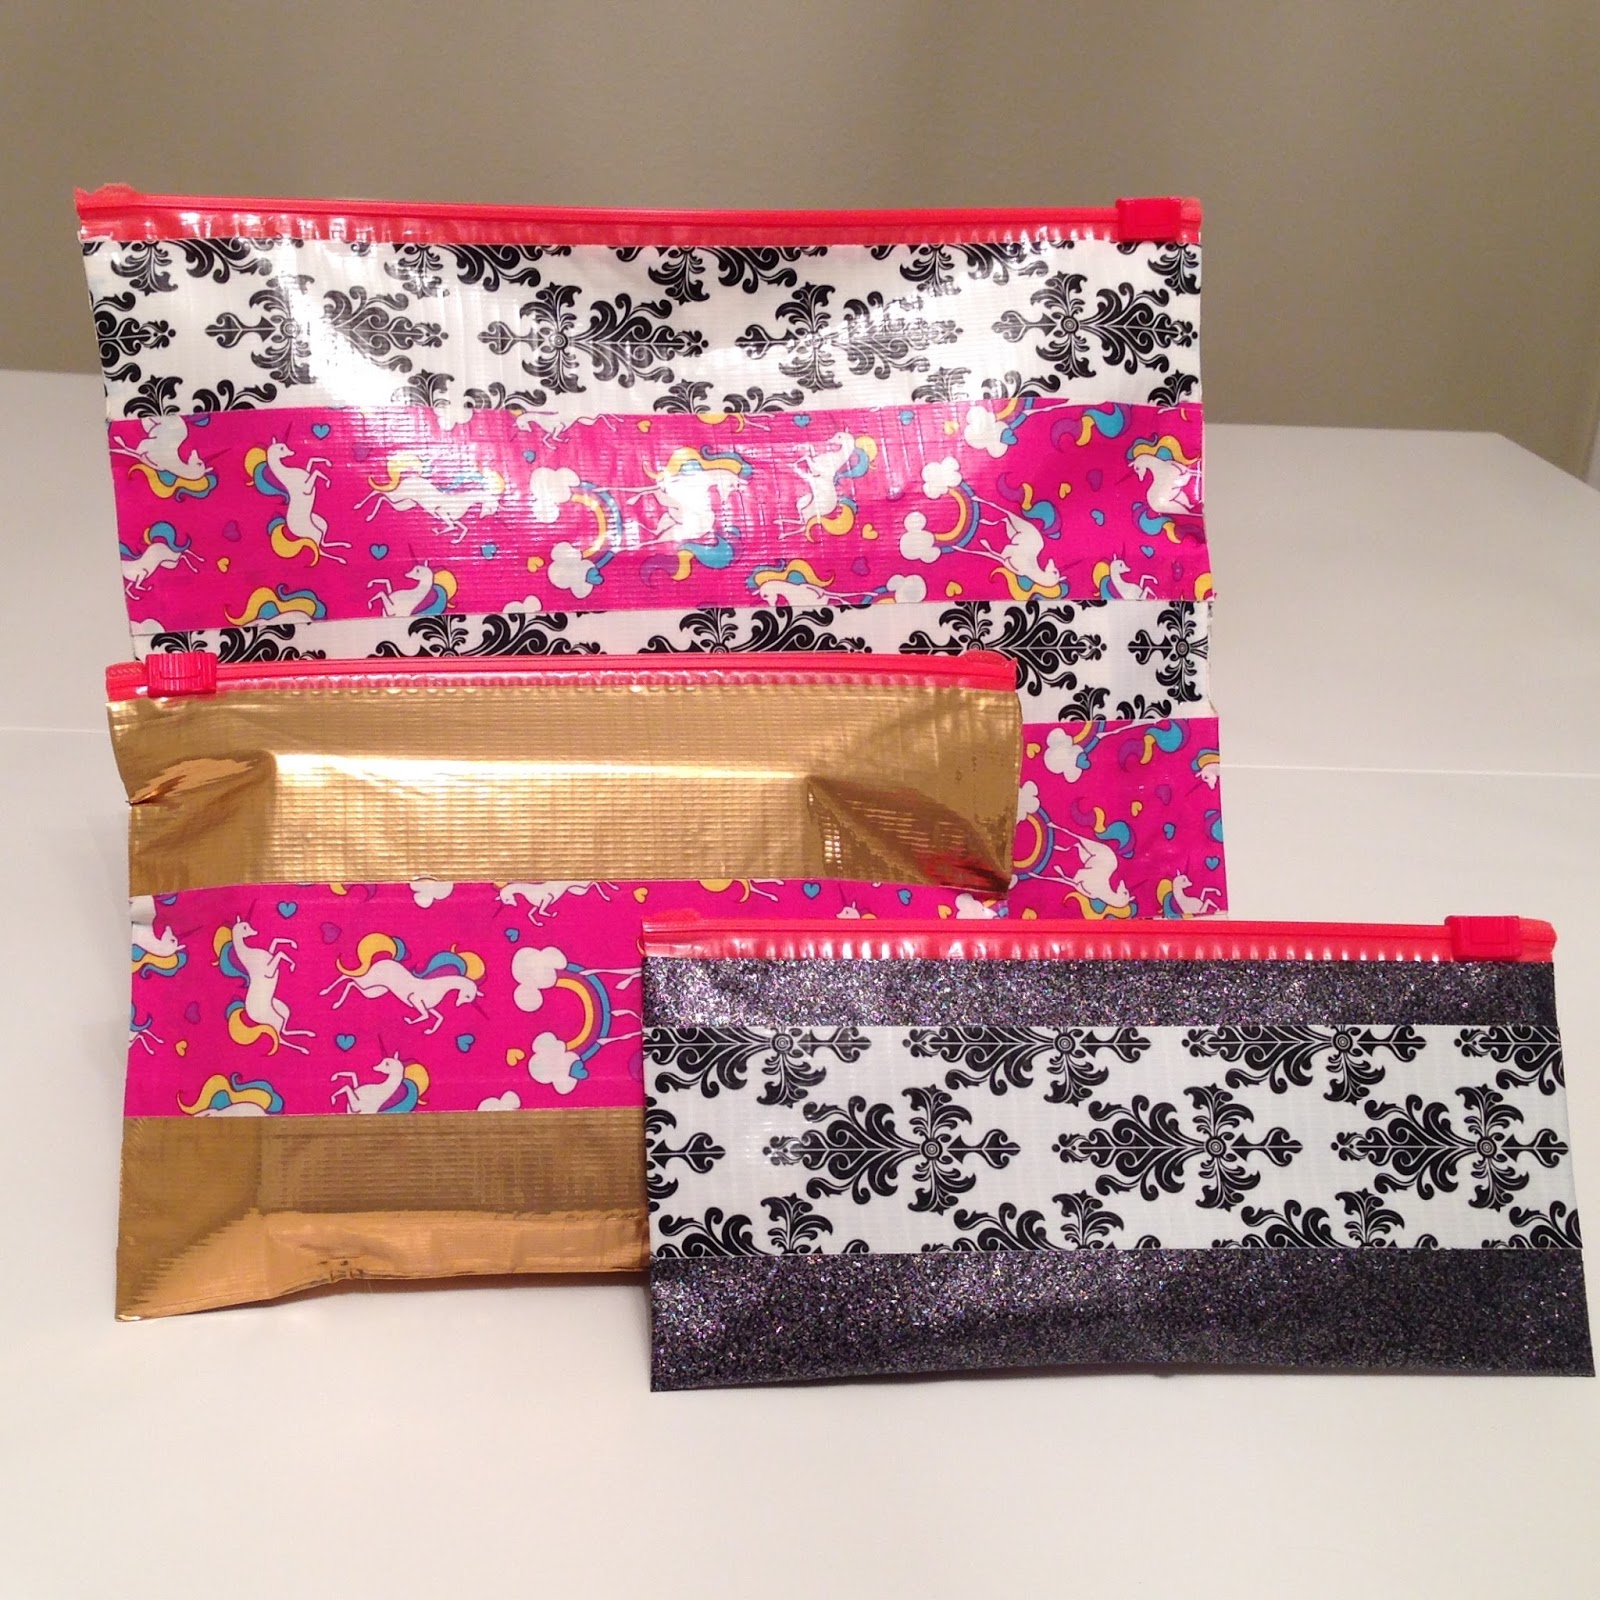
Can you believe these are made of plastic sandwich bags and Duct tape? They're so cute! 

Yay, a DIY blog! Monday Craft Night is back. Sorry it has been a while (craft shows have taken priority this month). A couple of weeks ago, I came across one of those "Duct tape hack" videos on Facebook. I normally don't find those videos very inspiring (and most of the time, the "hack" takes more time to perform than the problem its trying to solve... just buy a bathroom rug or fix a leak the old fashioned way!) But, the project in this video was simple and the supplies were cheap. I invited Lacey over and we recreated the project.
I saw this majestic unicorn Duct tape and knew that I needed it in my life! 

The cosmetics pouches turned out to be so friggin' adorable! Duct tape comes in so many printed designs (did you know that it is also now stickier than ever? The packaging proclaimed that the adhesive formula is stronger. Too sticky in my opinion.) and sandwich bags come in so many different sizes. The sky is the limit with this DIY project. The pouches don't have to just be for cosmetics, either. My craft supplies box was a mess so I'm using mine for organizing craft supplies instead.

DIY Cosmetic Pouch Tutorial-
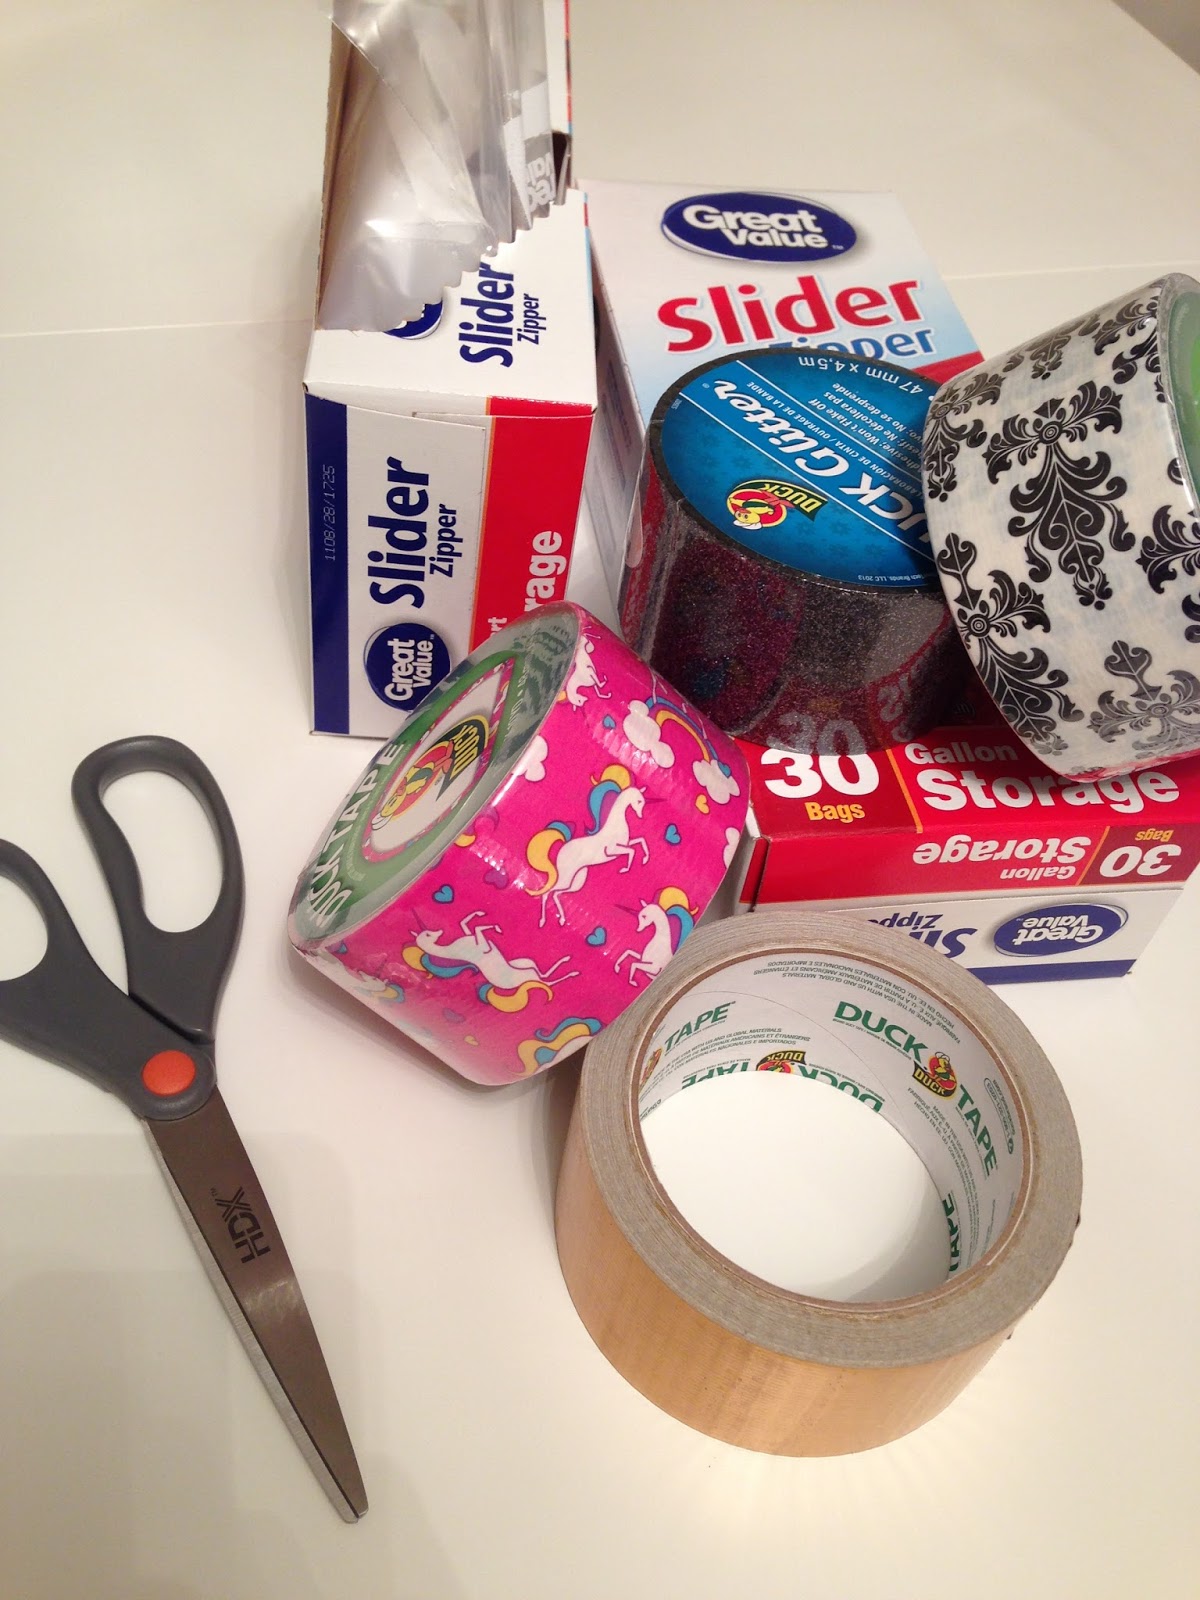
Materials needed: Duct tape, sliding zipper plastic sandwich bags, scissors

1. Decide what you want to put in the finished pouch. Using that as a guide, measure how big you want the pouch to be.

2. If you want the pouch to be smaller than the original size of the sandwich bag, fold it to the new desired size and tape it in place. 

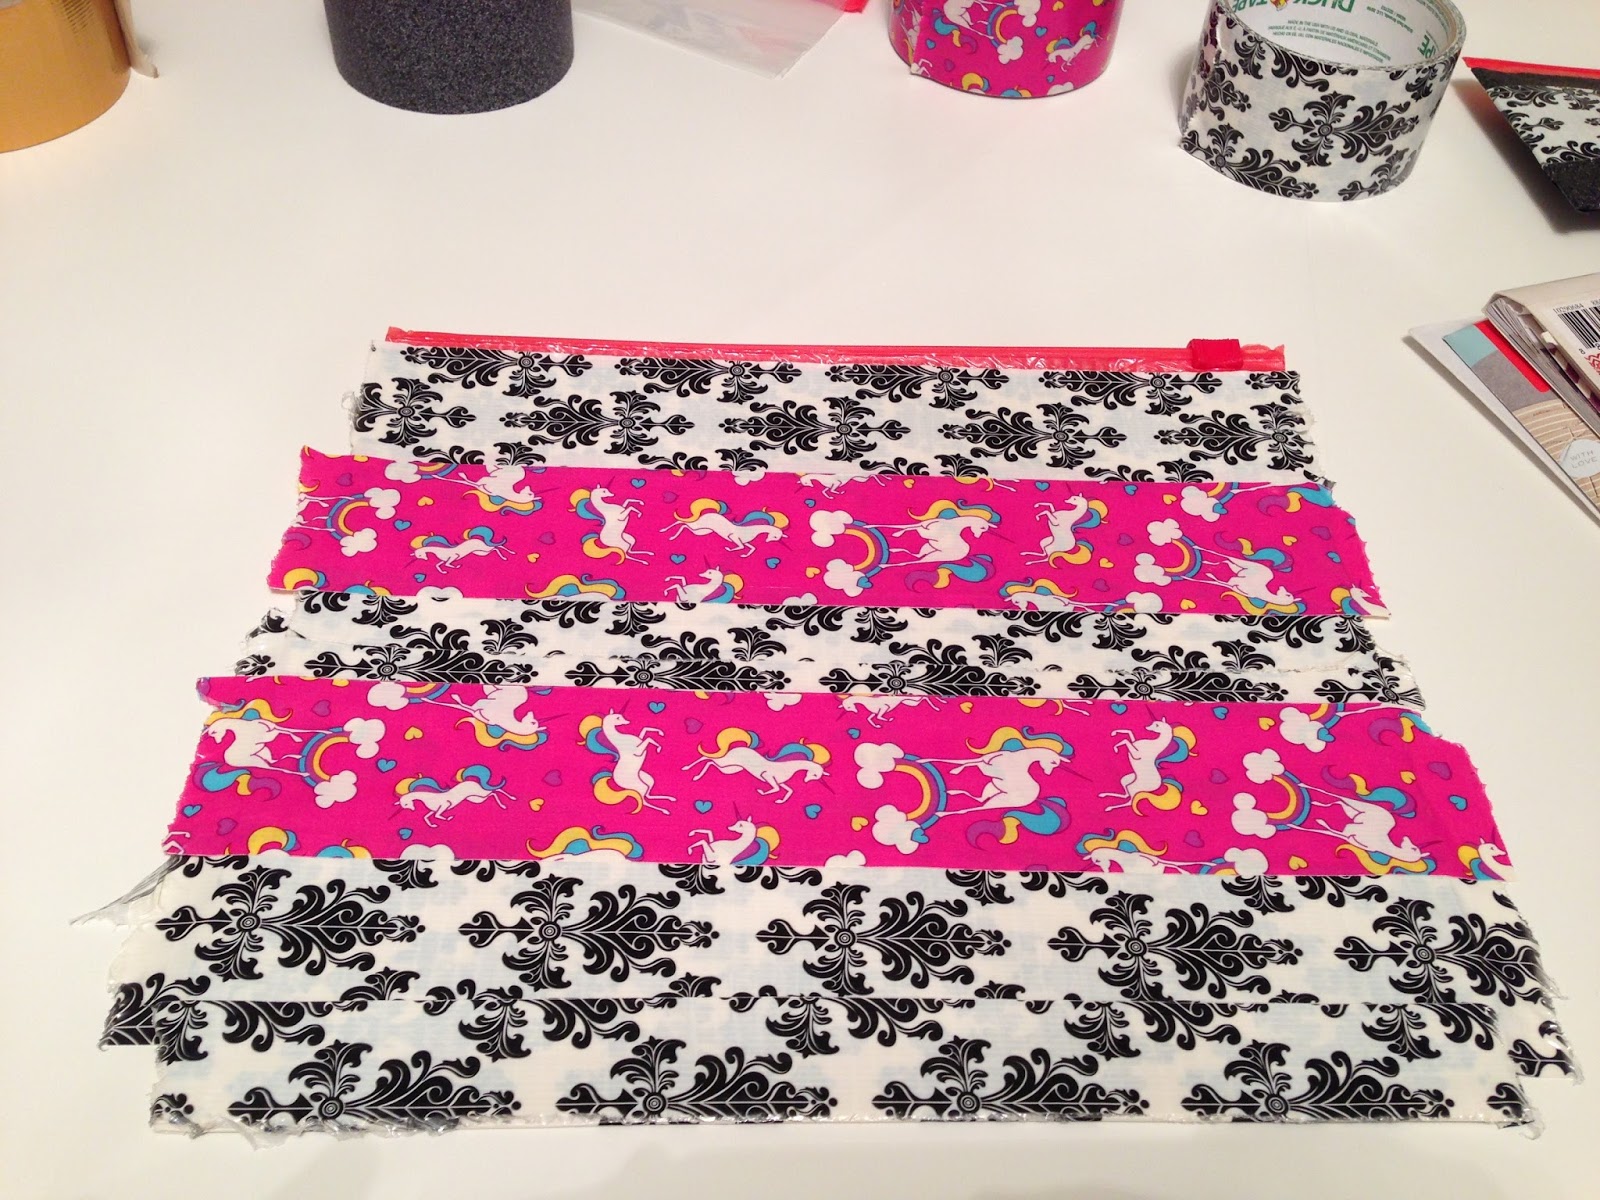
3. Cover the sandwich bag in Duct tape. Make sure to tape both front and back sides of the sandwich bag. Although the Duct tape was super sticky, I still found it fairly easy to tear pieces off of the sandwich bag if I accidentally placed it in the wrong position. To avoid air bubbles, I found it best to place the Duct tape on one end of the sandwich bag and slowly press it down, moving from one end to another, instead of placing the entire piece of tape on the sandwich bag at once. Also, be cautious of the zipper at the top of the sandwich bag. I stopped taping just underneath the red zipper. 

4. Repeat step #3 so there are two layers of Duct tape over the sandwich bag. (You can probably do multiple layers depending on what you plan to store in the finished pouch and how hefty you want it to be but I stuck with two layers.) 

5. For the first layer of Duct tape, I folded the edges of the Duct tape over (as shown in the picture above step #3). For the second layer of Duct tape, I left the edges hanging over. Once you're completely finished taping, cut all the extra tape off the edges of the sandwich bag. 
Athena enjoys crafting with us!

All done! In about 15 minutes, $10 worth of supplies and five easy steps, you've got a nice collection of matching pouches.