Showing posts with label Christmas gift. Show all posts

Monday, December 19, 2016

Erica makes Alan & Melanie a sculptural picture frame.

I don't have a single picture with Alan & Melanie so I'll just begin this blog with a picture of our dogs.

I have been blessed with good neighbors throughout my lifetime. There were always friendly kids in the neighborhood when I was growing up, I never got cursed with wicked roommates in college and I've made friends with my fellow apartment dwellers in my adulthood. This past spring, one of my best friends moved into my neck of the woods. Since Alan, his girlfriend, Melanie, and their dog, Jameson, moved in about a block away, Athena and I have taken several walks for puppy play-dates and family dinners. Continuing in my tradition to DIY everything, especially gifts, I decided to make a special Christmas present for my special neighbors.
Jameson and Athena are best puppy friends.

One thing that Alan always has on hand at his house is good drinks. As I was browsing Pinterest earlier this year, I saw several projects that incorporated wine corks. I asked Alan to start saving the wine corks from the bottles that he & Melanie drank. I expected more corks, but this is all I got. LOL Using these, I made a tabletop picture frame. I'm almost 99% certain that Alan doesn't read my blog but if you're reading this now, STOP... it'll ruin your Christmas surprise!!


DIY Sculptural Picture Frame Tutorial-
       Materials needed: Styrofoam fabric, craft glue and Styrofoam glue, wine corks, clothespins, toothpicks
Puppy not required.

1. Measure and cut Styrofoam to desired size. I'm sure an Exacto knife or a more appropriate crafting knife would have worked better but all I had was a bread knife, which worked just dandy. LOL

2. Measure and cut enough fabric to fully wrap around pieces of Styrofoam.

3. Glue fabric onto Styrofoam as if you were wrapping a box. I used both craft glue and Styrofoam glue. I'm sure just using craft glue would have been enough but I fear my projects falling apart after use so I always over-glue. After gluing fabric onto Styrofoam, set aside to let glue dry.

4. Decide how you want to stack and arrange the Styrofoam pieces. Poke toothpicks into one piece of Styrofoam. Using both glue and toothpicks, connect the pieces together.

5. Glue clothespins onto toothpicks. Set aside to let glue dry. These will be used to clip photographs onto the sculpture.

6. Arrange wine corks around perimeter of Styrofoam sculpture. Leave space in between two corks for where you would like to poke the clothespins toothpicks.

7. Use craft glue to attach the wine corks onto the sculpture.

8. Clip photographs onto sculpture and write notes and memories to pin onto the Styrofoam sculpture. Memory board is complete!!


Sunday, December 11, 2016

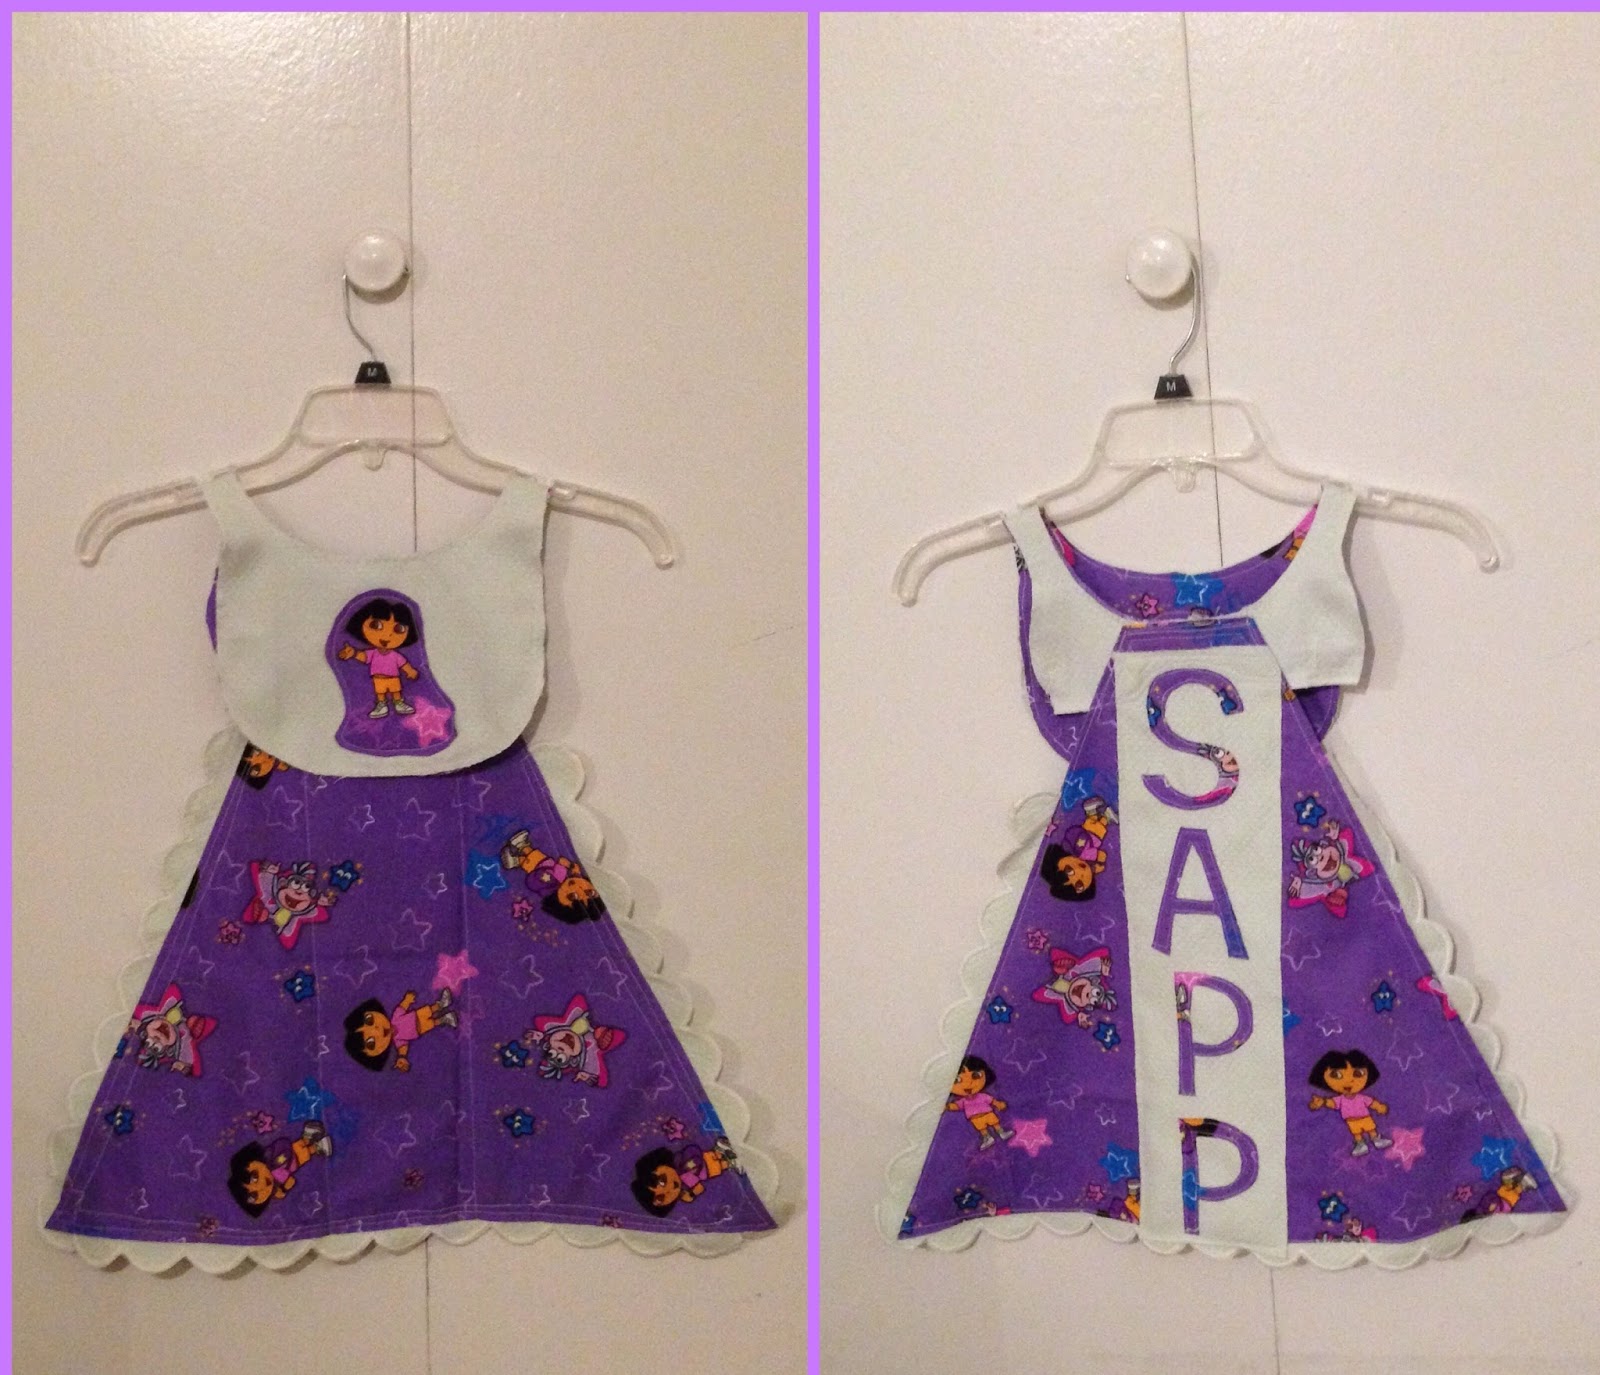
Erica sews Ruthie a bib-cape.

Me: Let me dress you up and take selfies.
Ruthie: Mom, help!! My Aunt Erica is nuts!!

Alright, if your name is Courtney Sapp or Alex Sapp, stop reading this blog right now! If you continue to read it, my Christmas present to your child will no longer be a surprise. You've been warned.
Just a preview of the project to come.

Ms. Ruthie Beth Sapp is currently my favorite small human. She lets me hold her and squeeze her and, best of all, when she farts, spits up or starts crying, I can just put her down and her parents don't get offended. Since she is my favorite small human, she will get heaps of Christmas gifts. I wanted to DIY at least one of her gifts. I decided that she needed something practical (and not just cute) so I brainstormed with Wes. He suggested that she needs a superhero cape since she'll be mobile in a few months. And who doesn't love a child running around wearing a cape? My idea was to sew her some personalized bibs. In the end, I combined both ideas and made her a bib-cape. For someone who knows nothing about babies, I think I did a damn good job. Tutorial to follow.

 DIY Bib-Cape Project:
Materials needed- fabric, lace or trim, sewing machine and all your basic sewing supplies (scissors, thread, ruler, pins)
I didn't get to use the baby dinosaur fabric. (;_;) But it's soooo cute!! If anyone has a child, let me know so I can sew you something with this fabric.
1. Make your pattern. 
       Lay a bib and a onesie next to each other (face the straps of the bib to the collar of the onesie) on top of a piece of cloth and cut around it. Cut a triangular shape around the onesie so it looks like the shape of a superhero cape.
2. First construct the bib.
       Trace the bib section of the pattern onto the piece of fabric you are using. I used two differently designed patterns of fabric so I traced the pattern twice.
3. Sew the two pieces together to make a bib. If you want to make DIY bibs, your instructions are done. LOL 
4. Embellish and decorate the bib, if desired.
5. Set the bib aside and begin to construct the cape.
       Trace the cape section of the pattern onto your fabric. Trace two copies so the pattern of the fabric will show on both sides.
BTW, rotary fabric cutters are one of the top 10 inventions, ever. 
6. Sew the lace or trim around one of the cape pieces.
7. Sew the second cape piece to the piece with the lace or trim (making a little lace sandwich).
8. Embellish or decorate the cape, if desired.
9. Lay the bib and cape pieces in the same way that you laid the bib and onesie when you marked the initial pattern. Then pin and sew the pieces together.
10. Make sure the two pieces are sewn on securely. I sewed around it twice to make sure it wouldn't tear from use.

And there it is... a bib-cape. It's a fun bib that your child will enjoy wearing and, now she can save the world while eating dinner! If you want one, I can make them custom to your or your child's preference. Please message me on social media or send me an email (ragsreborngifts@gmail.com).