
Me: Let me dress you up and take selfies.
Ruthie: Mom, help!! My Aunt Erica is nuts!!
Alright, if your name is Courtney Sapp or Alex Sapp, stop reading this blog right now! If you continue to read it, my Christmas present to your child will no longer be a surprise. You've been warned.

Just a preview of the project to come.
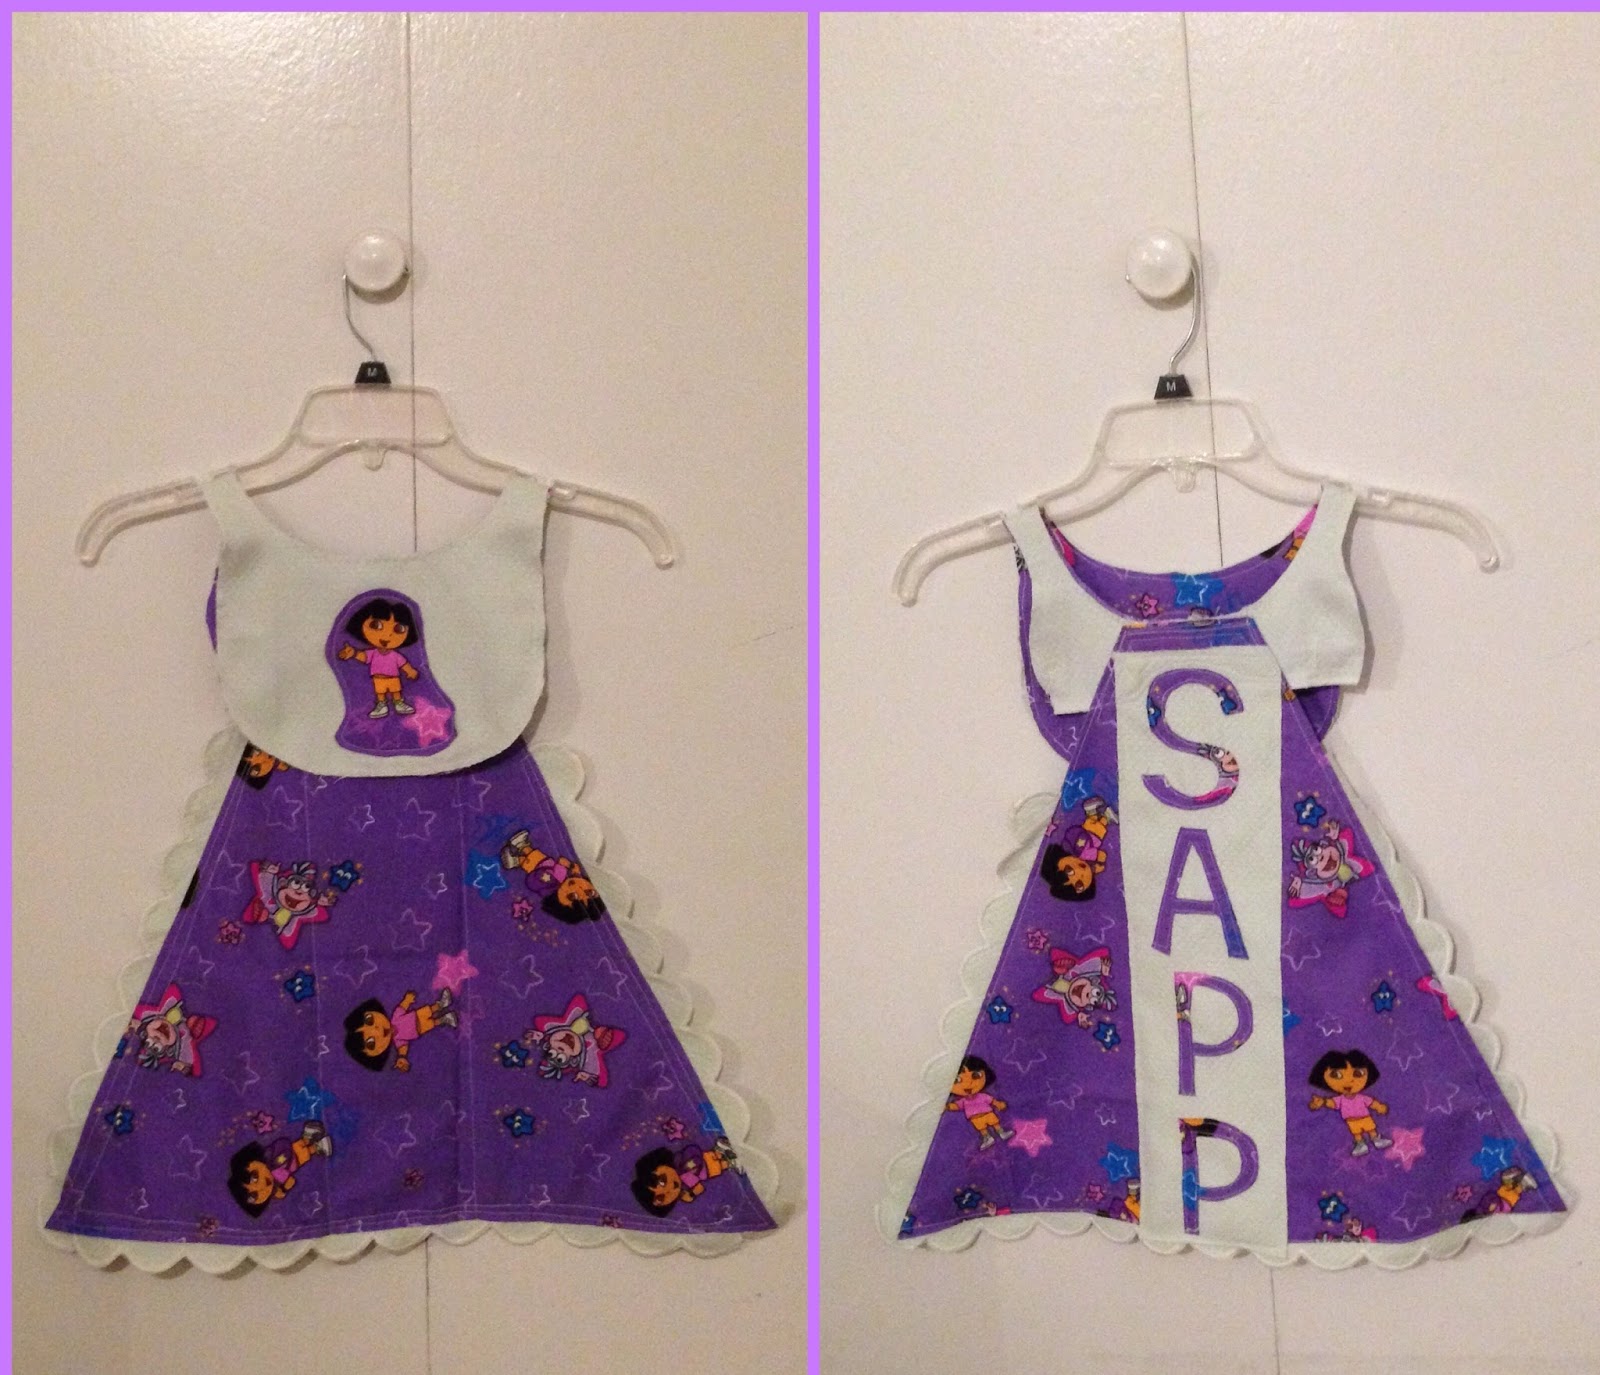
Ms. Ruthie Beth Sapp is currently my favorite small human. She lets me hold her and squeeze her and, best of all, when she farts, spits up or starts crying, I can just put her down and her parents don't get offended. Since she is my favorite small human, she will get heaps of Christmas gifts. I wanted to DIY at least one of her gifts. I decided that she needed something practical (and not just cute) so I brainstormed with Wes. He suggested that she needs a superhero cape since she'll be mobile in a few months. And who doesn't love a child running around wearing a cape? My idea was to sew her some personalized bibs. In the end, I combined both ideas and made her a bib-cape. For someone who knows nothing about babies, I think I did a damn good job. Tutorial to follow.
DIY Bib-Cape Project:
Materials needed- fabric, lace or trim, sewing machine and all your basic sewing supplies (scissors, thread, ruler, pins)

I didn't get to use the baby dinosaur fabric. (;_;) But it's soooo cute!! If anyone has a child, let me know so I can sew you something with this fabric.
1. Make your pattern.
Lay a bib and a onesie next to each other (face the straps of the bib to the collar of the onesie) on top of a piece of cloth and cut around it. Cut a triangular shape around the onesie so it looks like the shape of a superhero cape.

2. First construct the bib.
Trace the bib section of the pattern onto the piece of fabric you are using. I used two differently designed patterns of fabric so I traced the pattern twice.

3. Sew the two pieces together to make a bib. If you want to make DIY bibs, your instructions are done. LOL

4. Embellish and decorate the bib, if desired.

5. Set the bib aside and begin to construct the cape.
Trace the cape section of the pattern onto your fabric. Trace two copies so the pattern of the fabric will show on both sides.

BTW, rotary fabric cutters are one of the top 10 inventions, ever.
6. Sew the lace or trim around one of the cape pieces.

7. Sew the second cape piece to the piece with the lace or trim (making a little lace sandwich).

8. Embellish or decorate the cape, if desired.


And there it is... a bib-cape. It's a fun bib that your child will enjoy wearing and, now she can save the world while eating dinner! If you want one, I can make them custom to your or your child's preference. Please message me on social media or send me an email (ragsreborngifts@gmail.com).

No comments:
Post a Comment