.jpg)
For the Indie Trunk Show, I joined a Facebook group for local vendors. It was a great resource for all of the participating artists and especially for first timers like myself. One vendor made herself a personalized apron to help advertise her shop (I think she was an embroiderer) and some other vendors started commenting on how useful aprons are. I never thought about it but I'm glad I saw that post! Wes helped with the set-up and clean-up of my booth and my mom and Mike booth-sat for me for an hour so I could go to lunch and take a potty break but other than that, I was on my own. *cue independent women music!* Since I'm neither an octopus or a 2000s sk8r boi with those crazy baggy pants, I am no good at holding tons of stuff on my person. I had my phone, Square reader, loose cash, pen, business cards and lip gloss all stowed away in my little apron. Oh, what a life saver!!
I Googled some DIY apron tutorials but like always, in the end, I never really followed a tutorial. I researched some tutorials and then decided to do my own. So, here we go...

Half apron tutorial:
I used a sewing machine for this (once you go with a sewing machine, you'll never go back to hand stitching) but if you don't have one, its an easy enough project that you can sew by hand.

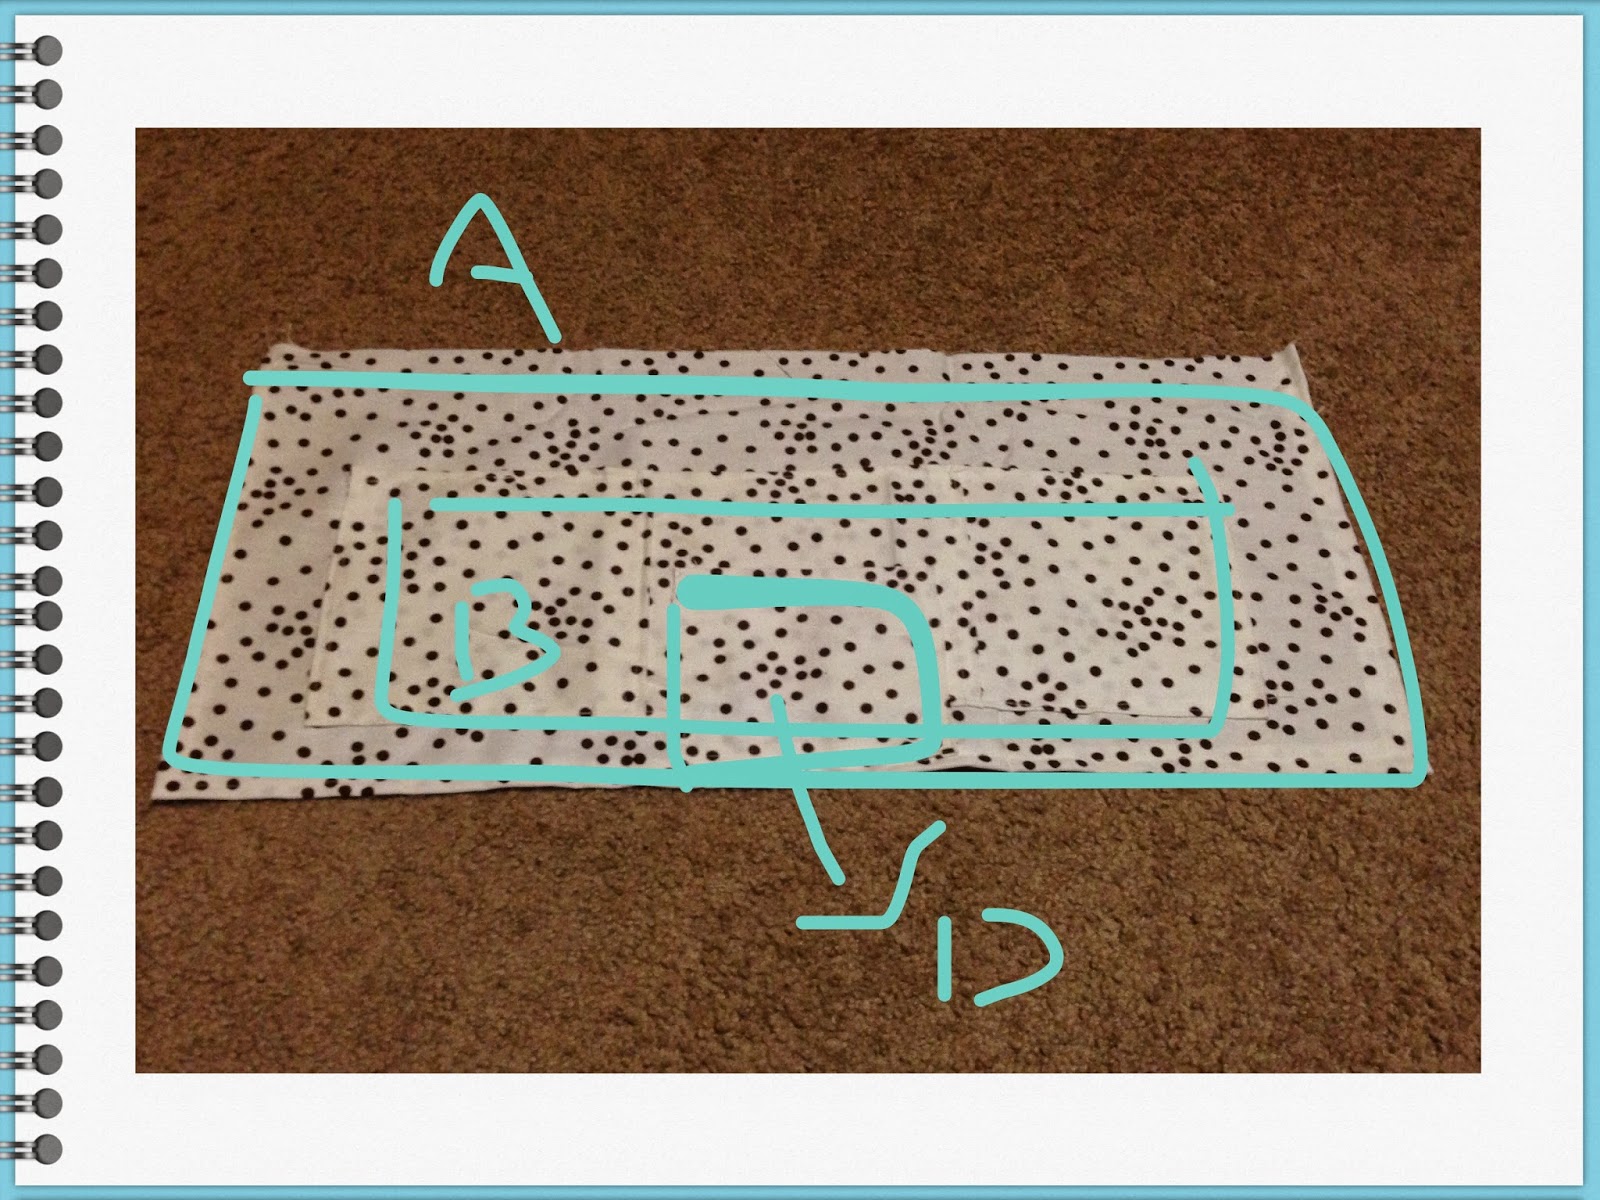
(according to your body structure and size of apron you want; I have my pieces on a large bath towel for comparison)
I'm between 5'2 and '3 height and ~110lb and these are my apron measurements-
Back piece A: 12.5 x 27 inches
Front piece B: 7.5 x 24 inches
Waist band C: 3.5 x 68.5 inches
Pocket D: 6 x 6.5 inches


.JPG)


.jpg)
.JPG)
No comments:
Post a Comment